If you’ve ever used a service like DocuSign to generate a contract or sign a legal document, you know how convenient it can be. Maybe you’ve considered hosting contracts on your own or a client’s site, but thought it was too difficult — or perhaps not legally sound. Those are legitimate concerns, but there is an easy solution.
Using Legal Signing with Gravity Forms you can take your existing contracts, turn them into fillable PDF forms, and collect digital signatures right from your WordPress site.
In this article we’ll go through how to set up legally-binding, eIDAS-compliant contracts in WordPress. But first, let’s talk a little bit about what that type of compliance means.
What is eIDAS Compliance?
The acronym eIDAS stands for “electronic IDentification, Authentication, and trust Services.” It’s an EU regulation passed in 2014 that sets the standards for eSignatures, digital certificates, and other authentication mechanisms.
Our Legal Signing product provides eIDAS Simple Electronic Signature compliance. That includes all electronic signatures, such as a typical e-signature on a form. Legal Signing is also compliant with ESIGN and UETA in the United States. What does that mean for you?
If you’re looking to collect eSignatures in a global market, you’ll need them to be compliant with eIDAS. With Legal Signing, you can generate eIDAS-compliant contracts with WordPress, and be confident that the signatures are legally binding.
Let’s get into the how-to and you’ll see how easy it is to set up.
Getting Started with Legal Signing
Here’s what you’ll need to begin:
- Gravity Forms: A robust form builder that’s super easy to use.
- Legal Signing: This product integrates perfectly with Gravity Forms and will help you ensure that your contracts are eIDAS-compliant and 100% legally-binding.
Once Legal Signing is installed and activated on your site, you’ll see it listed under your Gravity Forms menu.
Creating a Fillable PDF Form
In order to create a signable contract form, you first need to set up a PDF form with fillable fields. It doesn’t matter what software you use to create your PDF form, but it must include all the fillable form fields you want to be completed, including any signatures you need to collect. To make things easy, we suggest using Adobe Acrobat.
Create a Form in WordPress
Now that your PDF form is completed, let’s move to WordPress. Here, you’ll create a form using Gravity Forms. Make sure to add the fields that match the fillable fields on your PDF, including all signature fields.
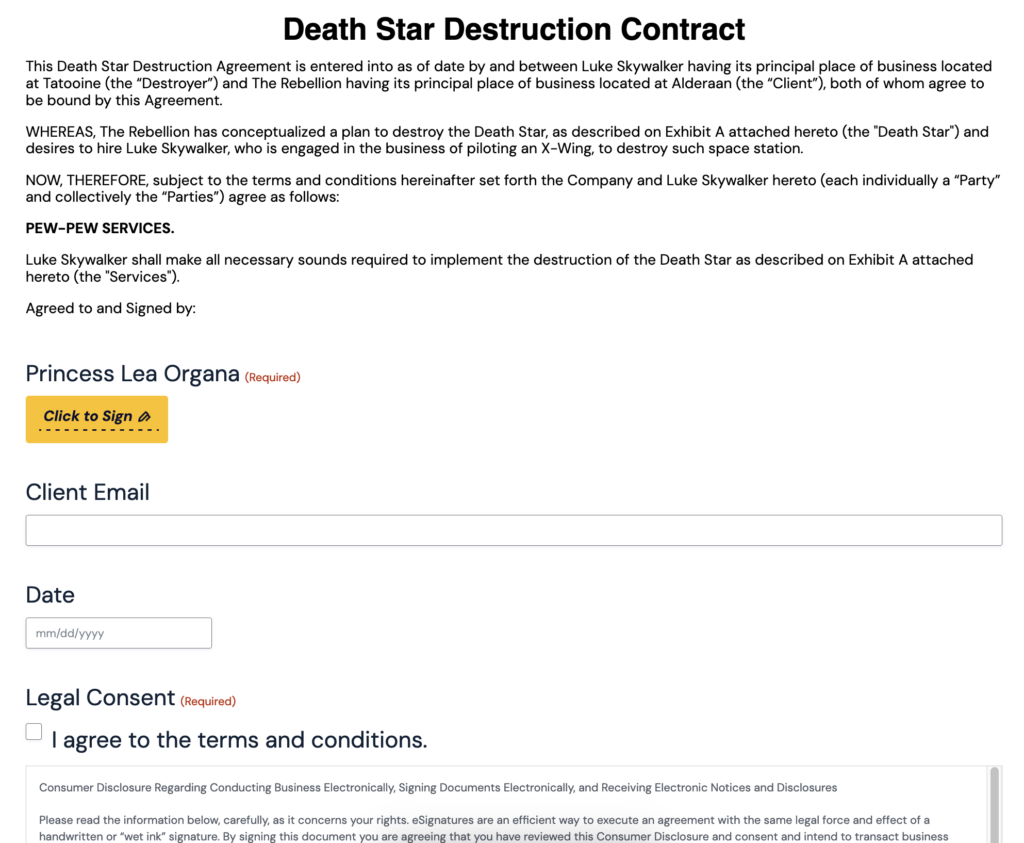
To display the content of your contract, add an HTML block and fill in the field with the contents of your original document. To make the text of your document formatted as it appears in your PDF, you’ll need to convert it to HTML. This is easy to do, even without any coding knowledge. Most word-processing apps will allow you to export your document as HTML. Alternatively, you can take advantage of several free online services that will translate your document into HTML for you. Then, paste the code into the HTML block field in your form. Use the form editor’s Preview button to see how it will look on the front end.
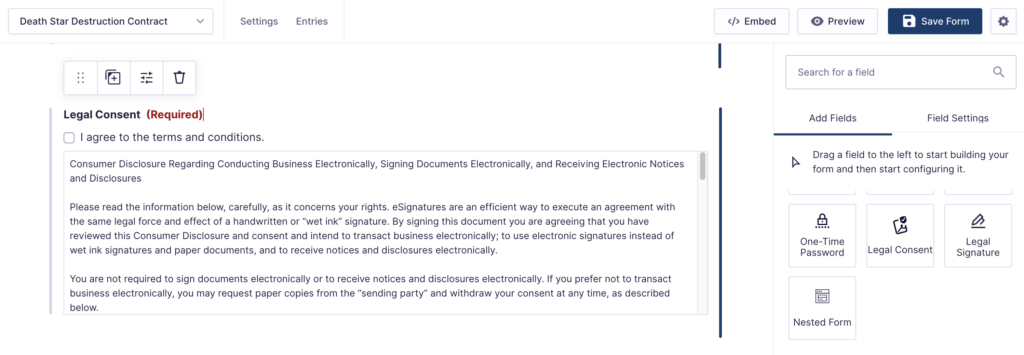
Now it’s time to add the signature fields. Legal Signing provides a specific Legal Signature field to make things easy. Add a field for each signature that needs to be collected.
To make your contracts eIDAS-compliant and legally binding, it’s necessary to add a Legal Consent field along with each signature field. This adds a checkbox and detailed disclosure for the signer, acknowledging that they agree to using an electronic signature.
Save your form. Now we’ll create a template that integrates your fillable PDF.
Adding a Template for Your Form
In this next step, you need to set up a template where you’ll sync the fields in your contract form to the fields in the fillable PDF you created earlier.
In your WordPress dashboard under the Forms menu, click on Legal Signing and navigate to the Templates section. Click Add New, and in the next section give your template a name.
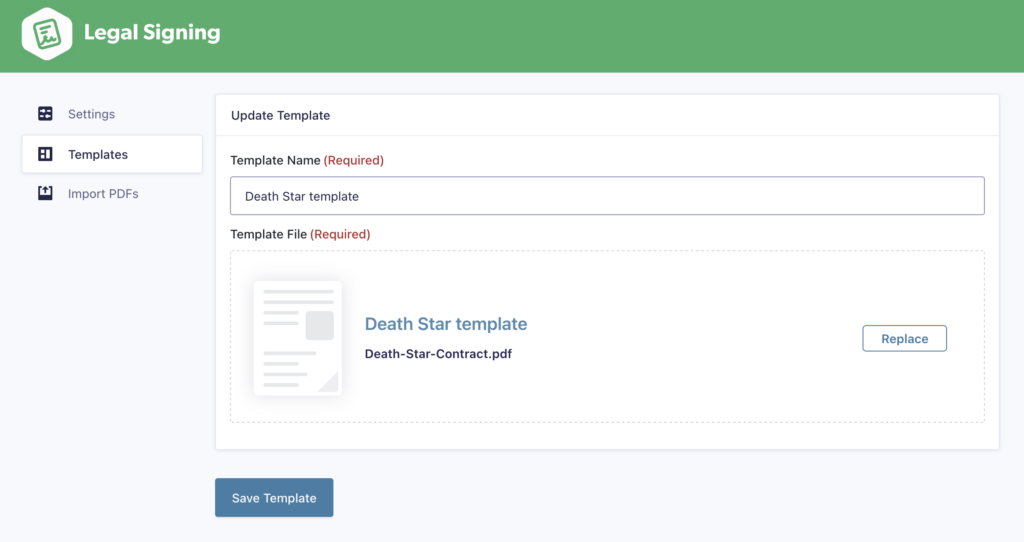
You can import your PDF here. Click the button or simply drag your PDF into the window. Click Create Template. Once you have a template, you can sync, or map, the form fields.
Creating a Legal Signing Feed
Navigate back to Forms and find your contract form in the list. Hover over Settings and select Legal Signing.
Click Add New.
Fill in the Feed Name and Output File Name fields using any names that will make sense to you later.
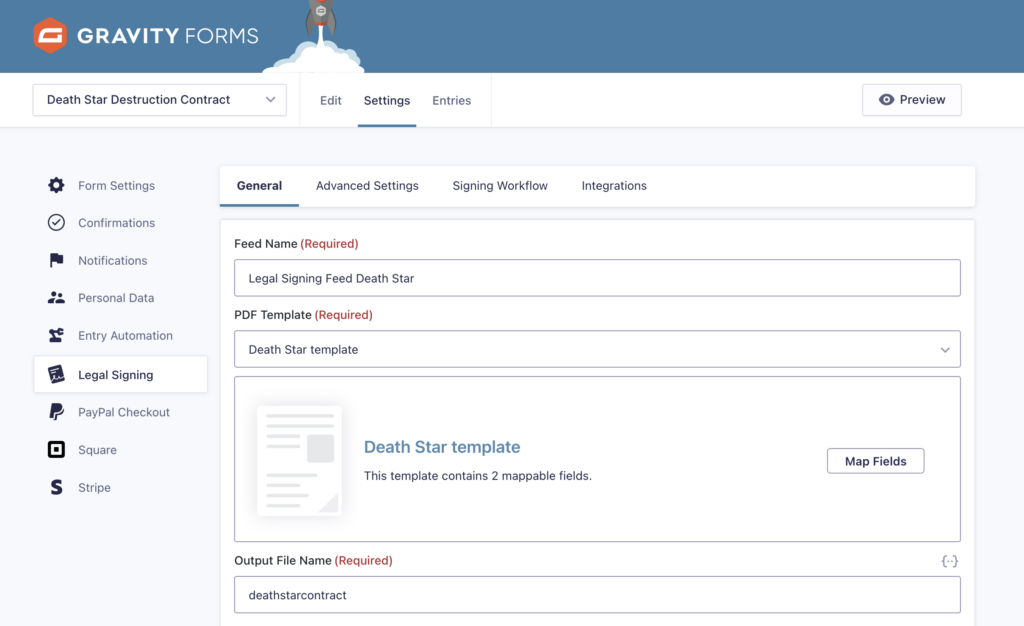
From the dropdown, select the PDF template you recently created. Then click the Map Fields button.
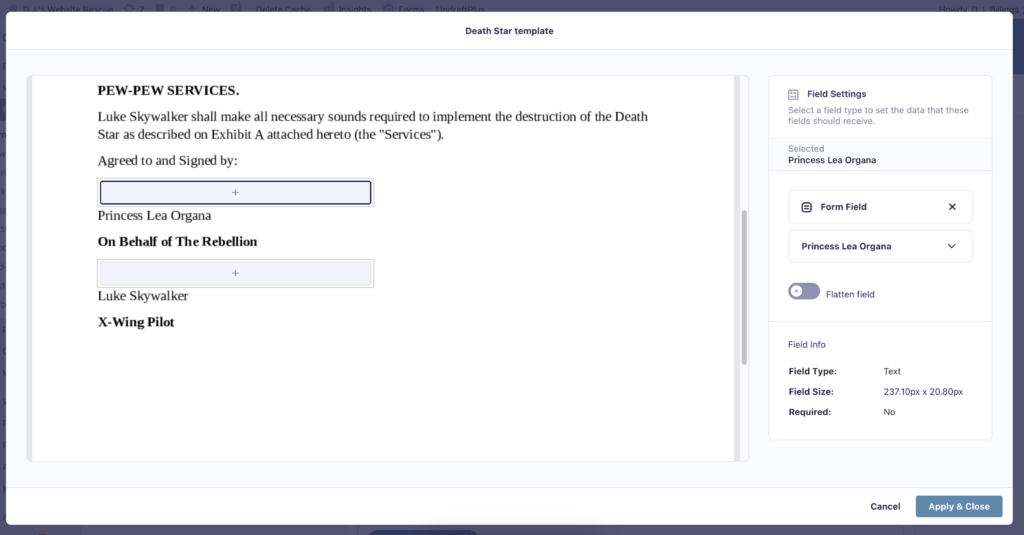
Here is where you’ll map your contract form’s fields to the PDF template. A modal will pop up showing your fillable PDF document on the left. Click on any fillable field in your document and the Field Settings menu will appear on the right. Select a Field Type. For our example, let’s say you want to map a signature field. Select the field in the document, the select Form Field in the right-side menu. From the dropdown that appears, choose the appropriate field for that signature on your form.
Do this for all the fillable fields in your document, mapping them to the matching fields in your form.
Advanced Settings Tab
Advanced Settings allows you to set certain permissions for managing the form and viewing the generated PDF after all signing is complete. You can create Owner and User passwords for the PDF, as well as specific permissions for printing, annotating, and more. An additional setting is available to designate who is allowed to download the generated PDF.
The Signing Workflow
By enabling Signing Workflow, you can set the order of signers on your document, or leave them at any random order.
You’ll need to choose email fields for each participant, assigning appropriate fields to each. The menu will prompt you to edit your form fields if you haven’t already added any email fields to your form.
After saving your form, go back to your Legal Signing Feed settings and revisit the Signing Workflow tab. Click Enable Signing Workflow.
You can choose to hide form fields from other signers by toggling the feature. Next in the menu, Audit Trail Certificate shows the timeline of all signing and viewing activity for each signer when enabled.
If necessary, you can also set a specific date when signers are required to complete their portion, or you can choose a date relative to either initial form submission or the last signing event.
The Signing Process
Now all you have to do is display the form on a page using the Gravity Forms block and send the link to your participants.
If you enabled Signing Workflow, an email notification will automatically be sent alerting the next signer in the process. You’ll receive a PDF that includes the signed document once all parties have completed signing.
Legally Binding and eIDAS-compliance for WordPress
That’s it! You can see how easy it is to generate an eIDAS-compliant contract using Legal Signing for Gravity Forms. You can be confident that signed contracts on your WordPress site are legally-binding and fully compliant in both the U.S. and the EU.
Give your clients and users the ultimate convenience and help them feel secure at the same time. Try Legal Signing now!