If you’ve been using Gravity Forms for a while, you probably know that you can add a field to your form that allows users to upload files. Which is great, except that the files aren’t automatically exported with the entry data. That means you have to go hunting them down in your WordPress Admin, which can be a pain. Not to fear! There is a way to export the files along with the entries, and it’s surprisingly easy to do. In this article, we’ll show you how to use Gravity Forms to export images and files alongside your entry data. Let’s get started!
Key Takeaways
- Introducing Entry Automation: Entry Automation is a plugin designed to enhance Gravity Forms by enabling automated export of submitted entry data, including any uploaded files.
- Steps to Create an Export Task: How to create a basic Entry Automation task.
- Setting Up the Export File: Choose which form fields to include in the export and include uploaded files.
- Automate Email Delivery: Enable Email Feature to receive exported entries and associated files via email.
- Integrate with Cloud Storage: Entry Automation supports uploading export files to cloud storage services like Dropbox, Google Drive, Amazon S3, and FTP servers.
Set up automated exports with Entry Automation
Gravity Forms is a powerful form builder with plenty of useful features. There are also a ton of add-ons that help you extend its functionality. One of those is Entry Automation, a tool designed and built exclusively for Gravity Forms, allowing you to export submitted entry data automatically. No longer do you have to slog through rows of entries in your WordPress admin. With Entry Automation you can set up your forms so the data comes right to you. And, of course, any included file uploads.
Once you have Entry Automation installed and activated, you can set up everything within the familiar Gravity Forms UI. Here’s how the configuration works.
Step 1: Configure an Export Task
Find your form in the Gravity Forms list, hover over Settings, and click Entry Automation. In the next menu, click Add New to add a task. Configuring your new task is easy.
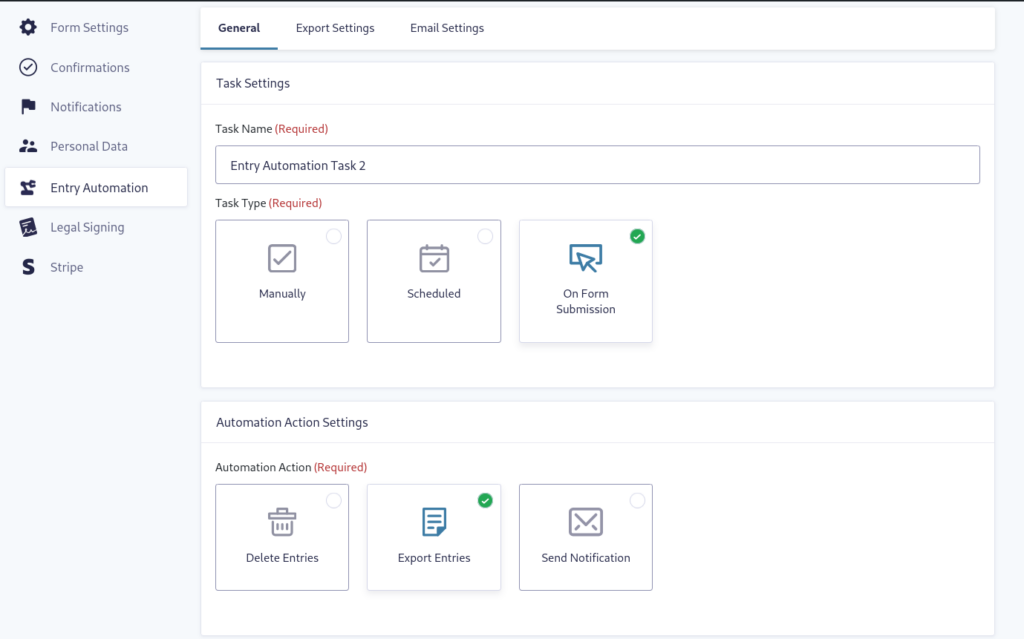
- Add a Task Name.
- Select a Task Type to determine how the task will be run: Manually, Scheduled, or On Form Submission.
- Choose an Automation Action: Delete Entries, Export Entries, or Send Notification.
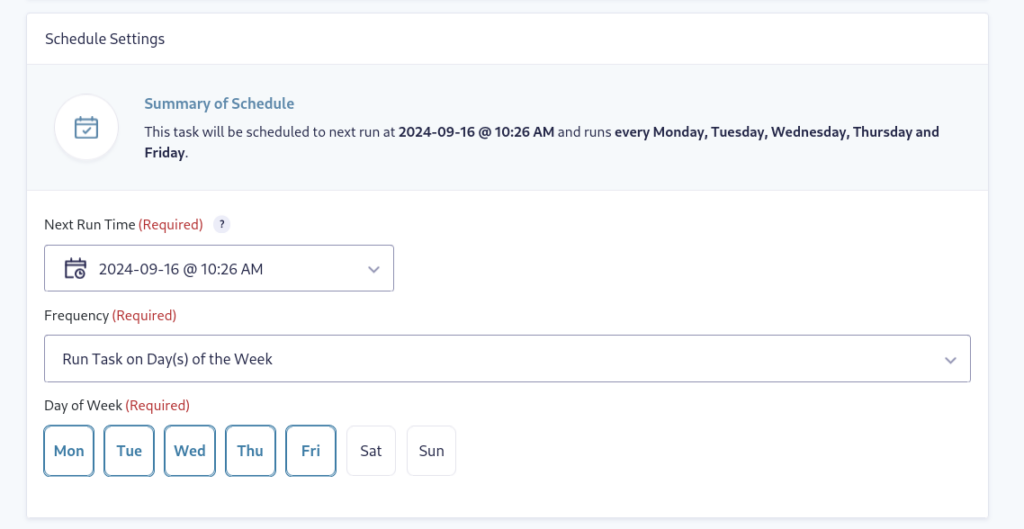
If you decide to schedule the task, you’ll need to adjust the Schedule Settings.
- In the Start Running Task field, you set when you first want the task to run.
- Under Frequency, select from the drop-down how often the task should run.
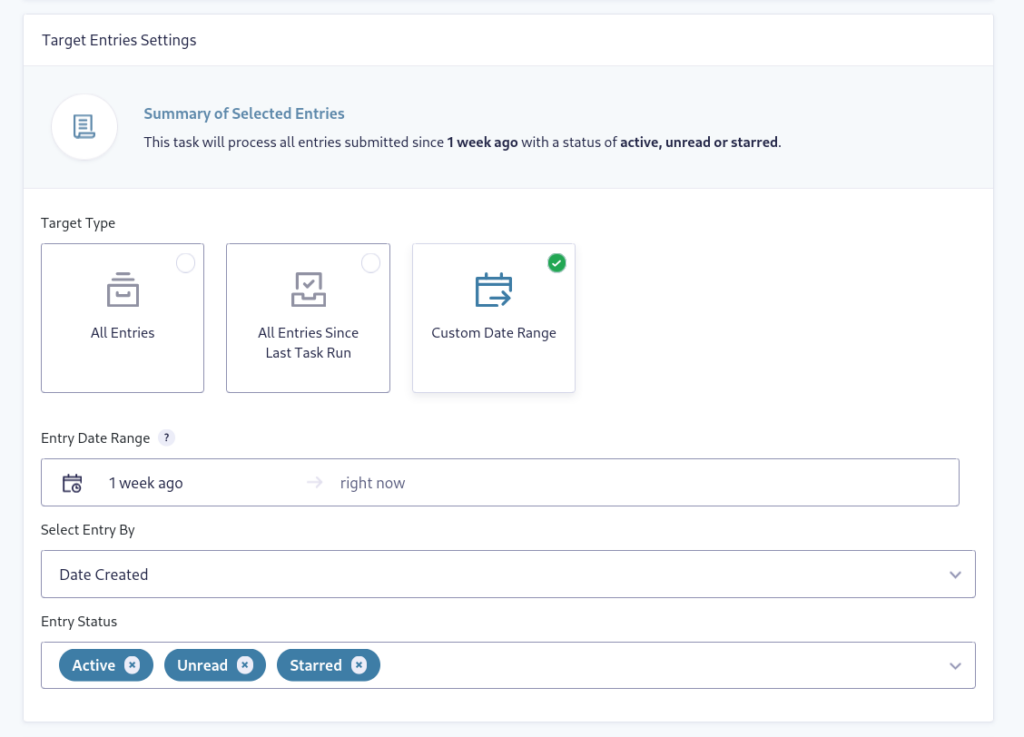
Next, configure the Target Entry Settings.
- Select an option to export All Entries, All Entries Since Last Task Run, or Custom Date Range.
- If you choose Custom Date Range, set the From and To dates for entry exports. You can use plain English phrases like “yesterday”, “4 hours”, or “3 weeks”.
- Click the Select Entry By drop-down and choose Date Created, Date Updated, or from the Date field on the submitted form.
- Choose a single or multiple choice for Entry Status.
Save your settings.
Step 2: Set up the Export File.
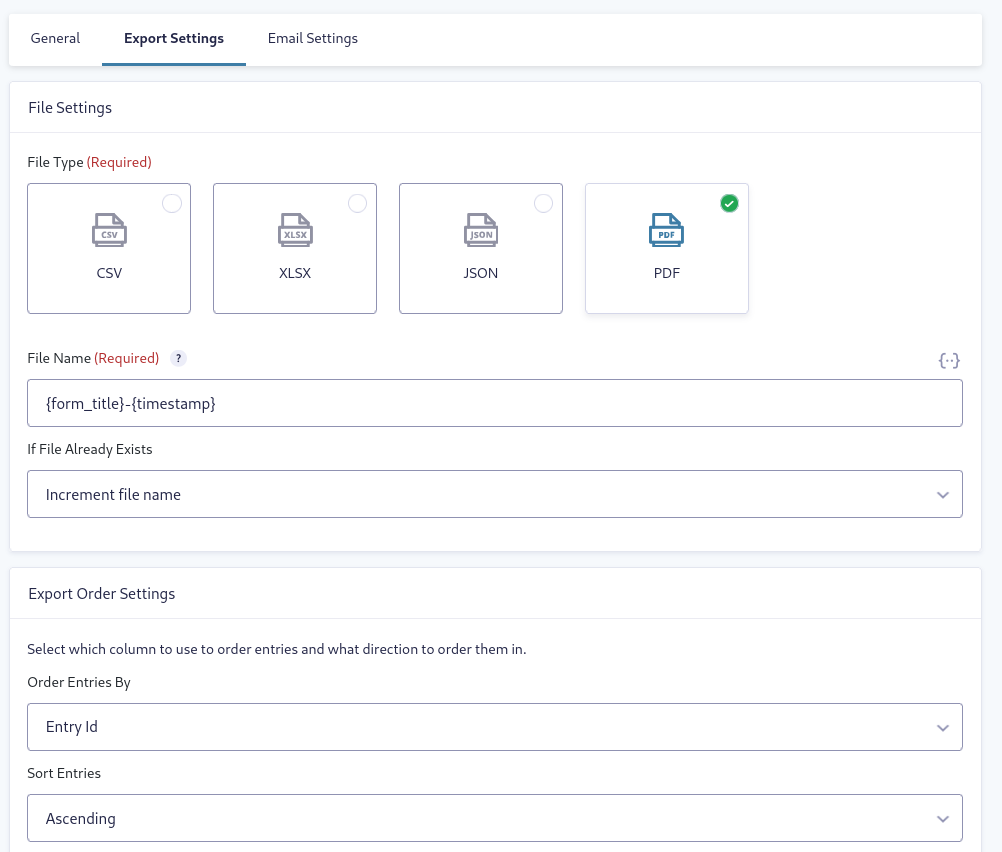
Navigate to the Export Settings tab.
- Enter the file name of the export file. In addition to typing a file name, Entry Automation offers multiple merge tags. Click the icon in the upper right of the field to choose from the list of available tags.
- Under If File Already Exists, you can choose to create an incremented filename, overwrite the file, or simply add entries to the existing file.
- Configure the order which the entries should appear in the export file.
In the Field Settings section, select the form fields you want to be included in the exported file.
Now scroll below the Field Settings list to the Export Files section. This is where you’ll enable the Include Files with Export File option.
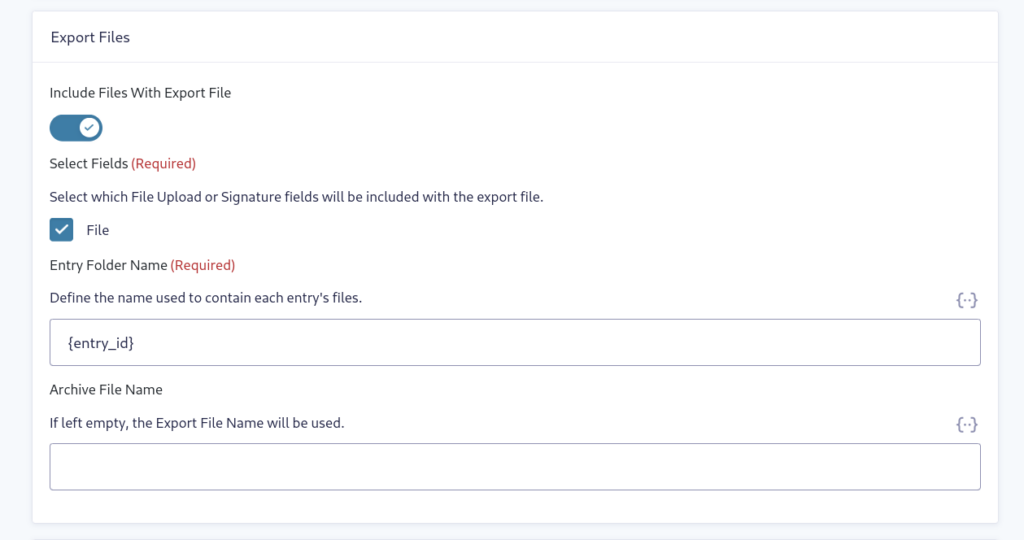
Entry Automation will save the automatically exported files to a protected folder in your site’s uploads directory. If you want to save server space, select the option to have the export file deleted after export.
Step 3: Automatically Email the Export File
Here’s where you get a huge boost in efficiency. Rather than digging through entries in your WordPress Admin, you can have the entries and files delivered right to your inbox — like magic! Here’s how to do it.
First, switch to the Email Settings tab at the top.
- Click the Email Generated Export File toggle to enable the feature.
- Enter the email address(es) where the entries should be sent. Export files can be sent to multiple email addresses by separating them with commas. You can also use the Email merge tag and send the file export based on fields in your form or a WordPress user.
- Optionally, customize the email subject and message to make them fit your branding, or just make it more personal.
Save your settings. That’s all there is to making Gravity Forms export images and files! But let’s take things a step further.
Export Files to Cloud Storage
Having your form entries and files delivered to your inbox is only one option. With Entry Automation, you can also send your images and files to cloud storage to share with your whole team in one convenient place. For example, let’s say your team shares a Dropbox folder. Setting this up is easy.
Install the Dropbox Extension
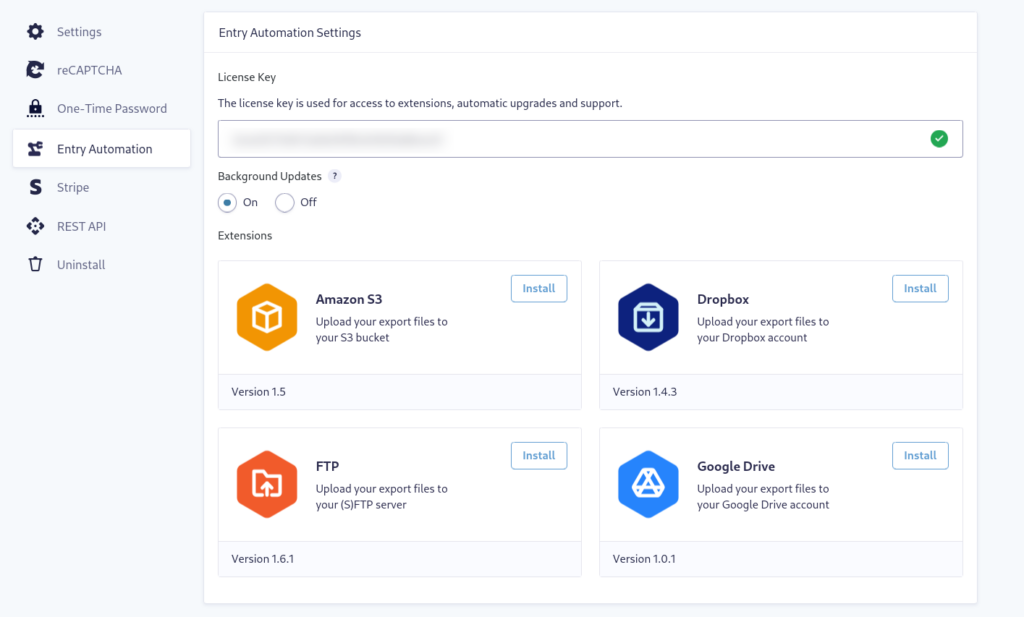
To get the Dropbox extension, navigate to Gravity Forms → Settings and click Entry Automation. You may need to upgrade your license to install the extension, in which case you’ll see an “Upgrade License” button. Once your license is upgraded, click that to download the extension, then activate.
Authenticating with Dropbox
Now, you’re ready to connect with your Dropbox account.
In the same menu, scroll down until you see the Dropbox Settings section — refresh the page if you don’t see it. Click the button to start the authentication process. If you’re logged into your Dropbox account, it should connect automatically. If not, you’ll need to enter your Dropbox login credentials.
How to Send Form Entries to Dropbox
Now you need to go back to your Entry Automation task. Just like we did before, hover over your form in the Gravity Forms list and select Settings → Entry Automation. You’ll see your task listed. Hover over the task and click Edit.
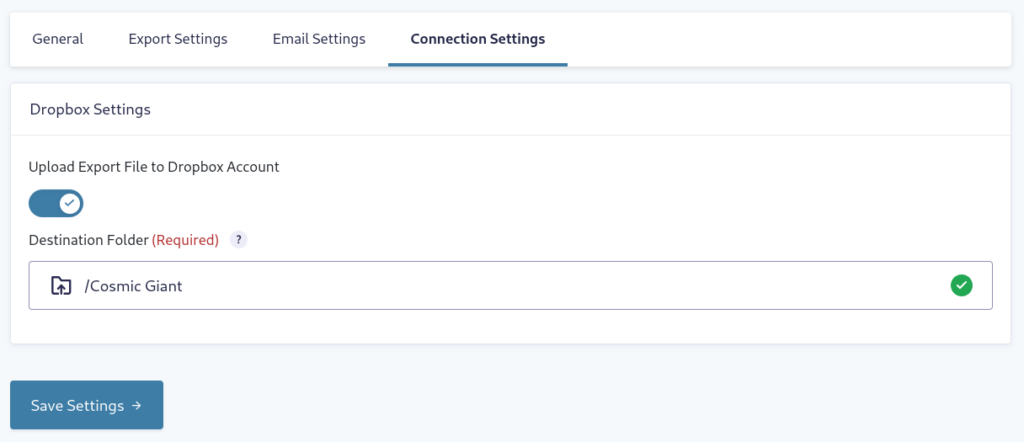
You’ll notice that you now have a Connection Settings tab. Navigate there and click the Upload Export File to Dropbox Account toggle to enable it.
Type in a specific destination folder (or leave it blank to use the root folder). Make sure to click Save Settings.
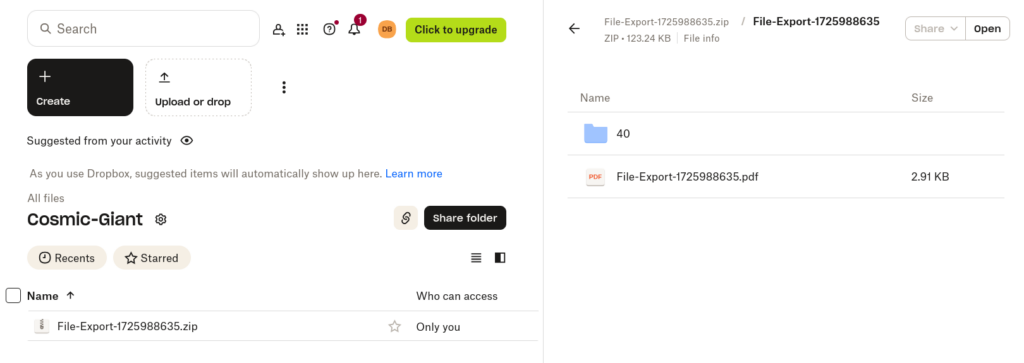
Viewing Your Exported File(s)
Once some entries have been submitted on your form — and depending on your Schedule Settings — you’ll see the exported files populate your Dropbox folder.
In this example we used Dropbox as the cloud storage choice. With Entry Automation, you can also send your files to Google Drive, Amazon S3, or even (S)FTP to your server.
Using Gravity Forms to Export Images and Files
Gravity Forms is the perfect solution to gathering data from your WordPress site. Now you can export any images or files uploaded through your form alongside the entry data. And better still, you can have it all sent directly to you or uploaded to cloud storage.
Start working with Entry Automation and see how powerful your forms can become!