Exporting entries from Gravity Forms is a reasonably straightforward process. There’s a simple Import/Export option right in the Forms menu, so it’s only a matter of selecting the form you want to export and choosing which entries you want to receive. Conditional logic also makes it easy to get specific about a date range. But what if you want to export entries from multiple forms?
In that case, you’ll have to select one form at a time and repeat the process manually. It’s not very efficient and could waste a significant chunk of your time.
Key Takeaways
- Challenges of Manual Export: Exporting entries from multiple Gravity Forms individually is time-consuming and inefficient.
- Use the Entry Automation Plugin: Entry Automation enhances Gravity Forms by automating export tasks.
- Consolidate Data: Combine data from multiple forms into one export to simplify analysis and sharing, reducing the need to manage multiple files.
- Automate Multi-Form Data Exports: With Entry Automation 6.0 and the Multiple Forms Extension, users can set up automated workflows and specify which forms to include.
- Export File Configuration: Customize the export file by adding columns with custom names and selecting data sources for each column, ensuring the exported data meets specific requirements.
Why exporting multiple Gravity Forms manually wastes your time
If you have several forms on your WordPress site created with Gravity Forms, manually exporting data is a tedious task. Not to mention, it’s not going to be any fun. For example, if you have five forms and need to send unique sets of entry data from each form to various team members, you’ll need to repeat the form selection, entry choice, and date range process several times.
Can you afford to spend that time every day? Most people can’t, and there are likely even more tasks on your plate that await your attention — like maybe analyzing the data.
If you don’t want to spend hours laboring over multiple entry data exports, I’ll show you how you can do it all at once and have it happen automatically.
How to consolidate data from multiple Gravity Forms
Understanding Gravity Forms’ native export limitations, you’ll appreciate the more automated method I will cover. First, you’ll need at least two forms to work with. You’ll also need to have the latest version of Entry Automation installed and activated. Entry Automation saves you time by simplifying common tasks in Gravity Forms. You can easily export entries, delete specific entry data, and send reminder notifications. With Entry Automation 6.0, you now have the capability to export entries from multiple forms! With an Agency or Pro license, you’ll have access to the Multiple Forms Extension, which will give you the functionality you need.
If you’re already comfortable using Gravity Forms to build your web forms, you can rest easy. Entry Automation was developed with a deep understanding of Gravity Forms. That means it’s fully integrated, so you’ll feel right at home in the menus. You can expand the capabilities of Gravity Forms without a steep learning curve.
The case for consolidating form entry data
But why would you need to consolidate data from multiple Gravity Forms? Let’s say you have two similar forms on your site. Switching from one set of entry data to another to analyze the entries is cumbersome. It would be much easier if you could have specific data from both forms right in front of you in one neat, concise document. With Entry Automation, you can export a CSV, Excel, JSON, or PDF file — whichever format best suits your entry data.
If you share entry data with other team members, sending one export file rather than several files is much more efficient. Even more efficient is the ability to automate the sharing. Let’s get into that now!
How to automate multi-form data exports
Once you have Entry Automation 6.0 and the Multiple Forms Extension Installed and activated, setting up an automated workflow is as easy as making some personalized choices.
The first step is to navigate to Forms → Entry Automation → Multiple Forms Tasks. This is where you’ll create a Task to handle your entry export. Click Add New to begin configuring your Task.
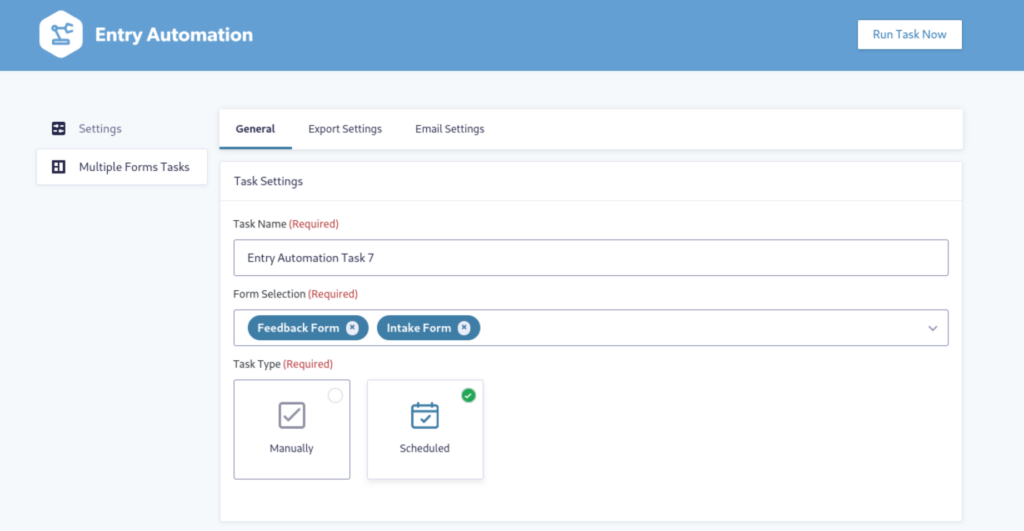
You’ll start by naming your Task. You can create as many Tasks as you like to accomplish different goals, so give each an easy-to-parse name to differentiate them.
Next, select the forms you want to include in the export under Form Selection. The dropdown menu makes it easy to find any form in your list where you want to include entries.
You must also choose whether to run the task manually or on a schedule. To benefit most from Entry Automation’s features, choose Scheduled. Once you’ve set up the schedule, it will make things completely automated.
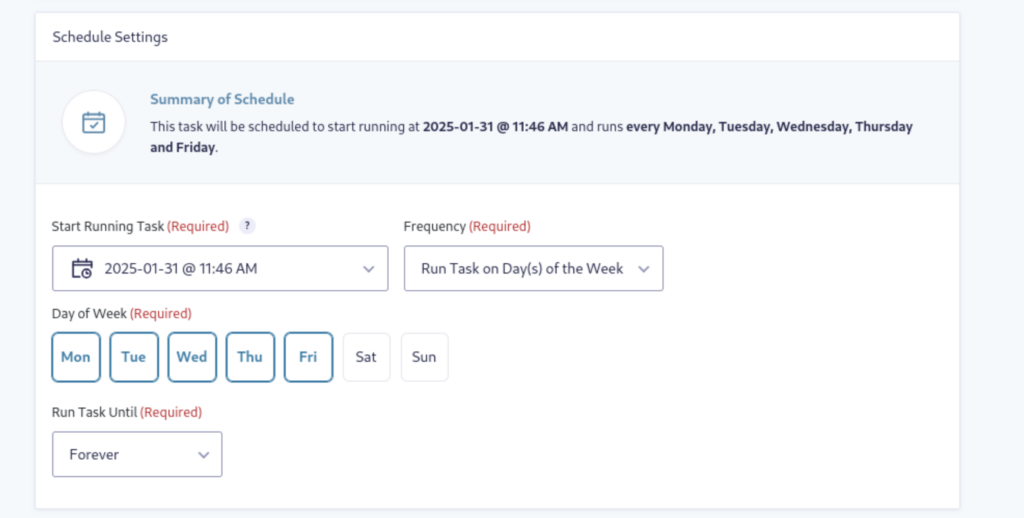
Under Schedule Settings, you have options for:
- Start Running Task (when it should run the first time)
- Frequency (how often it should run)
- Run Task Every (several options for hour, day, week, and month)
- Run Task Until (when it should stop running)
Determining the best schedule for your Task(s) can take a bit of experimenting. It’s a very individual choice that depends on your personal or team workflow.
Next, you’ll decide which entries should be targeted for the export. You have choices for:
- All Entries
- All Entries Since Last Task Run
- Custom Date Range
If you choose to create a custom date range, several options help you easily select beginning and ending dates. You can use plain English phrases such as “Yesterday,” “3 hours,” or “6 weeks.”
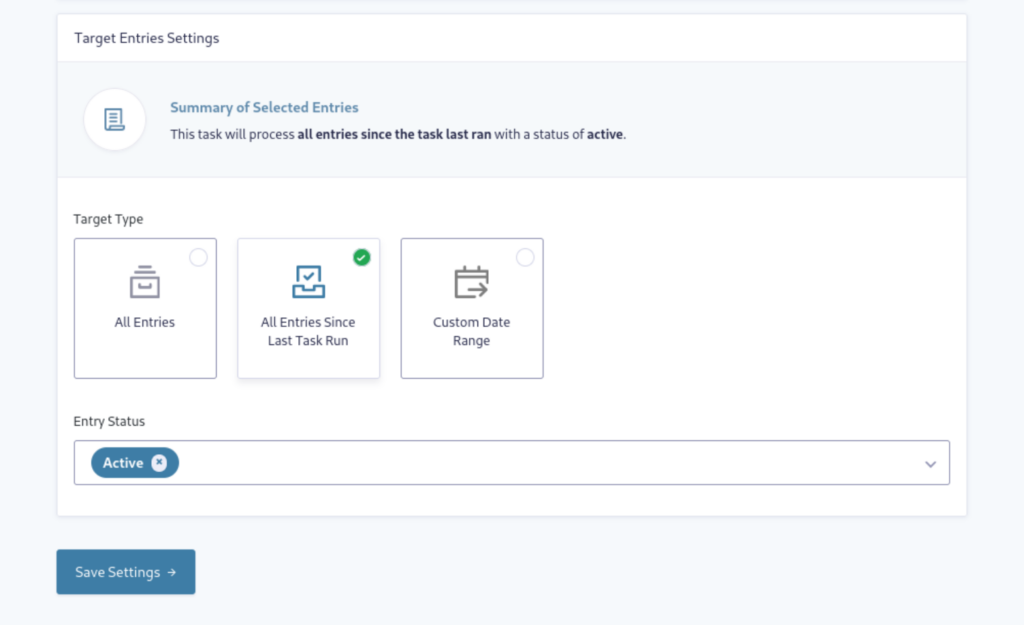
In this section, you will also select an Entry Status from which you want to export, such as Active, Unread, Read, Trash, and Spam. You can select as many as you like.
Save your settings; then, it’s time to configure the export file.
Creating efficient export workflows for multiple forms
When setting up your export file for multiple forms, you can choose from several formats: CSV, XLSX, JSON, or PDF. You can only select one per Task, but you can set up multiple Tasks if you want to export in more formats.
Enter a filename that works for you, or use the default name, which uses merge tags to populate the name dynamically. Under Export Order Settings, select from the dropdown the column you’d like to use for ordering and whether the sort should be ascending or descending.
In the next section, Field Selection Settings, you’ll set up your file export using all of the forms you previously selected under the General tab. To get started, you need to create at least one column.
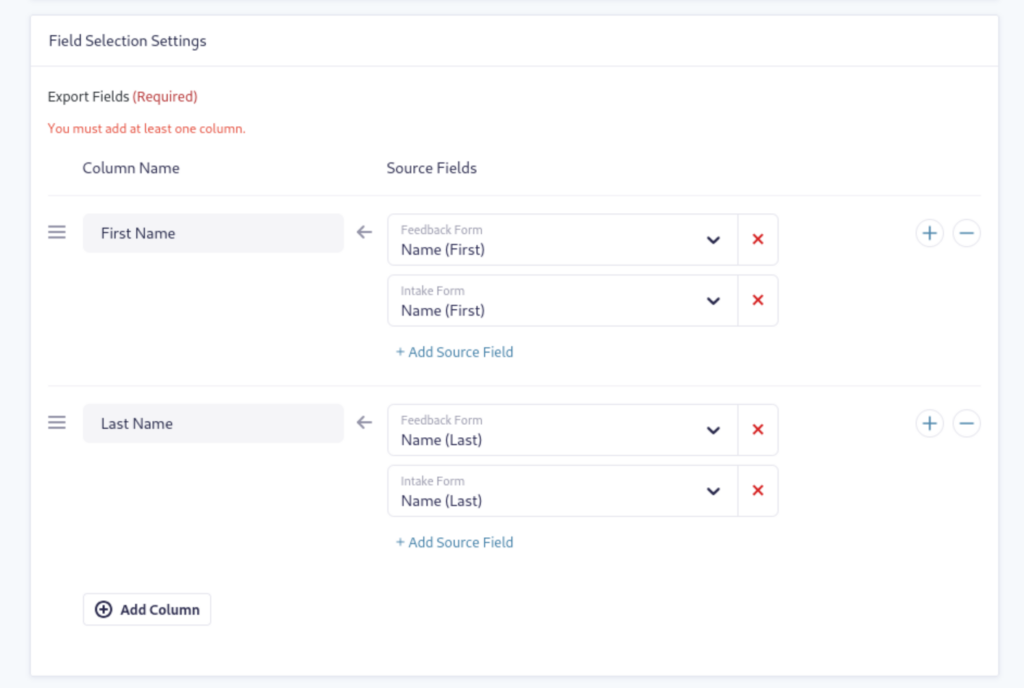
Give the column a name that makes sense for your export. For example, I’d like to export all the names from two of my forms: Feedback and Intake. The first column I’ll simply call “Name.” To the right, under the Source Fields dropdown, I’ll select the First Name fields from my Feedback form. Then, I’ll click to add another Source Field and choose First Name from my Intake form. I could continue adding as many columns and source fields as I like to create a more complex export file, but for this export, I just want the names.
To make this a truly automated process, you will want to have the exported file automatically emailed to yourself or your coworkers. This is done under the Email Settings tab, where setup is very intuitive.
When configured correctly, you won’t have to access your site to see your entry data exports — they’ll come right to you!
One-off exports
While the automated process makes your exports virtually hands-free, there’s also an option for when you just need to do a quick export. Entry Automation 6.0 and the Multiple Forms extension are integrated with Gravity Forms’ Import/Export menu. To fire off a quick multi-form export, navigate to Forms → Import/Export → Multiple Forms Export.
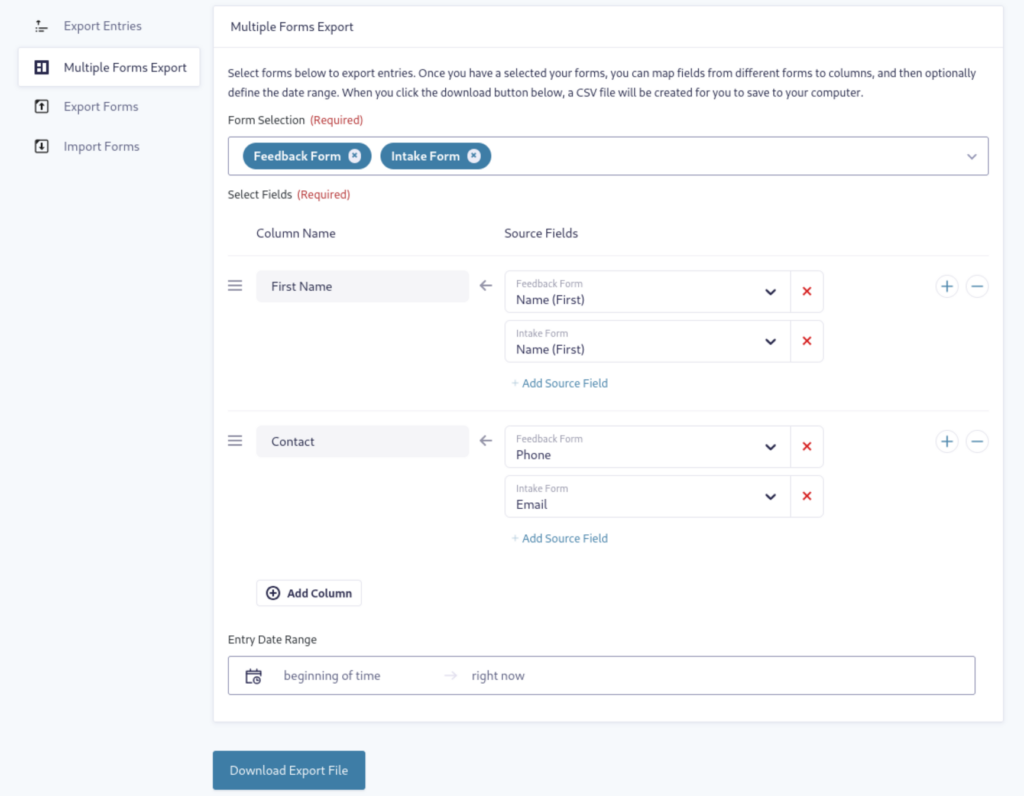
Just as we did when setting up a Multiple Forms Task, simply select the forms you need from the dropdown, then set up your columns and source fields. Configure an Entry Date Range, then click Download Export File. It’s that easy!
Transform your form data management today
You may have already discovered that manually exporting data from Gravity Forms is dreary and laborious. It’s a repetitive process of selecting a form, choosing the entries, and configuring a date range.
Now, you can export entries from multiple forms to one file, and you don’t have to waste time exporting your data manually. With Entry Automation the process couldn’t be easier.