Key Takeaways
- Gravity Forms User Registration Add-On: Enables easy creation of membership signup forms in WordPress with customizable fields for emails, usernames, and membership levels.
- Form Setup: Create a dedicated signup page, configure user registration settings, and map form fields to user roles and metadata for proper member permissions.
- Paid memberships: Supported by adding Product and Address fields plus integrating payment gateways like Stripe via their Gravity Forms add-on for subscription billing.
- Multiple membership tiers: Can be created using a Product field with multiple choices and optional total pricing display.
- Entry Automation Add-On: Allows automating tasks like exporting and emailing new member entries on form submission or scheduled intervals, improving workflow efficiency.
- Enhance security: The One-Time Password (OTP) Add-On verifies users by sending a code via email or SMS to prevent bogus or spam submissions.
- Integrations: Integrate with popular membership plugins and CRMs, including Mailchimp for email marketing, Paid Memberships Pro for membership level assignment, and Groups for user group management.
- Summary: Gravity Forms combined with these add-ons offers a flexible, automated, and secure solution for managing WordPress memberships and workflows.
Create powerful membership forms with Gravity Forms
Want to collect membership signups in WordPress? It’s easy to do with Gravity Forms and a few add-ons. Even better, everything can be completely automated. In this article, I’ll show you how to set it up.
Setting up user registration forms in Gravity Forms
The first thing you’ll need to do is install Gravity Forms’ User Registration add-on. You can find it in Forms → Add-Ons. Once that’s been activated, follow the steps below.
Step 1: Create a signup page
It’s a good idea to set up a designated membership sign up page. Using the default WordPress could be confusing, and there’s much more you can do with a page that’s specific to collecting subscribers or members. For now, you only need a blank page where you’ll embed your form later.
Step 2: Configure User Registration
There’s a minimal amount of setup with the User Registration add-on. Navigate to Forms → Settings → User Registration. Here you can enable the custom registration page, then choose the blank page you just created.
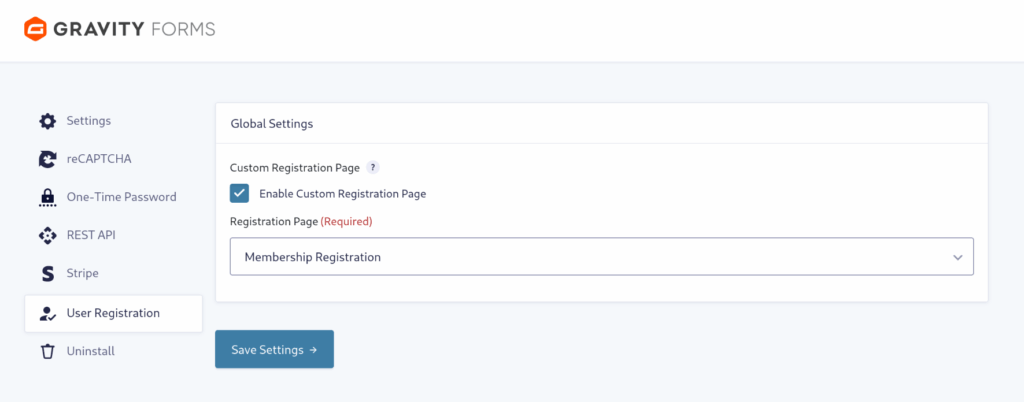
This step is completely optional. In fact, if you want to keep the default WordPress registration page available for other purposes, you should not enable this setting.
Step 3: Create the signup form
Now it’s time to create your membership sign up form. The only necessary fields are email and username. However, you may want to collect more info depending on the type of membership site you’re serving up. For example, if you want to charge for memberships, you’ll want visitors to be able to choose a level and pay right from your form — which I’ll cover in an upcoming section.
Step 4: User Registration feed
To make the registration functionality work, you’ll need to create a feed. Go to Settings → User Registration in your form. Click Add New.
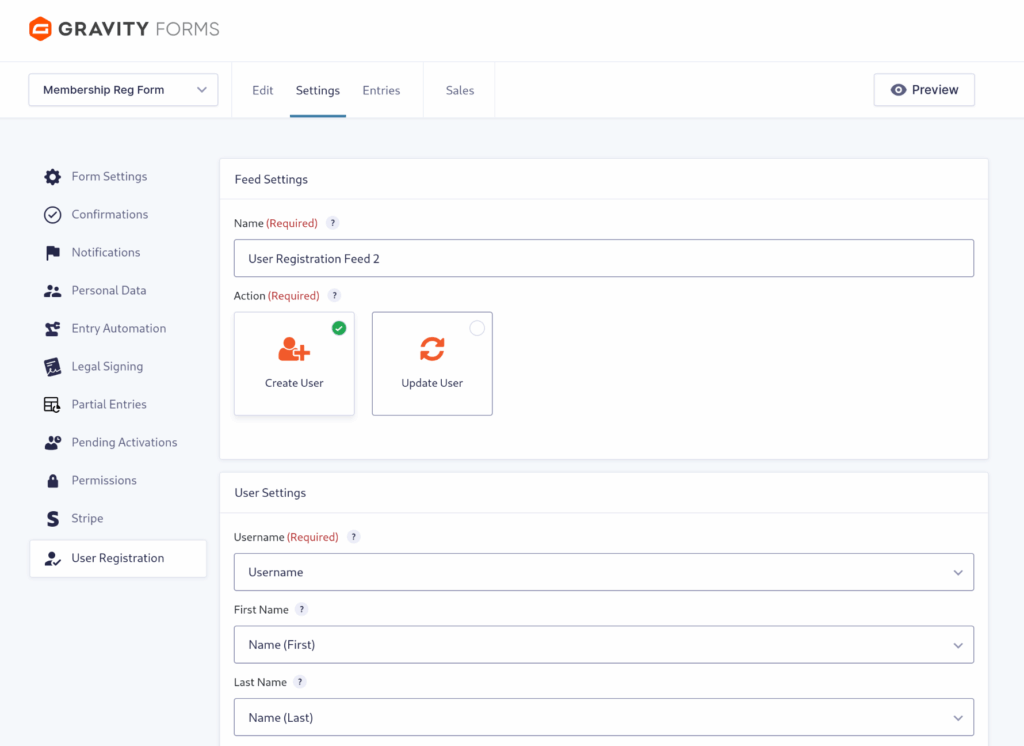
Give your feed a name and then move on to configuration.
User Settings
In this section you’ll be mapping the selections here to fields in your form. This section also gives you some clues as to what fields need to be added to your form.
Configuring user roles and permissions
The last part of User Settings is the Role selection. You’ll see all the available WordPress user roles in the dropdown, and you can choose the appropriate user level for your members. New members will inherit whatever permissions are designated for that role, so choose carefully!
User Meta
You can select various Meta Keys to map to your form, or create your own custom keys. Just remember that there needs to be a corresponding field in your form to match the Meta Key.
Additional Options
By default, Gravity Forms will send emails to new users about their accounts via WordPress. You can change this setting to send emails via a form notification instead.
Adding payment gateways for paid memberships
If you want to charge for memberships, you can do this in your form with a few additions. The first thing you need to do is add a Product field to your form.
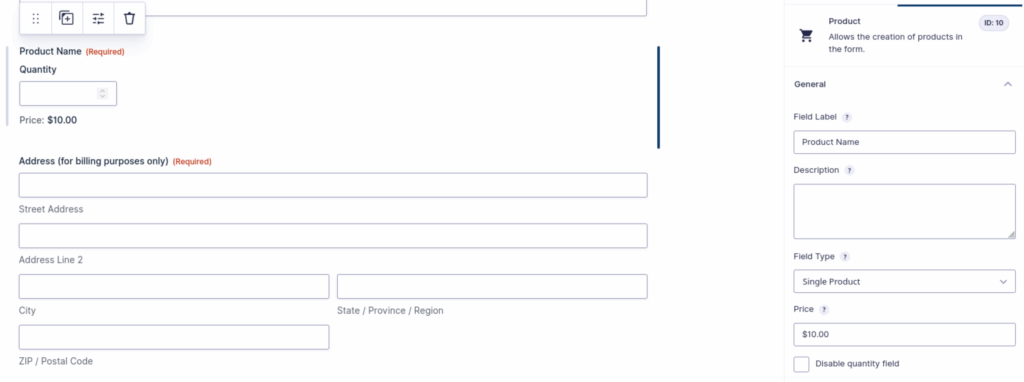
It’s also a good idea at this point to add an Address field. This will be needed for your payment gateway.
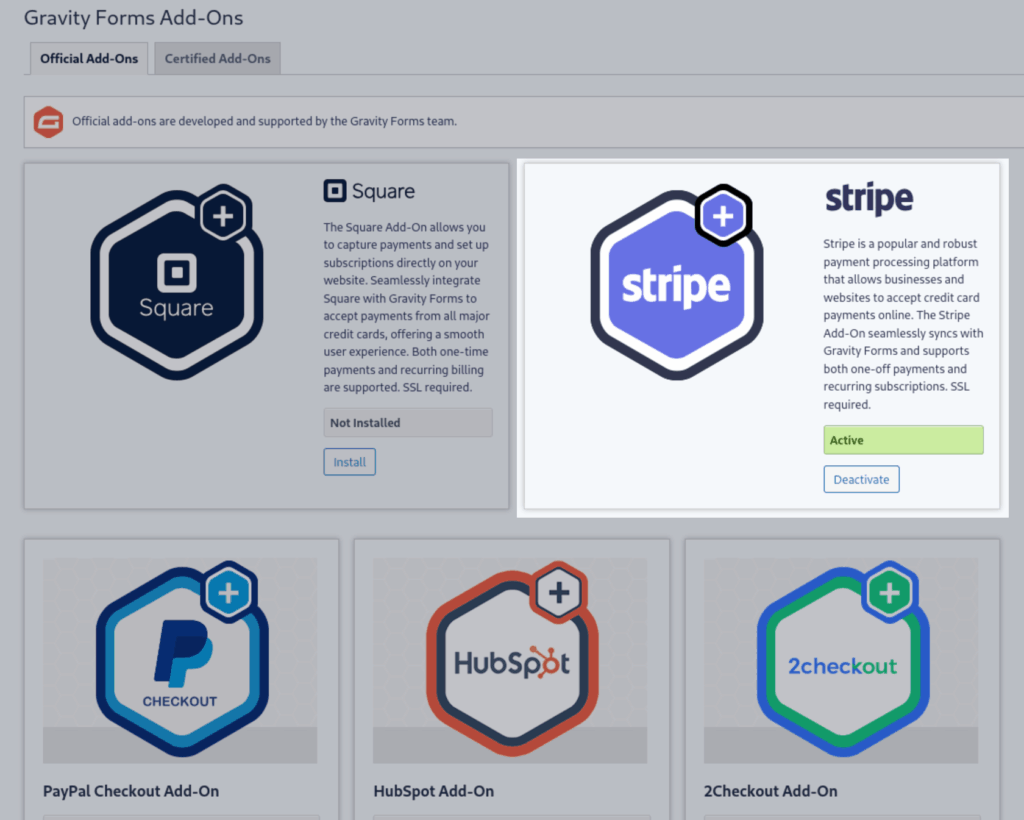
You’ll need to choose a payment gateway such as PayPal, WooCommerce, or Stripe. I’ll walk you through Stripe for this example.
First, grab the Stripe add-on for Gravity Forms in the same place you found the User Registration add-on.
Once activated, you need to head to Forms → Settings → Stripe and connect to your Stripe account. Now you can add the Stripe field to your form. It will prompt you to create a feed, so let’s walk through those steps.
In your form under Settings → Stripe, click Add New to create a Stripe Feed. Give it a name and then choose the Transaction Type you need — in this case, Subscription.
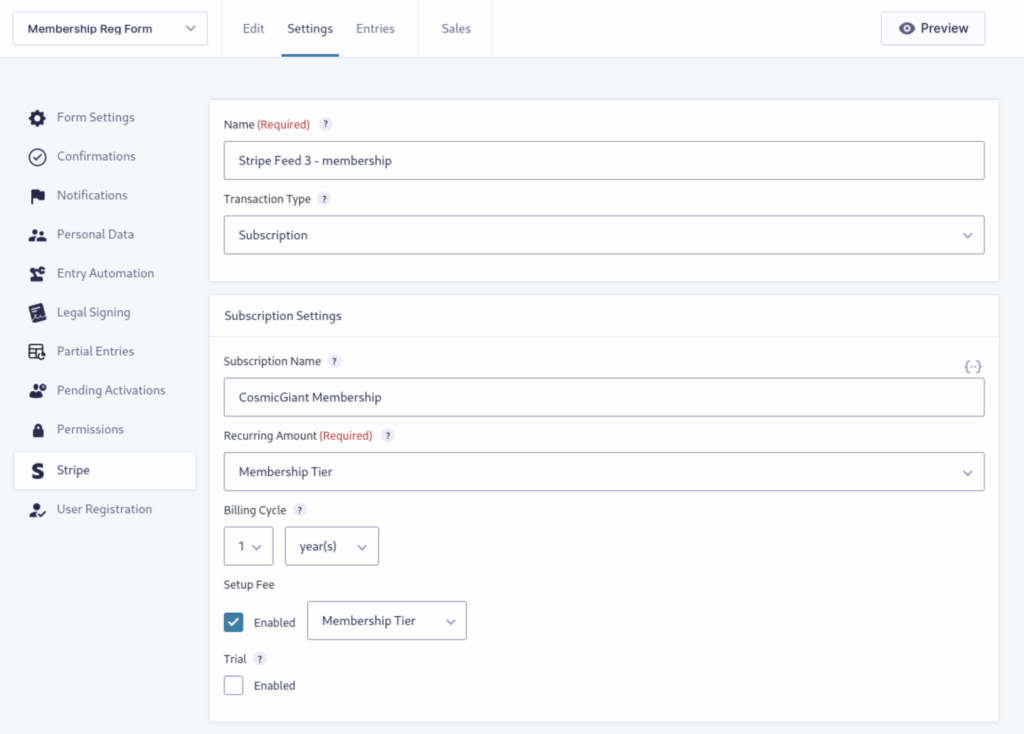
Under Subscription Settings, add the Subscription Name. Then configure the Recurring Amount and Billing Cycle selections as needed for your specific membership signup form.
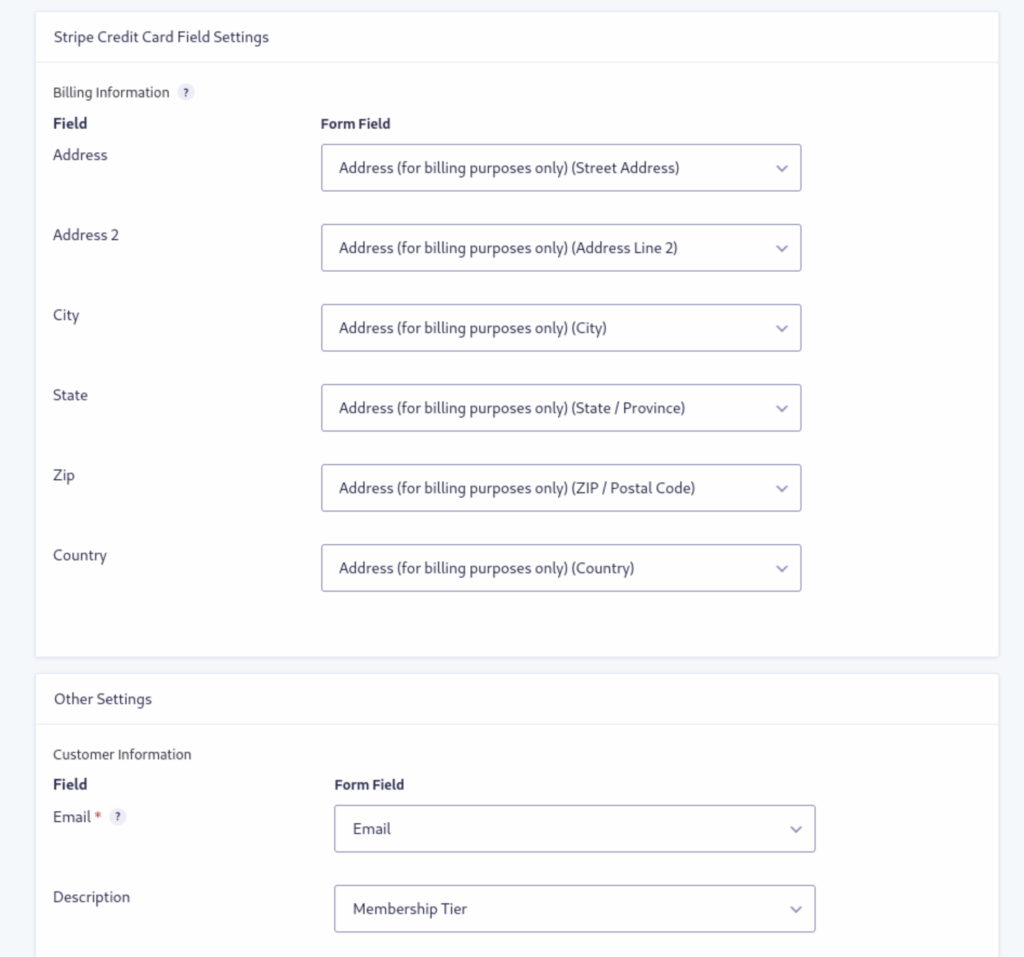
Continue by mapping the Stripe Credit Card Field Settings to the fields on your form.
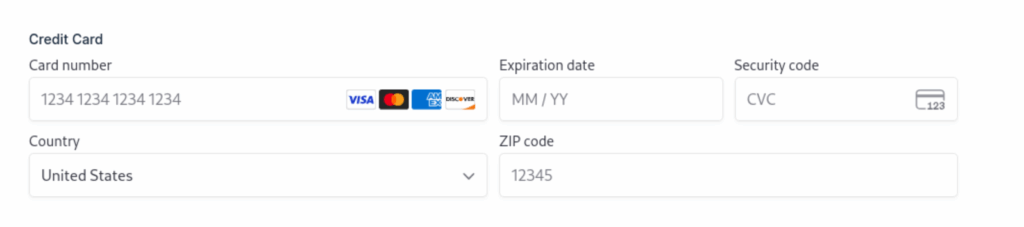
Back in the form editor, you’ll see that the Stripe field is now populated with credit card fields.
That’s all you need to do to collect paid memberships. But what if you want to offer multiple membership tiers?
Building membership tiers and access levels
If you want to create a membership subscription with multiple access levels, you need to make some adjustments to the Product field. Start by making sure the Field Type supports multiple choices rather than a Single Product.
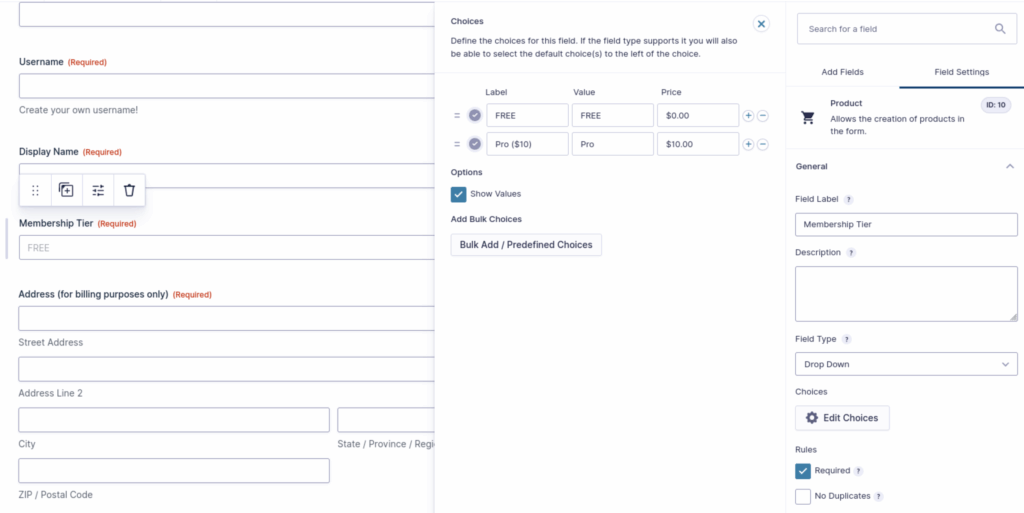
Click Edit Choices and add the desired number of tiers or levels you want. You can also add a Total field that will reflect the total price of the user’s membership choice — it’s optional yet helps confirm that the correct tier was chosen.
Automating member workflows with Entry Automation
At this point, your membership signup form will work fine. However, you can take it to the next level by automating the process of reviewing new signups. The key is Entry Automation. Install the add-on for Gravity Forms and the new user data will come to you! Configuration is easy:
Step 1: Create an Entry Automation Task
In your signup form, head to Settings → Entry Automation, then click Add New to create a Task. For the ultimate in automation, you’ll want to select either the Scheduled or On Form Submission Task Type.

Then choose the Automation Action you want:
- Delete entries
- Export entries
- Send notification
In this example, you should select Export Entries.
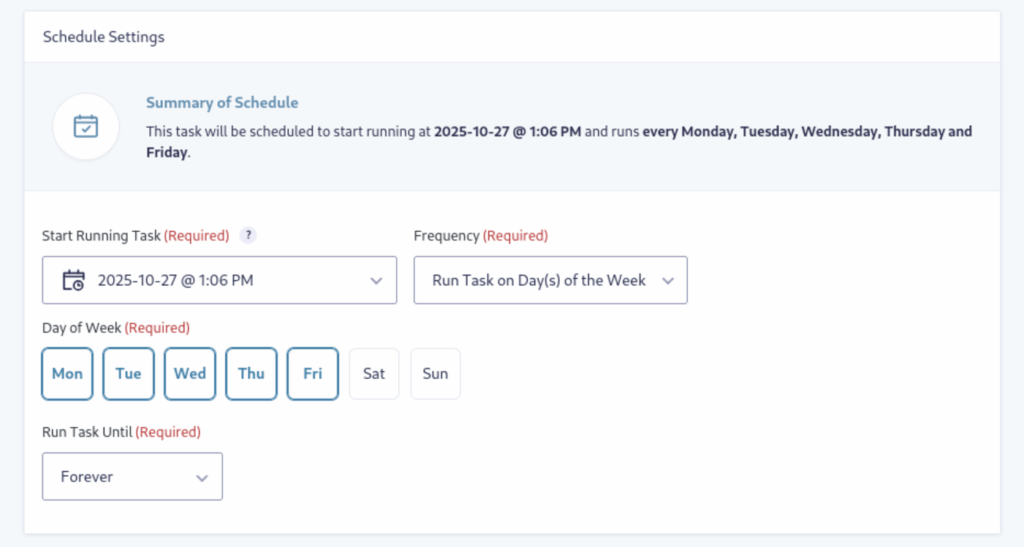
Step 2: Schedule the Task
If you choose to schedule the task, you’ll need to determine how often the Task should run.
Step 3: Set the entries to target
Next, you need to tell Entry Automaton which entries to process.
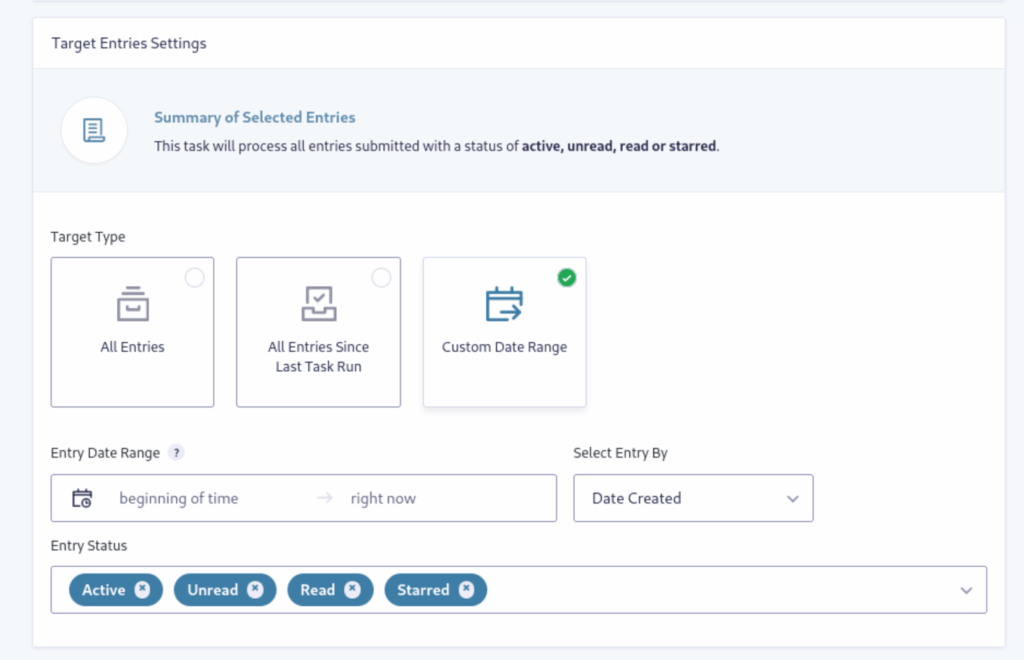
You can select:
- All Entries
- All Entries Since Task Last Run
- Custom Date Range
Step 4: Export Settings
Now, choose the File Type and naming schema you’d like under the Export Settings tab. Your file type options are:
- CSV
- XLSX
- JSON
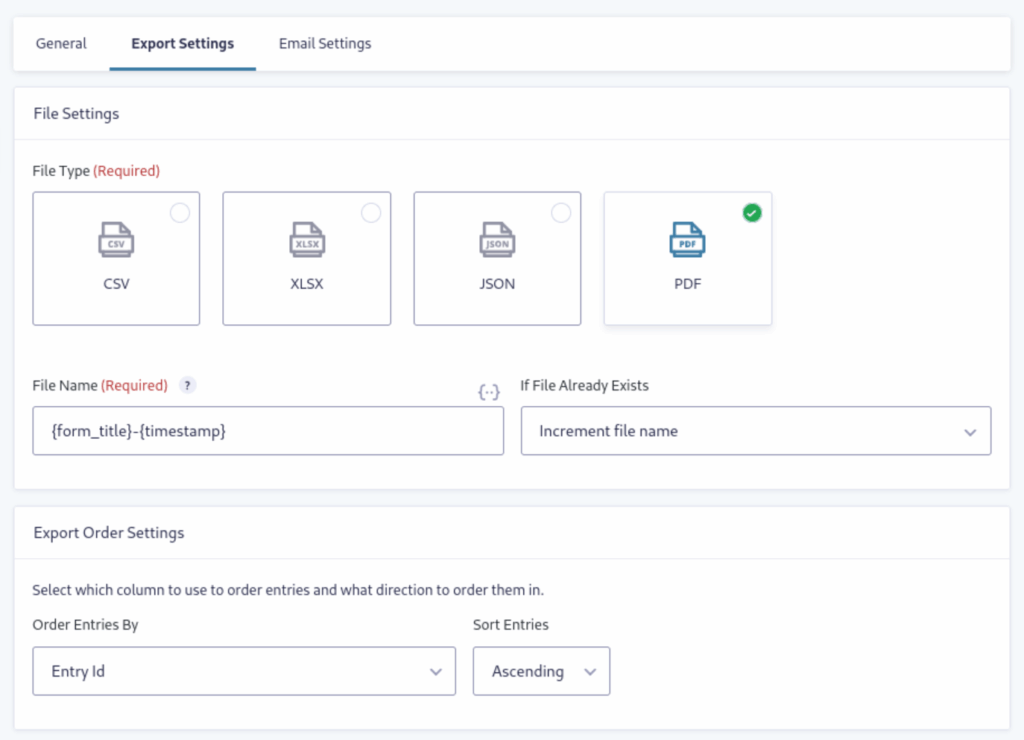
Additionally, you can set the order of the exported entries and which fields you want included in the file.
Step 5: Email the file
Finally, click the Email Settings tab and configure the settings to have the file automatically emailed to you and/or your team members.
Now your membership signup entries are fully automated! Check out this post for a more detailed guide on setting up Entry Automation.
Securing member data with One-Time Password verification
One issue that frequently comes up with member signups is security. Your new users will want to keep their member data private, and you want to make sure you’re only collecting legitimate submissions.
That’s where One-Time Password (OTP) comes in. With the OTP add-on for Gravity Forms, you can add a verification field to your membership form that prevents bogus entries and enhances the security of personal information submitted through the form.
OTP sends a verification code via email or SMS. The form will only be submitted when the correct code is entered. Once you add the field to your form, there’s minimal setup required — and no coding necessary! Let’s walk through the settings.
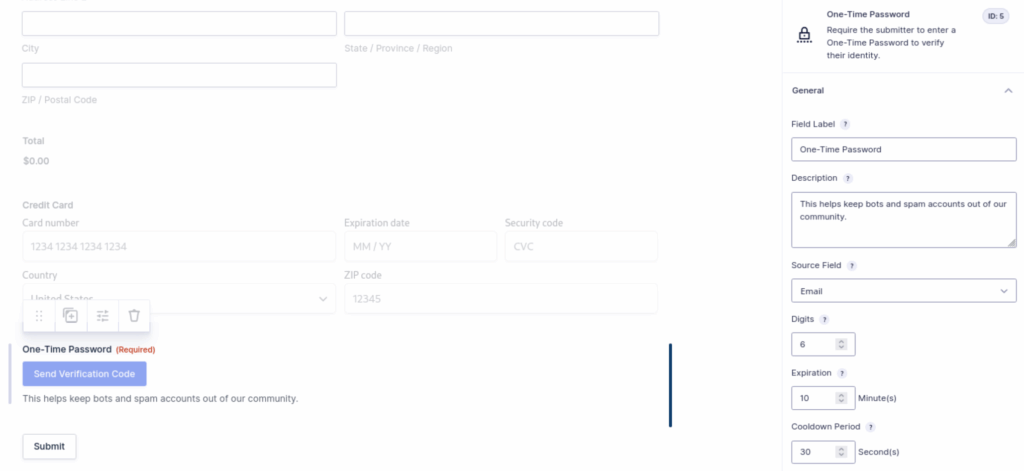
Field Label and Description
Pretty simple stuff here. Adjust as you like.
Source Field
If you have more than one email field in your form, this is where you’ll choose which email field OTP will use to send the verification email.
Digits
Set the number of digits in the verification code.
Expiration
This will determine the amount of time in seconds before the verification code expires.
Cooldown Period
The Cooldown field prevents spam by blocking repeated, rapid requests for new codes within a short time window, forcing a delay before each attempt. This restriction dramatically reduces the ability for bots or malicious users to flood forms with fake or repeated requests. The maximum cooldown period is sixty seconds.
Rules
This field needs to be required for OTP to be effective.
Integrating with membership plugins and CRMs
Of course there’s much more you can do with your membership signup forms to integrate them with CRMs and mailing lists. Here are a few examples:
Mailchimp
Use the official Gravity Forms MailChimp Add-On to connect your forms to your MailChimp account. Then create a MailChimp feed tied to your form to automatically subscribe users when they submit the form. Map your form fields to MailChimp list fields, including custom fields for detailed subscriber data.
Paid Memberships Pro
The “Gravity PMP” add-on plugin integrates Gravity Forms with Paid Memberships Pro to register new members directly into membership levels using your custom Gravity Forms registration form.
Groups
The Groups plugin can be integrated with Gravity Forms to automatically assign users to Groups based on their form submissions. This integration is provided by a dedicated Groups Gravity Forms extension, which allows automatic group membership assignment during user registration or other form submissions. Note that this plugin requires a Gravity Forms Elite license.
Start building your membership site today
Collecting membership signups in WordPress is super easy. Not only can you facilitate user registration through Gravity Forms, you can totally automate your workflow using Entry Automation. And with the One-Time Password plugin, your membership forms can be secure and bot-free.