When using Gravity Forms, you might need to export entries from a form on a recurring basis. It could be to get a list of that week’s entrants entering into a weekly contest on your WordPress site’s front-end, or maybe you need to gather all the new form submissions on your lead capture form every day.
Unfortunately, default WordPress doesn’t easily support recurring exports of form entries. The process is complicated, methodical and will need to be done from scratch every time you want to export entries. You can’t directly export to Excel either, you’ll need to manually export data as a csv file and then import it into Excel.
What you need is a tool that allows you to customize and automate the process to suit your needs, boosting your WordPress business productivity and conversions.
Our recommendation: the Entry Automation plugin for Gravity Forms
With the Entry Automation for Gravity Forms WordPress add-on, you can automatically export your Gravity Forms entries on any schedule you like. You can choose to schedule form data to be exported to PDF or other formats like CSV, Excel, or JSON. For further functionality, you can also have it automatically emailed to multiple recipients, including a custom subject header and message.
In this article, we’ll look at how easy it is to set up Entry Automation to export Gravity Forms entries automatically, saving you time and allowing you to focus on the things that matter.
Configuring an Export Task
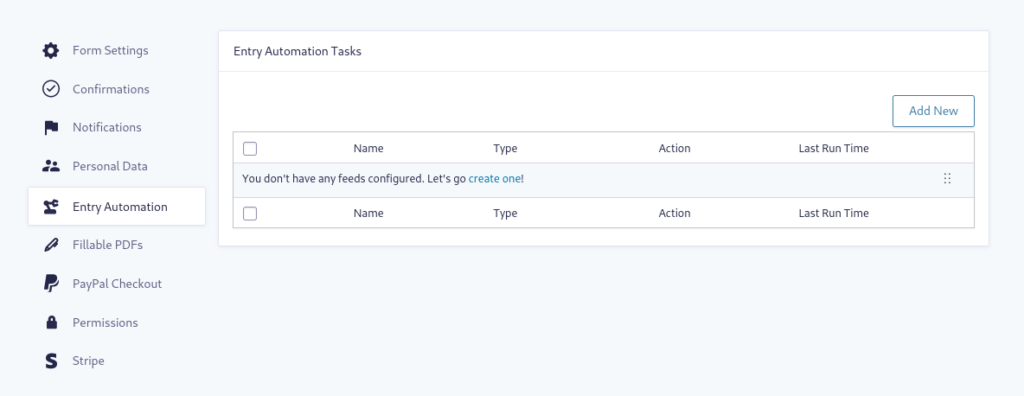
After the Entry Automation add-on has been installed from your WordPress dashboard, a new Entry Automation tab is added under the Form Settings section of each of your forms. On the Entry Automation tab of the settings page, you can add new Entry Automation tasks, modify existing ones, and rearrange the order in which they are run by dragging and dropping.
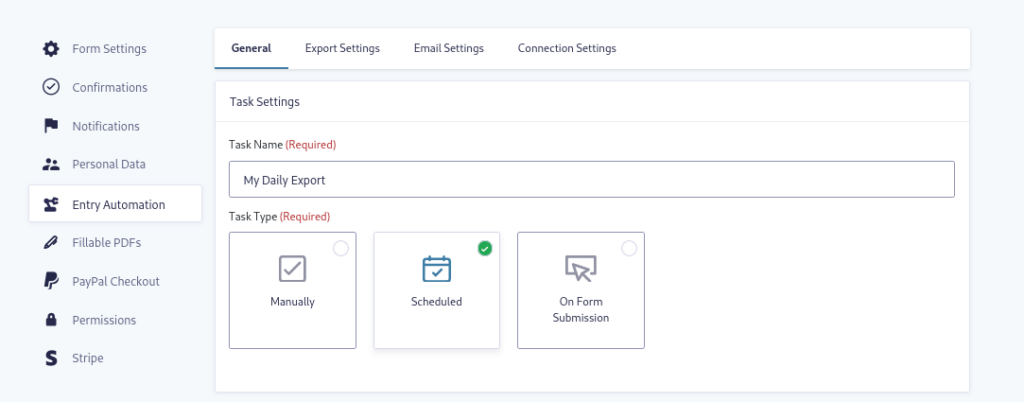
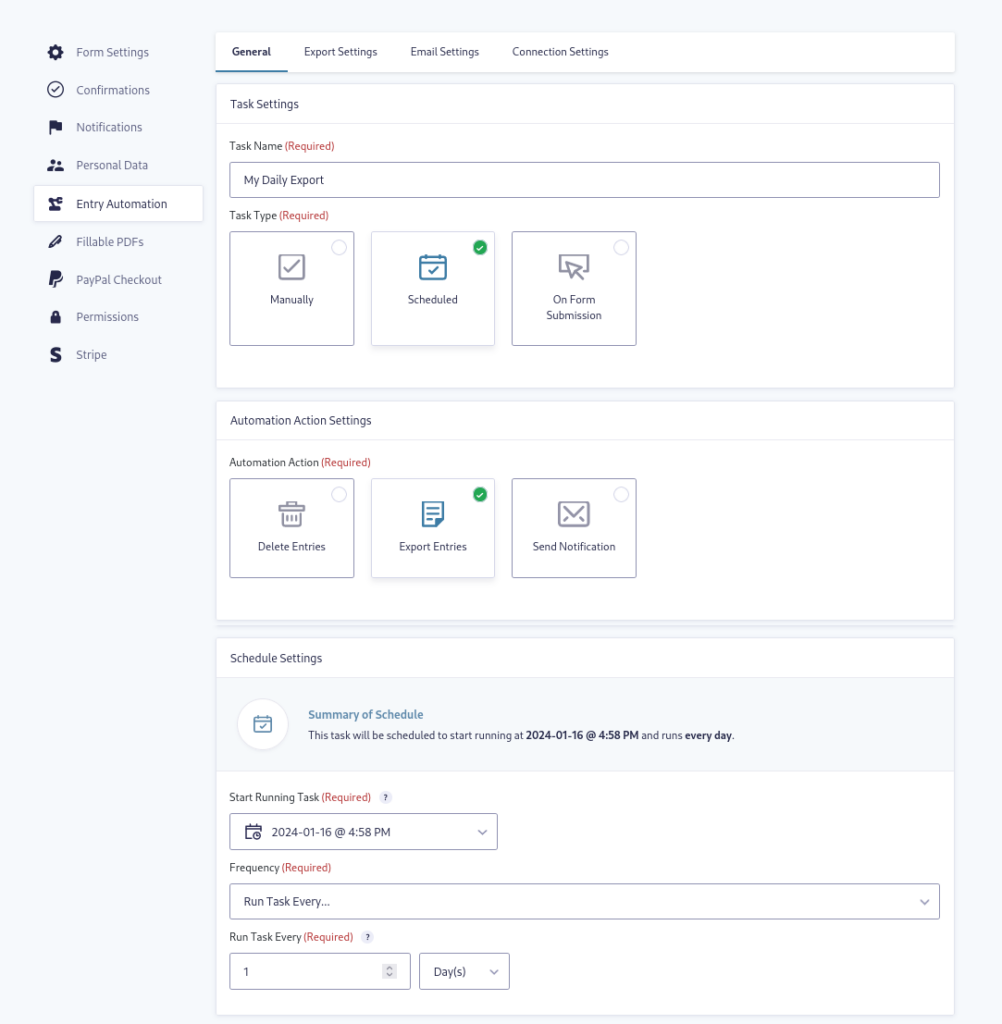
Once you click the link to add a new Entry Automation task, you are presented with some initial settings fields in the plugin: Task Name, Task Type, and Automation Action. You can use Task Name to describe what will happen with this task. This helps you easily understand what each task does when you have multiple configurations with conditional logic.
Task Type allows you to control how the Entry Automation task is run. You can choose to run them manually, on a schedule, or upon submission of the form.
Next, you can select what Automation Action this task will run. For this tutorial, you want to select Export Entries.
With an Automation Action selected, Entry Automation adds a few specific fields for configuration. You can set what time you first want this task to run with the Start Running Task field. By default, it is set to start in the next hour. Next, you can set how often you want the task to run in the Run Task Every drop-down field. This is how frequently this task will run after the Start Running Task time.
Setting the Custom Date Range For Export Entries
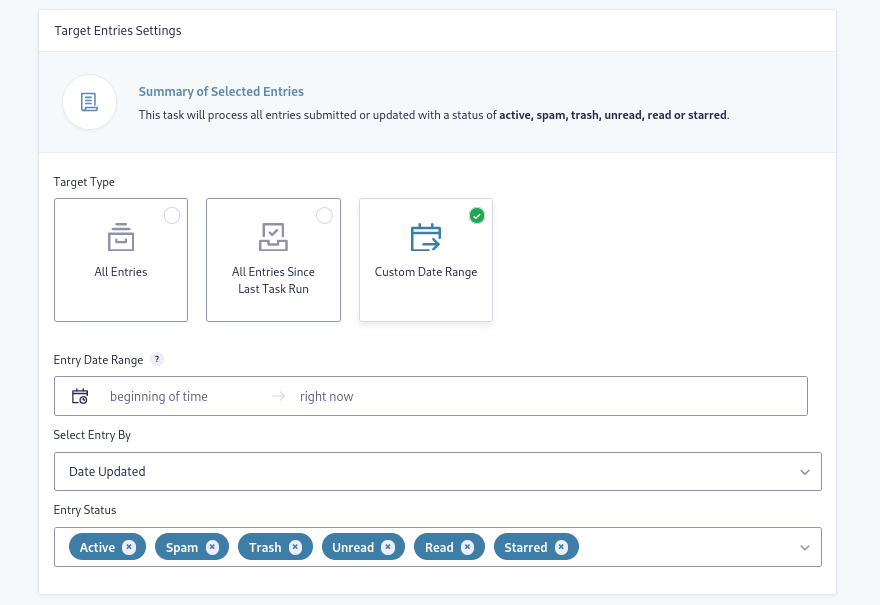
Moving down to Target Type, you can choose to export All Entries or All Entries Since Last Task Run. You’re also able to set a custom date range for what entries will be exported every time this Entry Automation task is run.
When you first create a new task, both the From and To date range fields are empty. When the From field is left empty, all entries since the beginning of time will be selected. When the To field is left empty, all entries up until the time your Entry Automation Task is being run will be selected.
You can set your own date range using plain English phrases (e.g., “yesterday”, “2 hours”, “5 weeks”). When entering a date, Entry Automation within the Gravity Forms plugin will display a preview relative to the current time. If the entered date is invalid, an error will be displayed.
If you want to get all the entries from the past week, set the From date range to 1 week and leave the To date range empty. If you want to get all the entries in the past day, set the From date range to 1 day.
Additionally, you can click the Select Entry By drop-down and choose Date Created, Date Updated, or from the Date field on the submitted form. You also have multiple options for Entry Status available for your task.
Setting up the Export File
Now that you have defined when the Entry Automation task will start running, how often it will run, and what entries it will select, you need to set up the export file itself. Click the Export Settings tab to view the export settings fields for your Gravity Forms user.
First, you want to set the file name of the export file. There are multiple merge tags available to use in the file name, the default being: {form_id} for the form ID, {form_title} for the form title, and {timestamp} for the time when the task generated the export file. By clicking the merge tag icon in the upper right, you can choose and combine any number of merge tags from the fields on your form to create the filename — although you’ll probably want to keep it short and easy to recognize.
You can also choose to automatically overwrite an existing export file with the same name instead of creating a unique export file, as well as creating an incremented filename if you prefer.
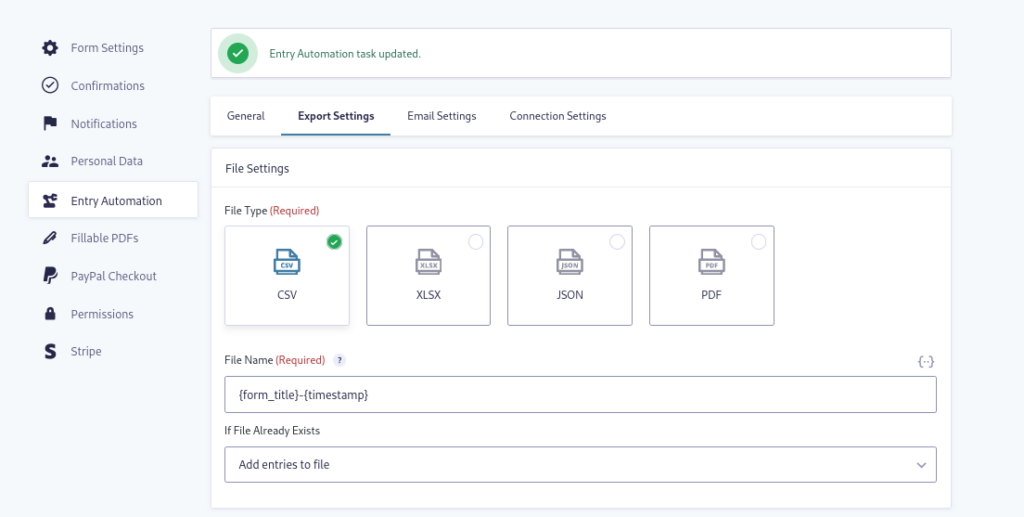
Next, you select which form fields, like the entry id or created_by Gravity Forms fields, you want to be included in your export file. These can be exported into a CSV or Excel file.
The Gravity Forms Entry Automation plugin saves the automatic export files to a protected folder in your site’s uploads directory. You can also have the export file emailed to you, which we’ll configure in a moment. The export file can be deleted from your site by enabling the feature under Post Export Settings at the bottom. Deletion happens after the file has finished exporting and is emailed to your user account.
Automatically Email the Export File
In the Email Settings tab, toggle the Email Generated Export File switch to enable emailing export files. You can send export files to multiple email addresses separated by commas. Using the Email merge tag, you can automatically email the file export to the form submitter if they have completed that field on your form.
You’ll likely want to customize the email settings to make sorting easier and communication clear with your recipients.
Click the Save Settings button, and you’re done! Your Gravity Forms entries will automatically be exported and emailed (if configured) to you.
Final Thoughts
If you need to regularly export Gravity Forms entries, Entry Automation can go a long way in making your life easier. Not only do you save time by automatically exporting data, you can also directly export the data into Excel and configure it to be emailed.
Entry Automation also ensures you are GDPR compliant by allowing you to set an auto-delete schedule for Gravity Forms entries based on “the shortest time possible”. And don’t forget about its automated reporting!
The plugin also lets you automatically generate PDFs based on form entries and set up multiple tasks like automated reports which can be customized using conditional logic.
Check out our pricing plans to get automating today!