You’re probably used to getting notifications when someone submits a form on your website. If you have a busy site that gets tons of submissions, all those entry emails can become a headache. And, you may not need to review all the data in every email.
In this article, I’ll show you how to create a Gravity Forms automated email digest that only gets sent on a weekly basis. You’ll be able to choose which fields are included for each entry submission, and you can send the email to one or more people on your team so you can all review the same data.
What You Need to Start
Creating a Gravity Forms automated email digest is a virtually painless process. We will set it up using Gravity Forms with our Entry Automation product. Entry Automation helps you automatically export your Gravity Forms data, delete private data, schedule tasks, and more. In this case, we’re going to focus on the Send Notification feature to create our email digest.
To follow along with this article, you should start with a form already created in Gravity Forms, with Entry Automation installed. It’s okay if you don’t have any entries yet; you can always create some test entries after setup.
Let’s get started!
Create A Task
The first step is to create a task where you can configure a specific notification. Choose a form you want to work on within your Gravity Forms forms list. Hover over it and choose Settings → Entry Automation.
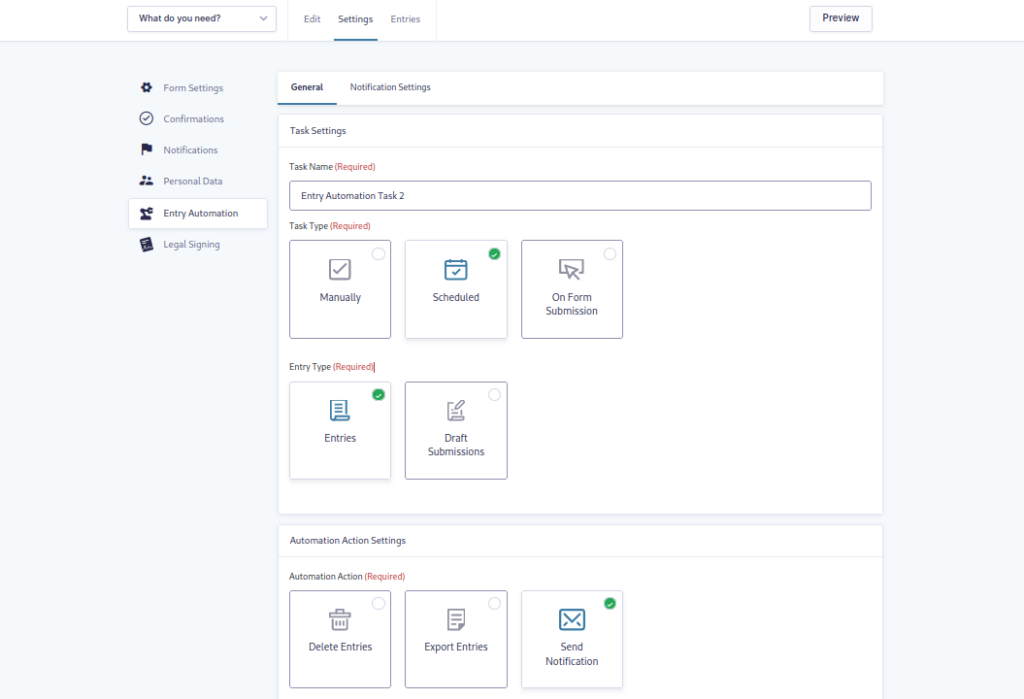
On the next screen’s General tab, give your Task a name — it can be anything as long as it’s meaningful to you.
Under Task Type, you’ll choose the method by which your task will run. While you can set tasks to run manually or on form submission, our purpose here is to create an automatic weekly digest — so select Scheduled.
For Entry Type, choose Entries. Once you get a handle on creating Send Notifications, you can come back and set up a new one that utilizes Entry Automation’s unique Draft Submissions feature.
Under Automation Action Settings, you’ll want to select Send Notification.
Schedule Settings
Now, we need to set the schedule for your weekly email digest. Moving down to the Schedule Settings section, you have some options.
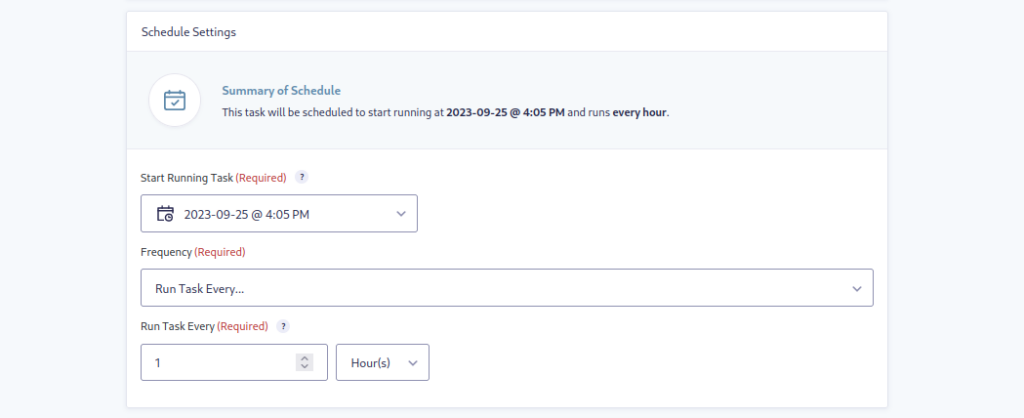
First, select a date and time when your task should run for the first time. If you want to test your digest emails very soon, leave this at the default. You can always come back and change it later.
There are several options under Frequency that may come in handy for future tasks you might set up. To send a digest of your collected entry data every week, Choose Run Task Every…, then Run Task Every 1 Week(s).In the next section, Target Type, you have three choices:
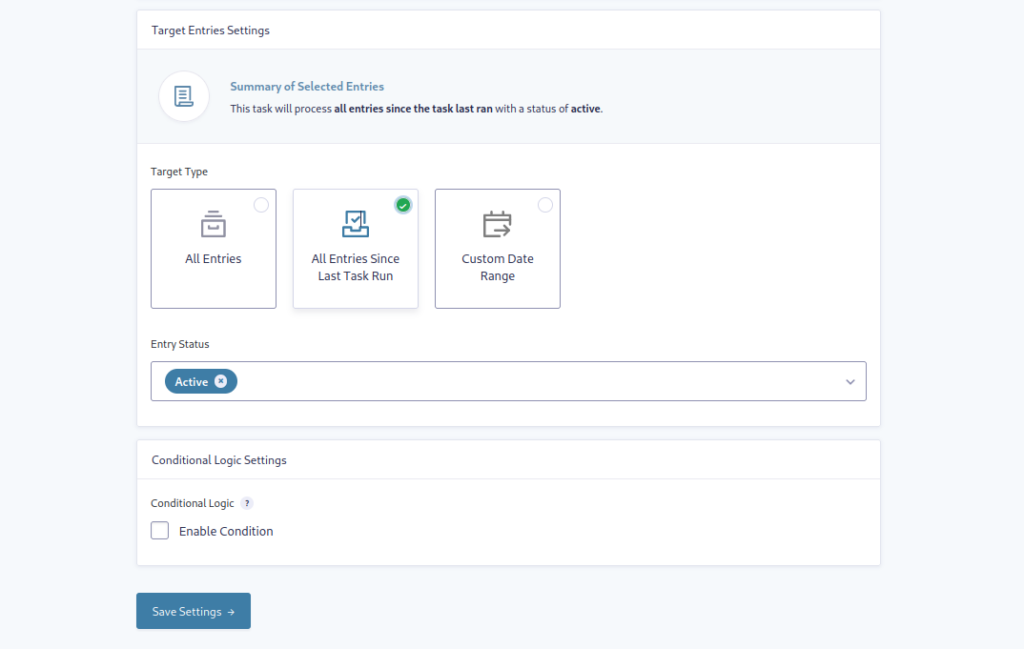
All Entries: Sends you all entries, just like it sounds
All Entries Since Last Task Run: This can narrow your selected entries considerably, which might be the right choice if you don’t want to receive repeated data every week.
Custom Date Range: Setting a date range could be a good option if you only want to review entries every week that were submitted before or after specific dates.
Under Entry Status, Active is the default. This means any entries that have been recorded and not sent to the trash or marked as spam. You can also specify if you want to receive entries that have been read, unread, or starred.
If you want to drill down further, you can enable and configure Conditional Logic to finely tune the data to include only certain entry fields.
When you’re done, make sure you hit the Save Settings button.
With the basic configuration completed, let’s configure the settings under the Notifications tab.
Set Up Notification Processing
The Notifications Settings tab lets you control how the emails are processed and sent.
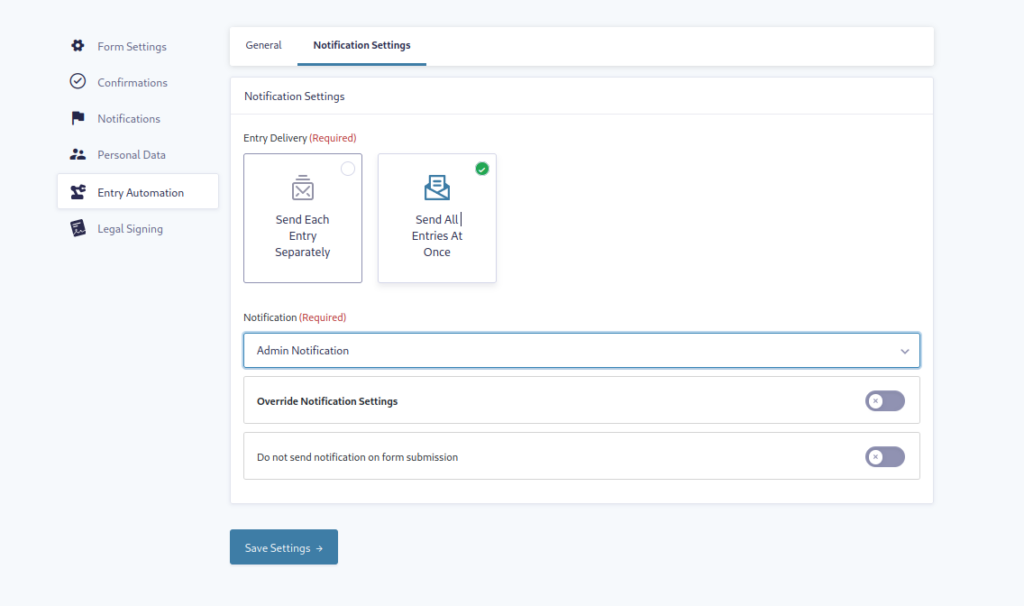
You’re setting up a weekly digest email, so you’ll want to select the Send All Entries At Once option under Entry Delivery.
Under Notification, select Admin Notification to have the emails automatically sent to the site’s Admin email.
If you’d like to have the emails sent to a different email address, like a colleague who needs to get the digest, then click the Override Notification Settings toggle.
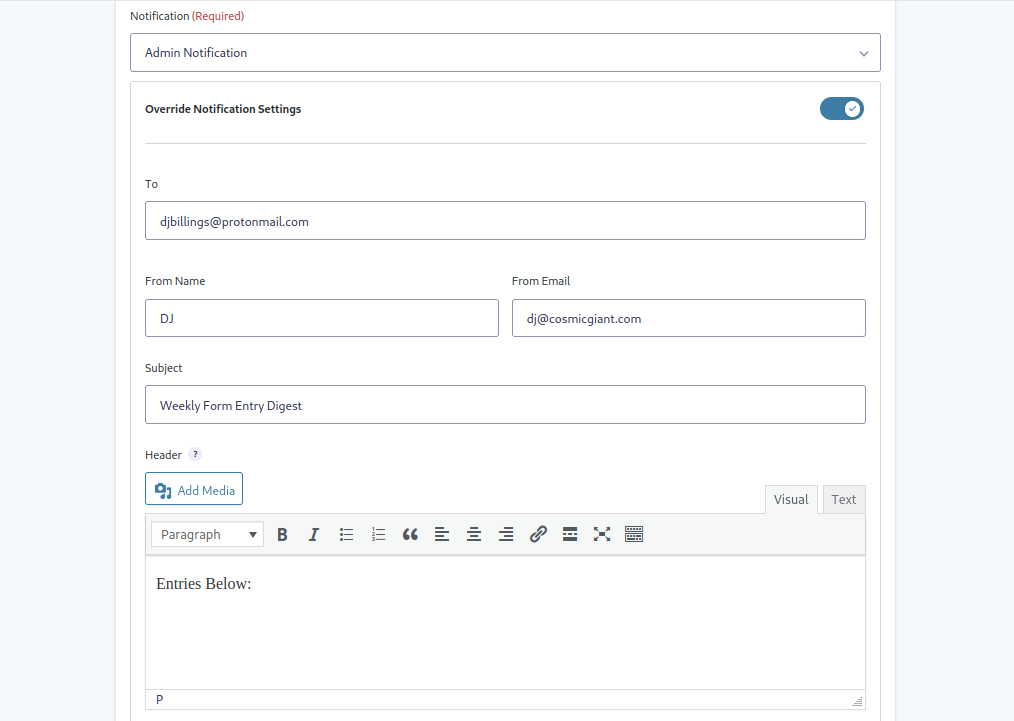
An additional menu will open up where you can enter the info for your colleague and set up how the email will look; Name, Subject, Header, Message, and Footer can all be customized. If you’d like to send the email digest to more than one person, just add additional email addresses separated by a comma.
To make sure the data gets included with the email, you need to add the appropriate merge tags in the body of the message. For example, to include data for all fields, click the {..} icon and choose the {all_fields} tag. And, of course, you can customize this by adding any combination of merge tags you like.
Testing and Troubleshooting
Now, you can test your digest email by submitting some entries on your form. If you don’t want to wait too long, make sure you go back and adjust the schedule so it arrives sooner. Again, once you’ve tested it, you can change the task to run on a weekly schedule.
If you’re not getting the emails, verify that the date and time for the first run and your schedule are correct. If you still don’t receive anything, it’s most likely an issue with how your WordPress site is configured to send emails. Gravity Forms and Entry Automation don’t handle emails directly. They use a function in WordPress core that interacts with your web server to send emails from your site.
To test your email-sending capabilities, use a free plugin like WP SMTP. That will help you to troubleshoot any issues.
Going Further
Congratulations! Now that you’ve set up a Gravity Forms automated email digest, you can explore more ways to use Entry Automation’s Send Notification feature. For example, you can create a powerful, automated drip marketing campaign with the skills you’ve just learned.
Check out all the features of Entry Automation and see how it can save you tons of time.