Life happens. Right in the middle of a task, you get pulled away by something else that demands your immediate attention. And if you’re in the middle of signing up for an event, or filling out a particularly long inquiry form on a website, you have to put it aside until later — that is if you remember. Chances are, with your hectic life, you won’t. Or you’ll forget the link.
This is happening to your website visitors, too.
Like you, they may stall out on your form page because, well, life. While it’s nice to know it’s not necessarily your fault, those unfinished forms mean that you’re losing precious leads.
The good news is that you can significantly increase your conversion rates with automated email reminders. Using our Entry Automation product, alongside the Gravity Forms Save and Continue feature, you can configure email reminders to help users finish their form submissions. In this post I’ll show you how to set that up.
Save and Continue vs Send Notification
Gravity Forms has a built-in Save and Continue feature that allows you to add a button below your form, prompting the visitor to save their current form submission data so they can return to continue it later.

When clicking, the user is shown a link that will bring them right back to their uncompleted form, with the fields they’ve already filled out intact. They can copy and paste the link into an email or document, or they can fill in their email address and they’ll be emailed the same link.
The Send Notification Task differs in that once you set it up, visitors get follow up emails directly in their inbox, reminding them to finish their submission. It’s important to note that, since draft submissions only exist for 30 days, you’ll want to have your reminders go out before the draft submission vanishes.
Let’s go over how to set it up, and you’ll see the power in this Entry Automation feature.
How to Create a Send Notification Task
This will be different from the usual submission notifications you set up for your forms. We’re going to set up a notification specifically for entries that are not submitted.
First, make sure you have Entry Automation for Gravity Forms installed. This will place an additional menu item in the settings for your Gravity Forms.
Next, you need to create a form — or you can edit any existing form you like. From the Form Editor (or Forms list), click Settings → Entry Automation.
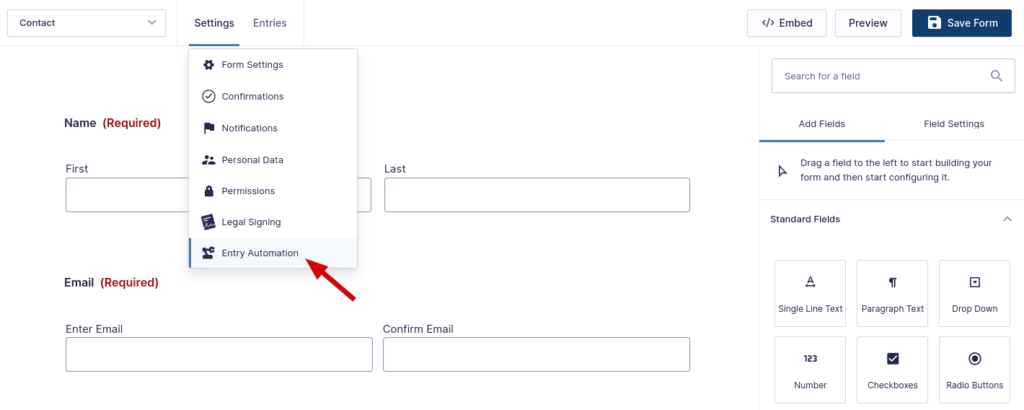
This will take you to the Entry Automation Tasks menu, where you can click Add New to create a new task. Here, you need to enter a Task Name.
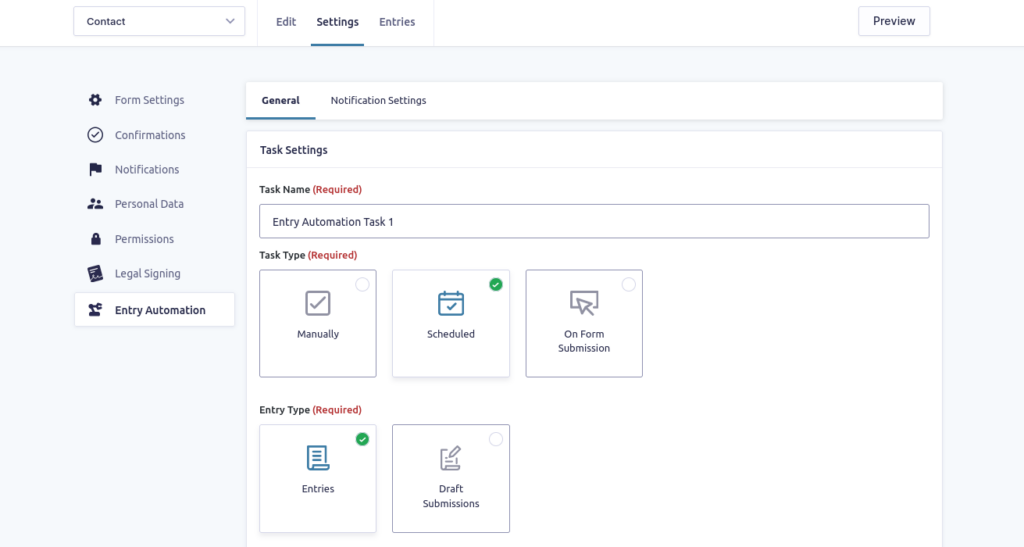
Task Type
You also have three options for how the task is run:
- Manually
- Scheduled
- On Form Submission
If you choose Manually, you’ll need to come back to the Entry Automation and click Run Task Now. Since the whole purpose is to make this process as automated as possible, you’ll probably want to select Scheduled. And, since you want to target only draft submissions — not submitted forms — you don’t want to use the last selection.
Automation Action Settings
You can choose to delete the entries, export them, or send notifications. For our purposes here, let’s choose Send Notifications.
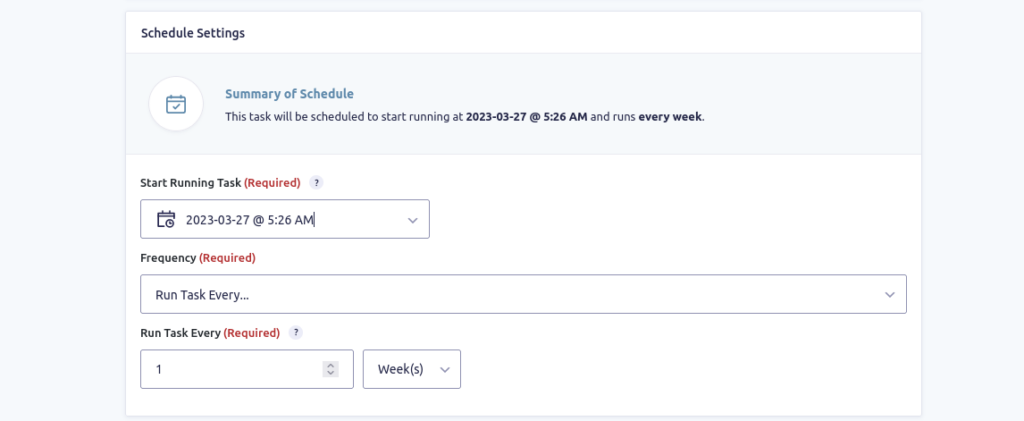
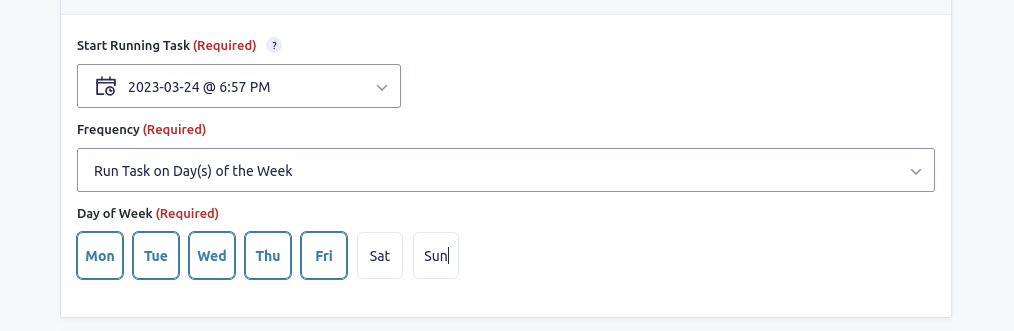
Schedule Settings
You’ll need to select a date and time in the future when your new task will start running. After that, you can set the Frequency. Because you don’t want to annoy your visitors, you’ll probably want to only remind them to complete their form once per week at most.
Target Type
The Target Type determines which Entries are processed when your task is run. You can choose:
- All Entries
- All Entries Since Last Task Run
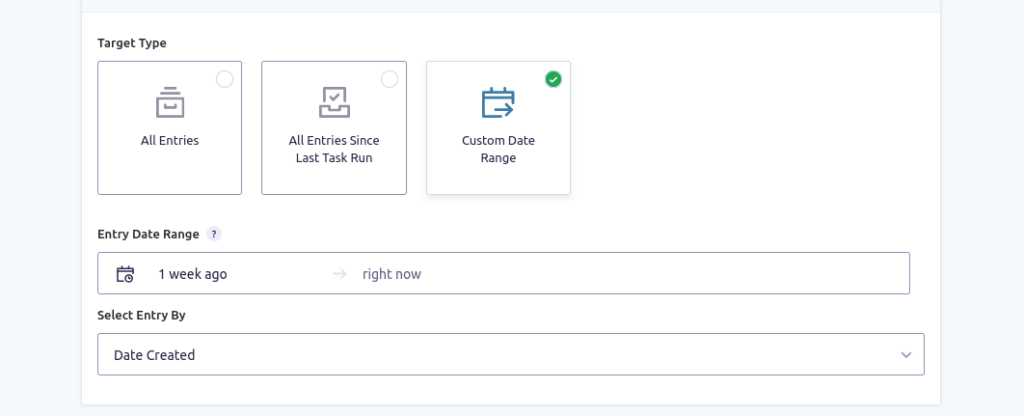
- Custom Date Range
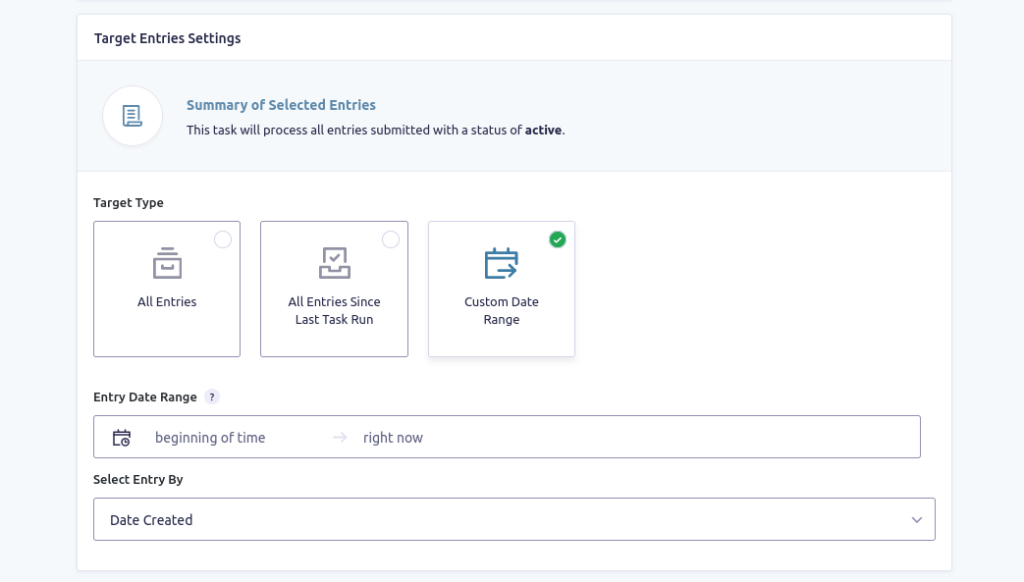
By choosing Custom Date Range, you have a lot of flexibility over which entries are targeted. For example, if you set the Entry Date Range to Last Week, it will include any draft submissions that were made a week ago and those people will get a reminder instantly.
Combining the Schedule Settings with Custom Date Range gives you lots of possibilities for timing your reminders. Another example setup would be to set your task to run Monday – Friday.
Then set your Custom Date Range’s Entry Date Range to 1 week ago. This will capture any draft entries made a week ago and begin sending daily reminders — but only on weekdays.
Once you’ve decided on the best settings for your site, click Save Settings. Now let’s move to the Notification Settings at the top of the menu.
Entry Delivery and Notification
Under Entry Delivery, you’ll want to select Send Each Entry Separately. The Send All Entries At Once selection is for Admins — and in this case, you want your visitor to get the notification, not your Admin.
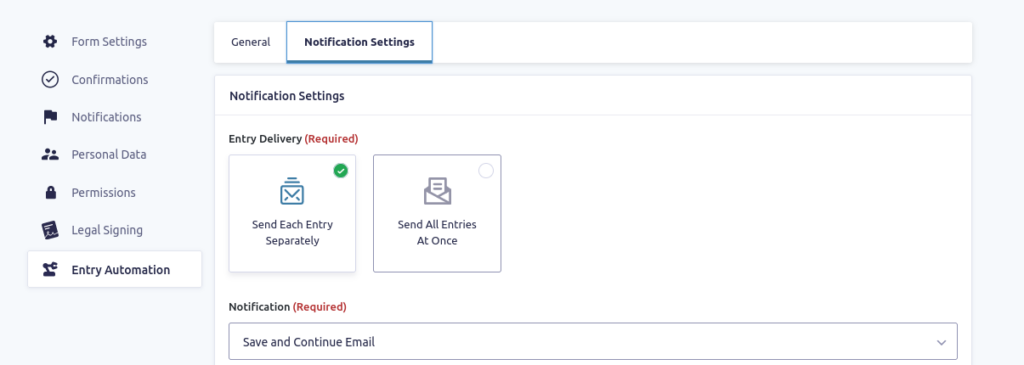
For Notification, choose Save and Continue Email.
Next, you need to toggle Override Notification Settings. This allows you to override the Gravity Forms’ default notification. You can customize this and send a completely different message to visitors who don’t complete a form.
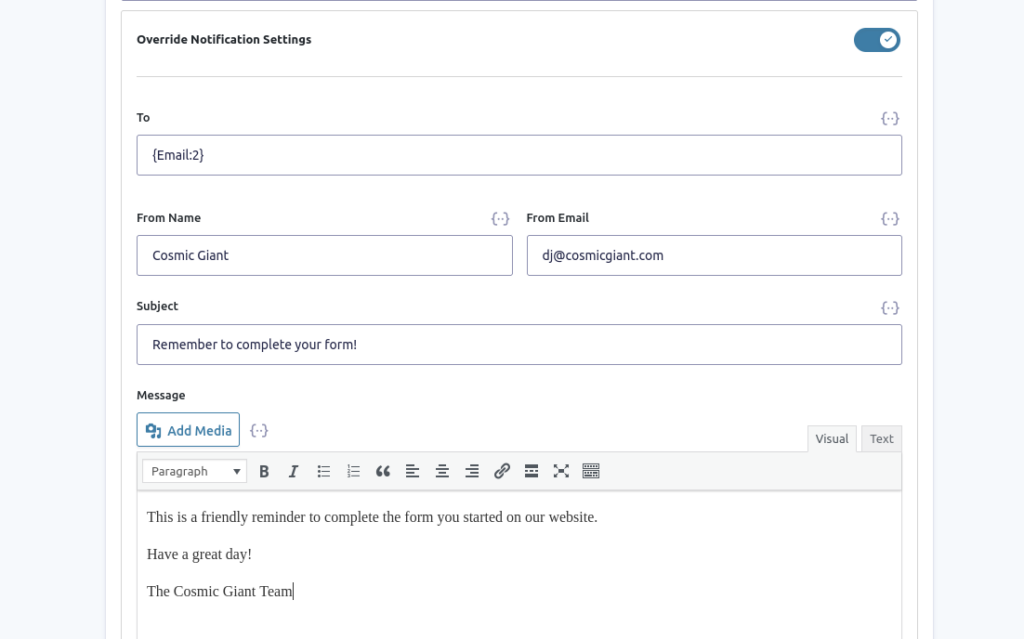
Lastly, the Do not send notification on form submission toggle will turn off the default notification set by Gravity Forms when this task is run.
That’s all there is to it!
Don’t forget to test your form and make sure that your new notification task is working! If you run into any issues, you can view the handy Troubleshooting Notifications Guide provided by Gravity Forms.
More Ways to Use Send Notification Tasks
Send Notification tasks give you a lot more control over your Gravity Forms notifications. This is only one way to use Entry Automation. There are many more uses for creating Send Notification Tasks.
You can create sophisticated processes like drip marketing campaigns, student onboarding, and other types of reminder notifications. Entry Automation for Gravity Forms puts you totally in charge of your notifications.