Want to build great surveys in WordPress? The solution is easy: Gravity Forms. Creating surveys can be as easy as building any other form. But when it comes to analyzing the data, the process can be a little clunky. If you want to learn how to use Gravity Forms to export survey results, then follow this guide!
Key Takeaways
- Create a Survey Form in Gravity Forms: Utilize the Gravity Forms Survey Add-On to design various types of surveys.
- Use Entry Automation to Export Survey Results: Using the Entry Automation plugin to export survey results into formats like CSV, PDF, Excel, or JSON facilitates more effective data analysis and sharing.
- Schedule the Export Task: This setup ensures that exports occur automatically at designated times, facilitating regular data analysis.
- Configure the Export File: Choose the desired file format for the export, use merge tags for dynamic file naming, and select which form fields to include.
- Automate Email Delivery of Exported Data: Configure the export task to email the generated file to specified recipients automatically.
Creating a Survey in WordPress
The first thing you need to do, of course, is create your survey. Gravity Forms makes this super easy with their Survey Add-on. You can create any kind of survey you need, whether it’s for getting customer feedback, doing market research, or even a churn survey to figure out how to boost customer retention.
How to Create A Survey Form
First, add a new form from the Gravity Forms menu. You can create a blank form or use the handy Survey template they offer.
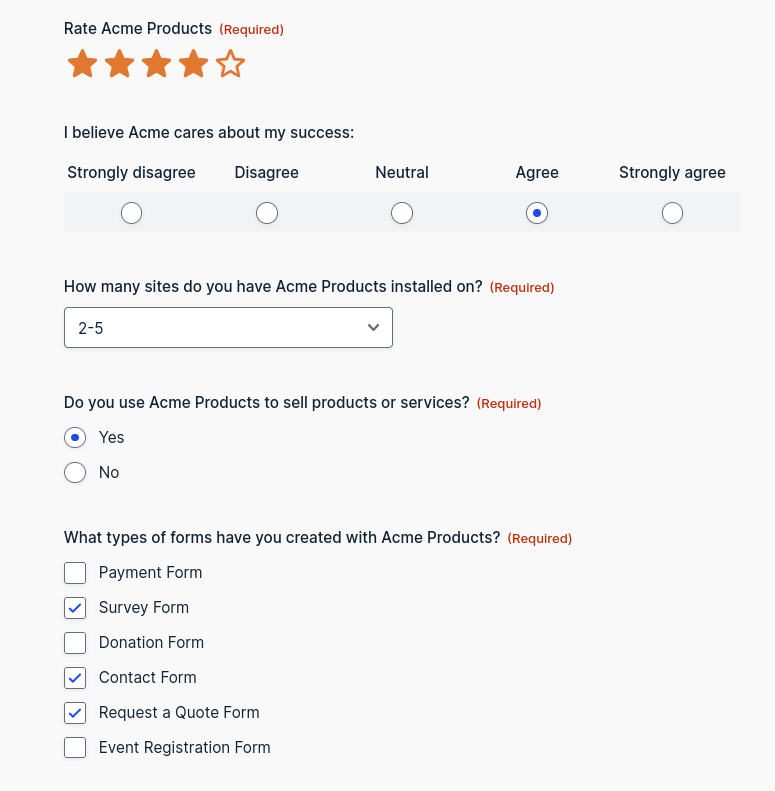
You’ll notice there’s now a Survey field in the form editor. Drag it onto your form, and choose the type of survey question you want to add from the field’s settings drop down list.

There are several types of survey fields to choose from:
- Likert
- Rank
- Rating
- Radio Buttons
- Checkboxes
- Single Line Text
- Paragraph Text
- Drop Down
By combining the various types, it’s easy to create a rich, interactive survey and collect information for your particular situation. Like any form created with Gravity Forms, it looks darn professional on your WordPress site.
Once your survey results start coming in, you can go to WordPress and start analyzing the entries. However, that may not be the most efficient method for you or your team. It would be a much better experience if the entries came directly to your inbox in a CSV, PDF, Excel, or JSON file.
You can make that happen with Entry Automation. Here’s how to do it.
How to Export Survey Entries
Configuring Entry Automation is going to feel very familiar, because you can do it all within Gravity Forms. With Entry Automation installed, there will be a new Entry Automation tab under the Form Settings on any form.
Create an Export Task
In your forms list, hover over your survey form, and from the Settings drop-down, select Entry Automation. You can also find this in the form editor under Settings at the top. From this menu you can add new Entry Automation tasks, modify them, and easily drag n’ drop to reorder the flow.
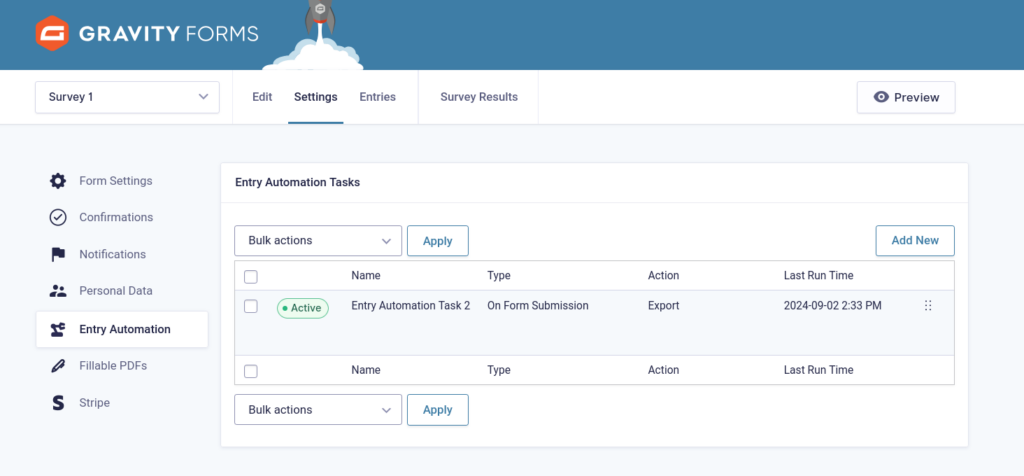
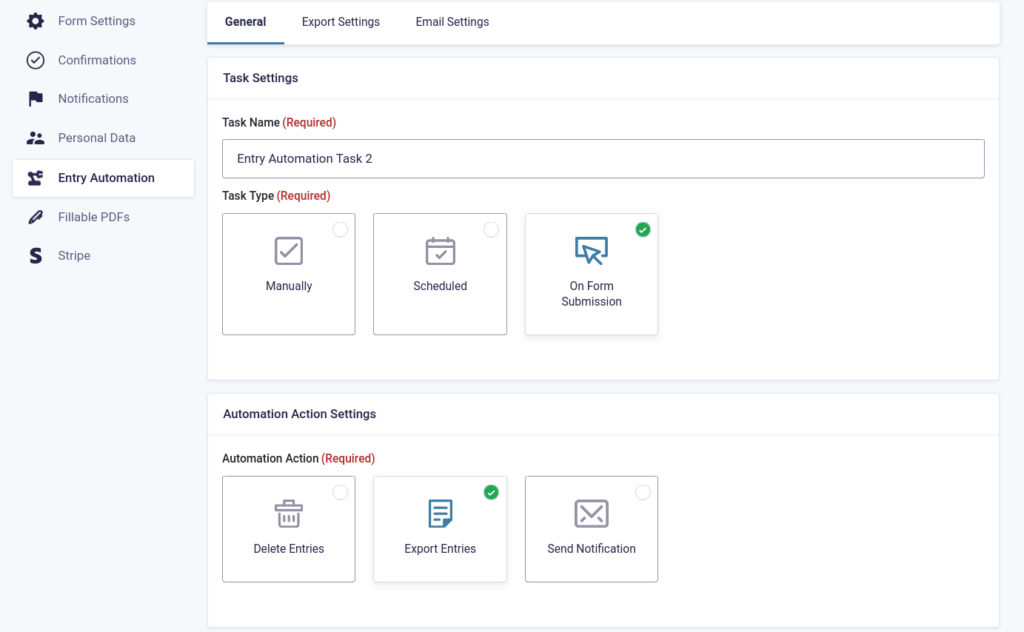
Click Add New. Enter a Task Name — it can be anything that makes sense for your personal workflow. You’ll also see other settings, like Task Name, Task Type, and Automation Action.
Task Type allows you set how the Entry Automation task is run:
- Manually
- Scheduled
- On Form Submission
Automation Action allows you to choose what to do with the entries; delete them, export them, or send a notification. Select Export Entries.
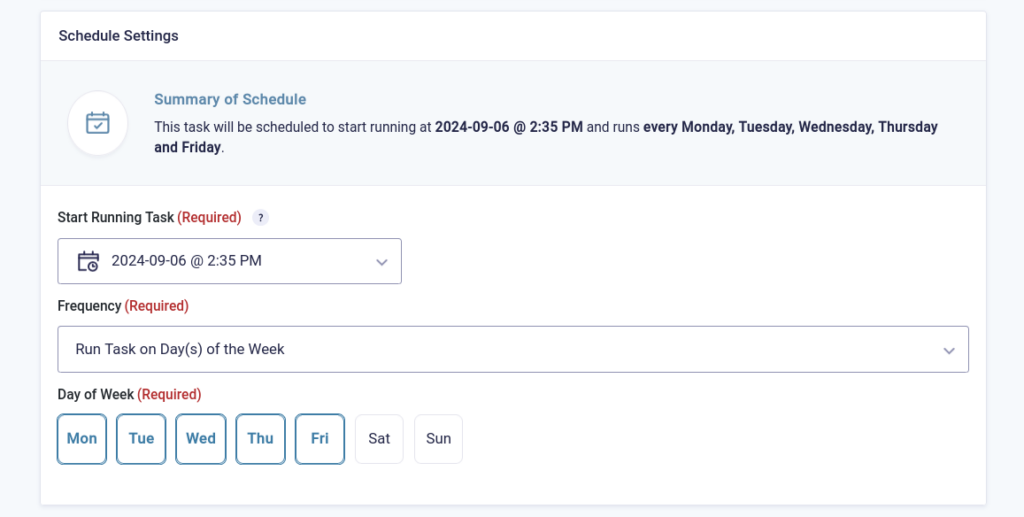
Scheduling the task
If you choose to schedule your survey results export task, there are specific settings to configure. Choose the time and date you want the task to run for the first time under Start Running Task. You can also set how often you want the task to run under Frequency. If you choose Day(s) of the week, simply click each day on which you’d like to activate the task.
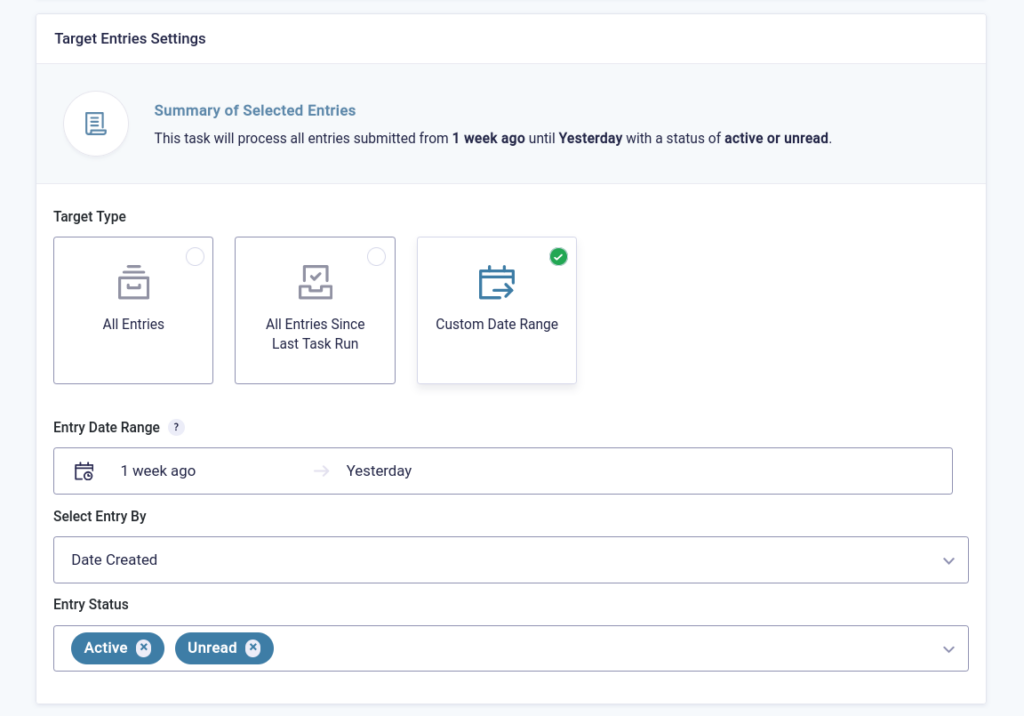
Target Entry Settings
Next, you can decide whether you want export All Entries, All Entries Since Last Task Run, or Custom Date Range.
All Entries and All Entries Since Task Last Run are self-explanatory. If you want to set a Custom Date Range, you can get very granular with your configuration.
Both the From and To date range fields are empty by default. When the From field is left empty, all entries since the beginning of time will be selected. When the To field is left empty, all entries up until the time your Entry Automation Task is being run will be selected.
To set your own date range, you can use plain English phrases like “yesterday”, or “1 week ago.” You’ll see a preview at the top that’s relative to the current time set in your WordPress admin.
You can also select options for Entry Status, such as Active, Unread, Spam, or Trash.
Conditional Logic is available so you drill things down even more specifically. Make sure to save your settings!
Configure the Entry Export File
Navigate to the Export Settings tab to set up the export file.
First, choose your file type. Note that if you’d like to export multiple file types, you can always create additional Entry Automation tasks with different configurations.
Type in a file name, or select from the multiple merge tags available. Use a combo of typed name and merge tags, getting as detailed as you want with your export file names.
Next, decide how to handle the file name if a file of the same already exists. Another handy option is selecting how the entries are ordered in the exported file.
Select from the Field Settings list which form field data you want to be included in the exported file. This can be useful if you have multiple team members reviewing the survey results and want only certain people to analyze specific questions rather than all of them. You could configure unique Entry Automation Tasks for each reviewer.
When the task runs, Entry Automation saves the exported files to a protected folder in your site’s uploads directory. If you want to save server space, the export file can be deleted after it’s been exported and emailed to your user account. To make this work, toggle the switch under the Field Settings section and save your settings.
Email the Export File Automatically
At this point, your survey results will be exported as the file you configured. If you want them automatically emailed to you and/or others, there’s one more step — which is just as easy as everything we’ve done so far.
Under Email Settings at the top of the menu, click the Email Generated Export File toggle. Send the exported survey results to multiple email addresses by separating them with commas. The Email merge tag will allow you to automatically email the file export based on completed fields in the submitted form or a WordPress user.
Customize the subject and message if you like. This can be especially helpful if you’ve set up multiple Entry Automation Tasks for multiple team members.
Now your survey results will be exported and attached to emails — like magic!
Entry Automation is the solution for exporting survey results from Gravity Forms
You can see how easy it is to create surveys using Gravity Forms. And they look great, too. Now you can make your surveys monumentally more efficient by exporting the data and have it sent to your whole team.
Use Entry Automation and let your survey results to come right to you.