You might be used to logging into your WordPress site to view entry data from Gravity Forms. If you have a long list of entries, that can be time-consuming. Of course, you can have the data emailed to you, but with the amount of emails you already deal with, it can be just as exhausting.
There’s a better option. You can export entry data from your form submissions and upload it to your Google Drive account automatically using Entry Automation. Rather than sift through each submission individually, you can combine multiple entries into one easy-to-read file. Entry Automation supports exporting entries in CSV, JSON, Excel, and PDF formats. You can also share the data with colleagues who have access to your Google Drive folder.
Entry Automation makes it easy to export from Gravity Forms and upload to Google Drive. In this post, I’ll show you how to set it up.
Start with Entry Automation
All you need to get started is Gravity Forms, our Entry Automation product (Professional license tier or higher) and the Google Drive extension. Entry Automation helps you save time by automating the process of data export. By setting up separate tasks, you can export your data in multiple formats — and the files are automatically uploaded to your Google Drive.
First, download and install Entry Automation. With the plugin activated, you can install and configure the Google Drive Extension.
Install the Google Drive Extension
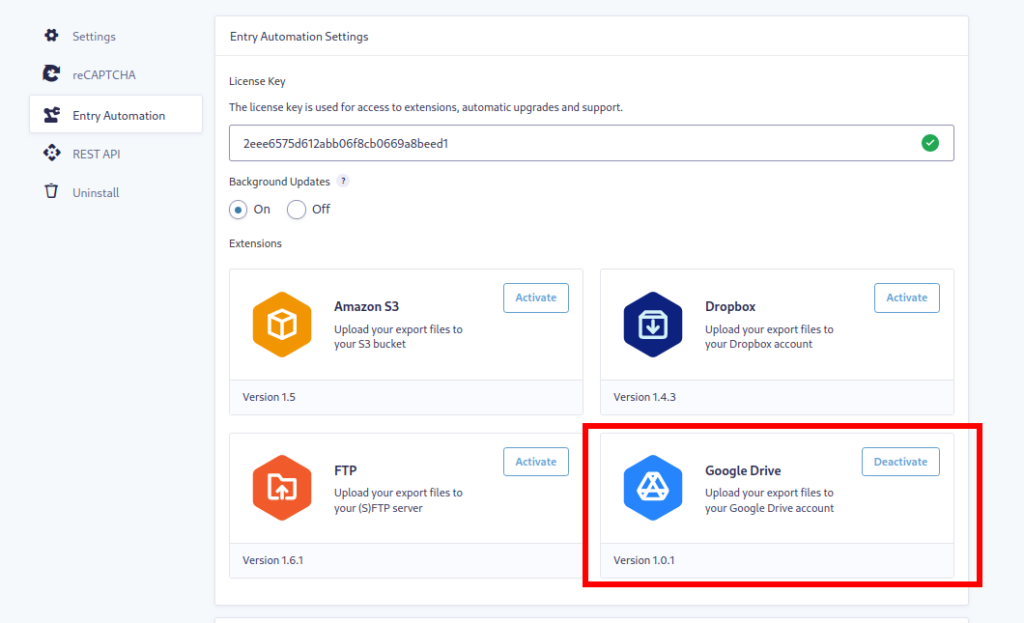
To activate the Google Drive extension, navigate to Gravity Forms → Settings and select Entry Automation. A list of available extensions will appear once your license key has been entered and validated. If you need to upgrade your license you’ll see an “Upgrade License” button.
With the appropriate license, you’ll have an “Install Extension” button. Click to download it, then activate the extension.
Authenticating with Google Drive
Now, you’re ready to connect with your Google Drive account. In the same menu, scroll down until you see the Google Drive Settings section — you may need to refresh the page if you don’t see it. Click the button to start the authentication process.
If you’re logged into your Google account, you’ll be given the option of choosing the correct Google Drive account. If not, you’ll need to enter your Google Drive login credentials. Then click Connect.
Now you’re connected! You have the ability to upload entry data straight to your Google Drive account.
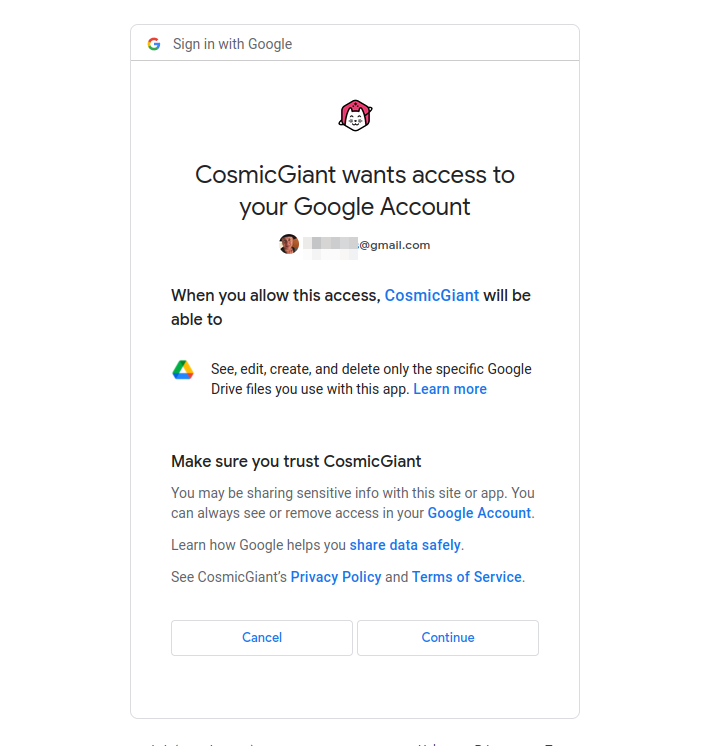
Note: The Google Drive authentication flow may say you are authorizing CosmicGiant to have full access to your Google Drive data. However, only the plugin installed on your local site can do anything with that access — namely, upload to a specific folder you designate in your settings. None of your Google Drive-related information is stored on our end.
How to Send Entry Data to Your Google Drive
In your list of forms, hover over any form and select Settings → Entry Automation. In the Entry Automation Tasks menu click the Add New button. This will take you to the next menu, where you can give your task a name like “Export to Google Drive” or any name that’s easy to recognize for you.
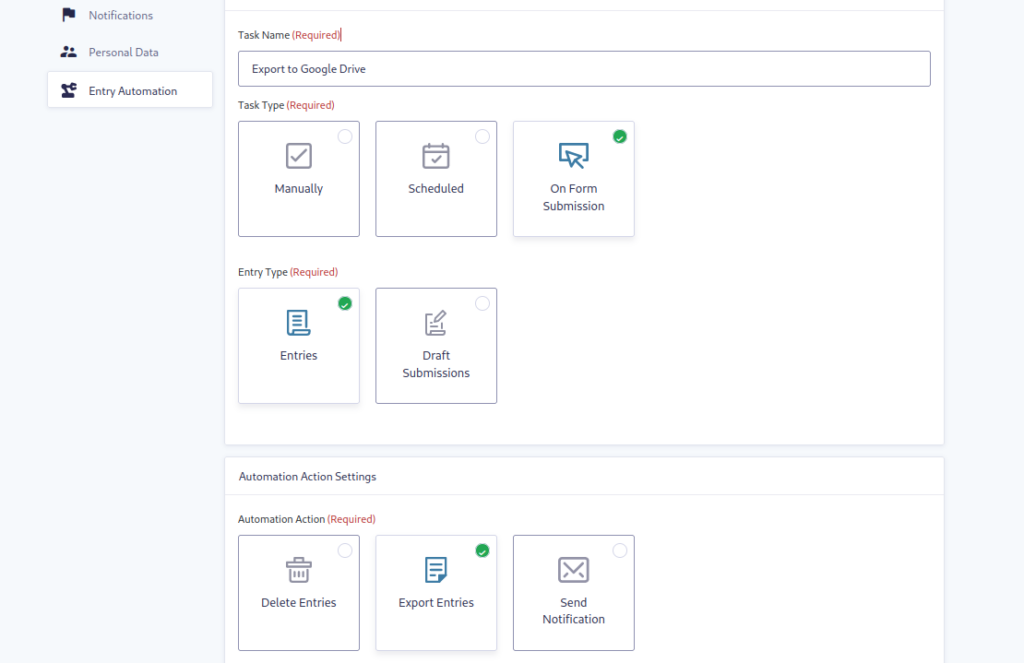
In the next section, choose your Task and Entry Types. Under Automation Action Settings, you should choose Export Entries. If you want to configure any Conditional Logic, you can do that and then click Save Settings.
Now you get to decide which format you want your files exported as: CSV, XLSX, JSON, or PDF. You can create additional tasks later to additionally export in other file formats. Next, specify the file name structure. Clicking the {..} icon will show you more merge tags you can use. You also have multiple choices for handling if the file already exists — you can increment the file name, overwrite the file, or add new entries to the existing file.
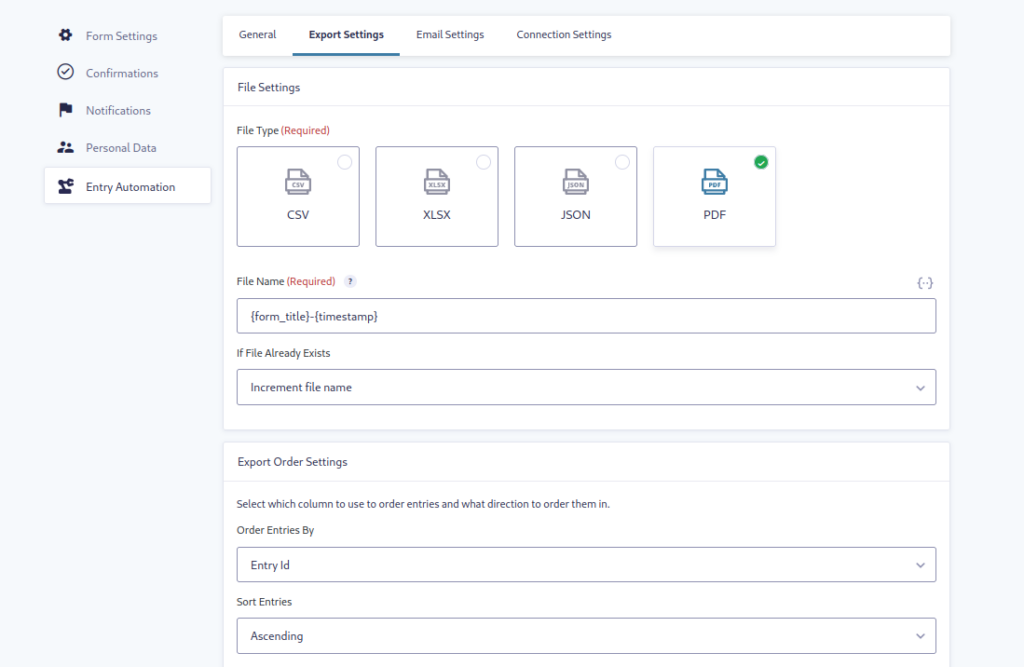
In the Export Order Settings section, you’ll decide how the exported entries should be ordered and sorted. Under Field Selection Settings, select from the list all entry data you want to include in the file.
If you want to keep your web server from getting too full, toggle the slider and the exported file will be deleted from your site after uploading to your Google Drive.Click Save Settings, then navigate to the Connection Settings tab*.
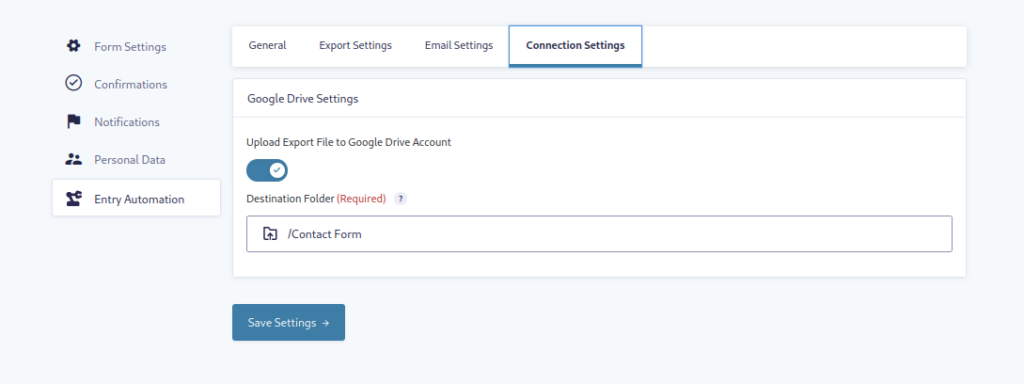
All you have to do here is toggle the Upload Export File slider to Upload Export File to Google Drive Account. Type in a destination folder and save your settings.
*Note that you can additionally have the exported file emailed in addition to being uploaded to Google Drive. See the Email Settings tab to configure it.
Viewing Your Exported File in Your Google Drive
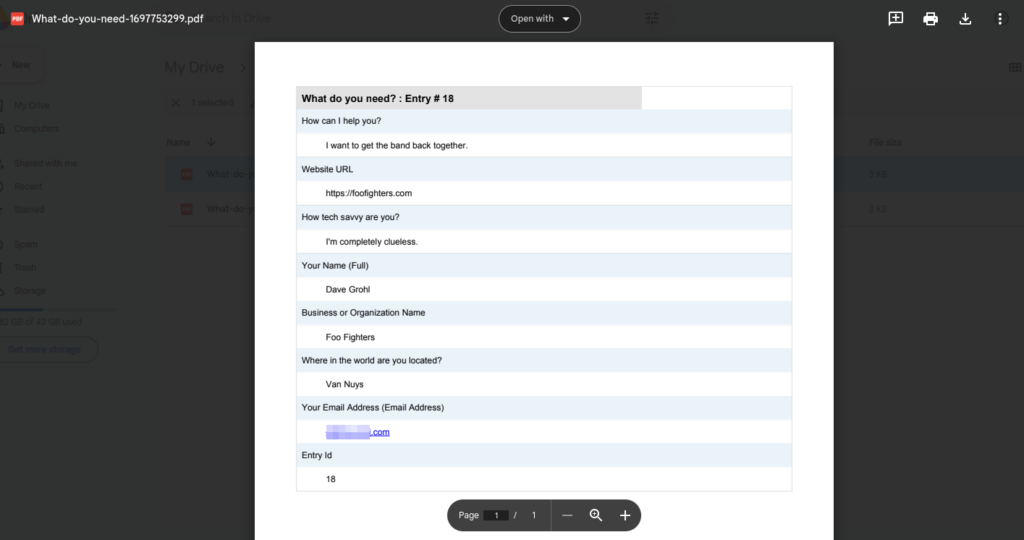
Once some entries begin to be submitted through your form, you’ll see files appear in your designated Google Drive folder.
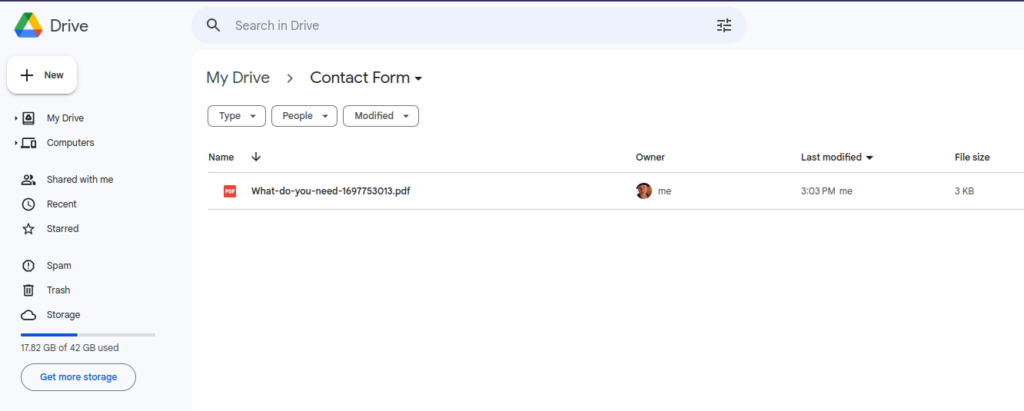
When you open the file, any entry data you selected from the list will be displayed. For example, a PDF file will list entry data on a page.
After testing a form submission and exported file, you can tweak any settings to your task.
Easily Upload Gravity Forms to Google Drive
With Gravity Forms entries automatically uploaded to your Google Drive, it becomes a lot easier to manage form submissions. With the power of Entry Automation, you can also schedule tasks, delete entries, and send custom notifications to anyone who needs to review the form data.
Check out all the features of Entry Automation and see how it can save you tons of time.