Generate professional PDFs with Gravity Forms
Gravity Forms is great for collecting information directly from customers and potential leads directly on your WordPress site. What makes Gravity Forms super powerful is being able to take that submitted lead data and export it out in different forms.
With Fillable PDFs for Gravity Forms, you can take that lead data and populate it into an existing PDF document. This lets you create filled out applications or even signed contracts without requiring your customers to go through extra steps. Even better, the generated PDF will look exactly like your original form template with the fields dynamically populated.
Key Takeaways
- Enhance Gravity Forms with PDF Generation: Integrating the Fillable PDFs plugin allows for the automatic population of submitted data into existing PDF documents.
- Design a Fillable PDF Template: Prepare a PDF template by converting it into a fillable form using software like Adobe Acrobat.
- Steps to Configure PDF Generation: Add the template, assign it to a specific form, and map to the form fields using the visual template mapper.
- Automate PDF Workflows: Once configured, the system can automatically generate PDFs populated with user data upon form submission. These PDFs can be attached to email notifications, providing a streamlined method to share completed documents with team members or clients.
Build automated PDF workflows for your business
The beauty of hosting a form on your website is that it’s an automated way to collect data from your visitors. Wouldn’t it be fantastic if you could export that data in a neatly formatted PDF to share with your team?
Follow along as I lay out the steps for generating a professional-looking Gravity Forms PDF with ease!
Design your PDF template
Before we can start generating PDFs with Fillable PDFs, we first need to prepare our PDF to be fillable. I’ve chosen the IRS 1099-MISC form.
When you open the PDF form in Adobe Acrobat, click the Prepare Form button to convert the PDF into a fillable PDF. Adobe Acrobat will go ahead and detect where in the form you might want to have the user enter text in directly.
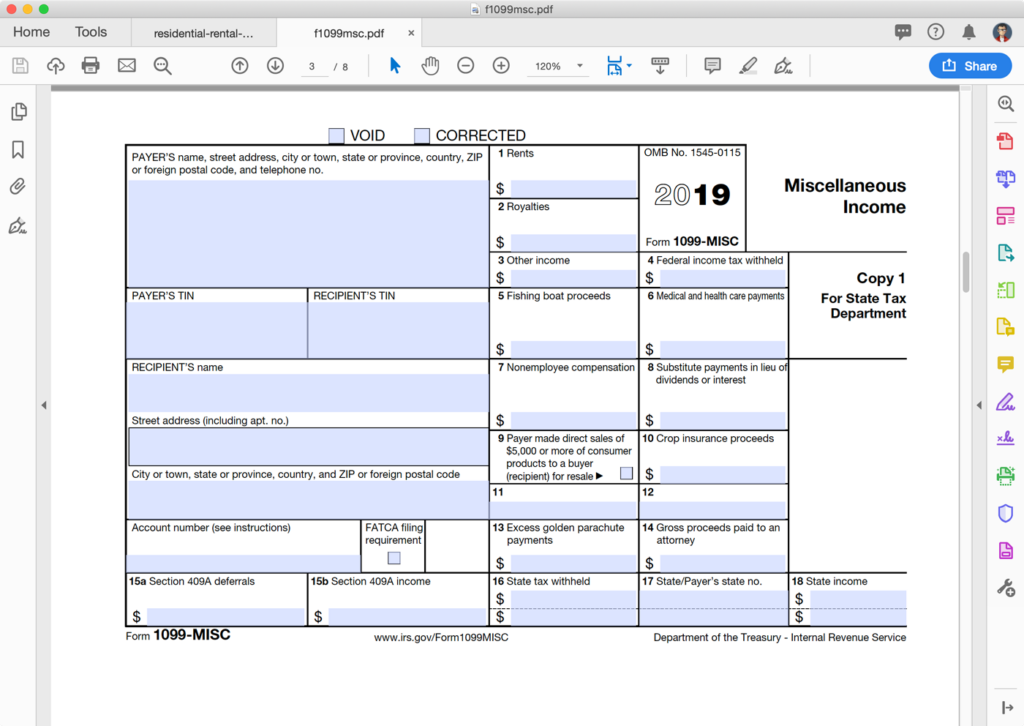
This should take care of the majority of the fields in your form, but you might have to manually add some additional fields or change the placement of the automatically detected fields.
Once your fillable PDF fields are ready to go, save the document so we can add it to Gravity Forms.
Configure PDF generation and email delivery settings
Now that you’ve prepared your PDF template to be fillable, we need to add it to the Fillable PDFs plugin. This can be done in a few easy steps.
Step 1: Add your template
With the plugin and your license key activated, go to Forms -> Fillable PDFs and click on the Templates tab. Here you’ll see a list of the Fillable PDFs template configured for your site.
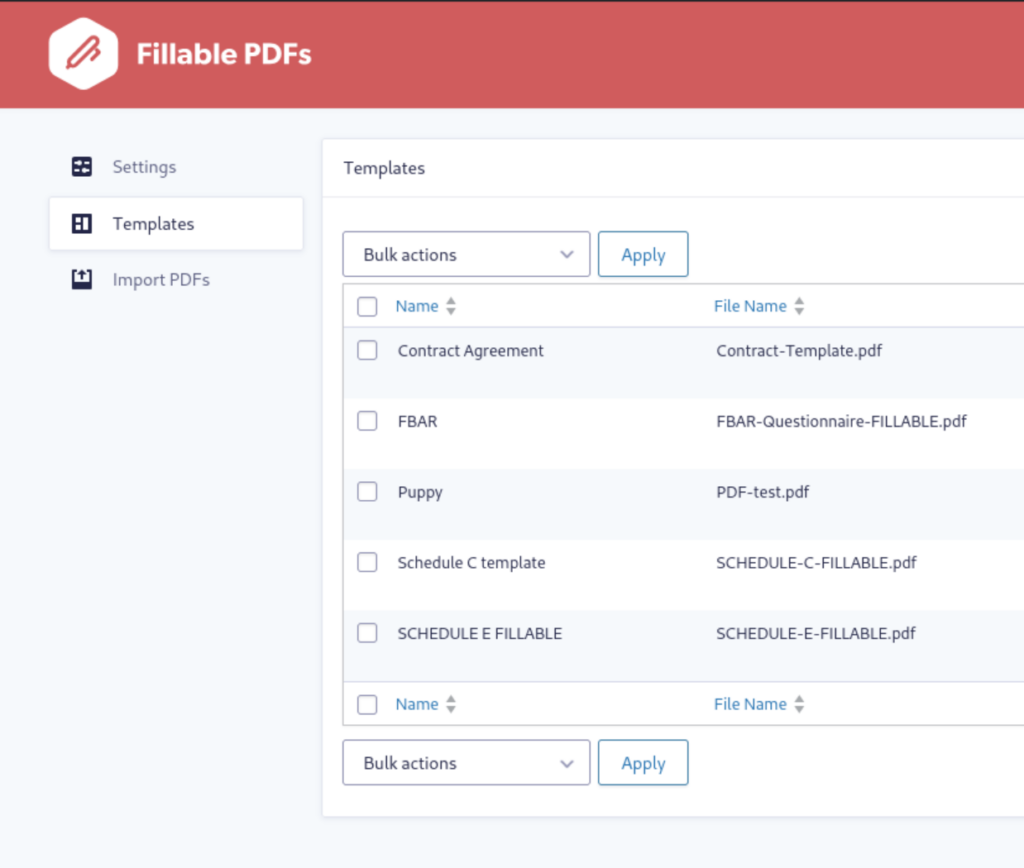
To add a new template, click the Add New button at the top.
Next, select the PDF template file you created in the previous section. Fillable PDFs will recommend a template name based on the file name.
Click the Create Template button to upload the template. If your PDF file contains a lot of fields, it might take an extra minute or two for your new template to appear in the list while Fillable PDFs processes it.
Step 2: Setting up PDF generation
With the PDF template file prepared and added as a template in Fillable PDFs, we can now set up PDF generation.
Go to the main Forms list in your WordPress admin. Hover over the form you want to add PDF generation to, mouse over the Settings link and click on Fillable PDFs inside the drop down menu.
Click the Add New button to create a new Fillable PDFs feed.
Step 3: Selecting the template
When creating a new Fillable PDFs feed, you are presented with two settings: the feed name and the template selector.
Enter in a feed name that uniquely identifies this PDF configuration.
Select the template you added in the previous step from the drop down.

After you’ve selected the template, you’ll see a generic thumbnail image with your template name beneath the drop down, along with a couple new settings.
Using the Output File Name setting, you can set the name of the generated PDF file. In the Notifications setting, you can choose which notifications to have the generated PDF automatically attached to. You can also configure conditional logic to set when the feed is run.
Step 4: Mapping PDF Fields
Now, we need to map our Gravity Forms fields to our PDF template. Click the Map Fields button next to the template drop down.
Your screen will now be filled with the visual template mapper. Each page of your PDF will be displayed with all the available PDF fields highlighted.
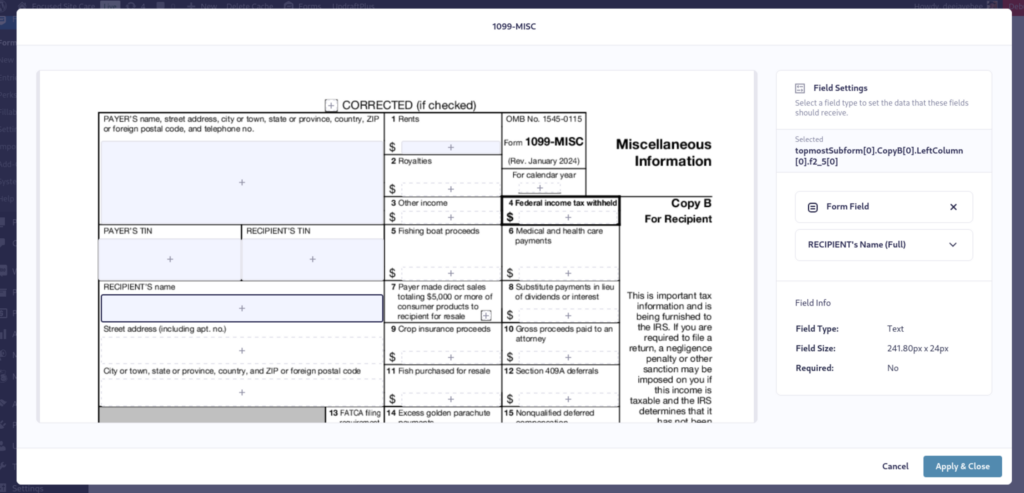
To map a Gravity Forms field to a PDF field, simply click on the highlighted field. A popover will appear allowing you to select which Gravity Forms field to map. You can also map Gravity Forms entry meta or a custom value using merge tags.
If you map a PDF field to a File Upload field, you’ll have the option to automatically embed the uploaded image into that PDF field. Signatures will also be embedded into mapped PDF fields.
Password protection and access management for sensitive documents
Once you’ve mapped all your Gravity Forms fields to your PDF template, click the Apply & Close button to save your field mappings and exit the visual template mapper.
You can click on the Advanced tab to configure additional settings for the generated PDF.
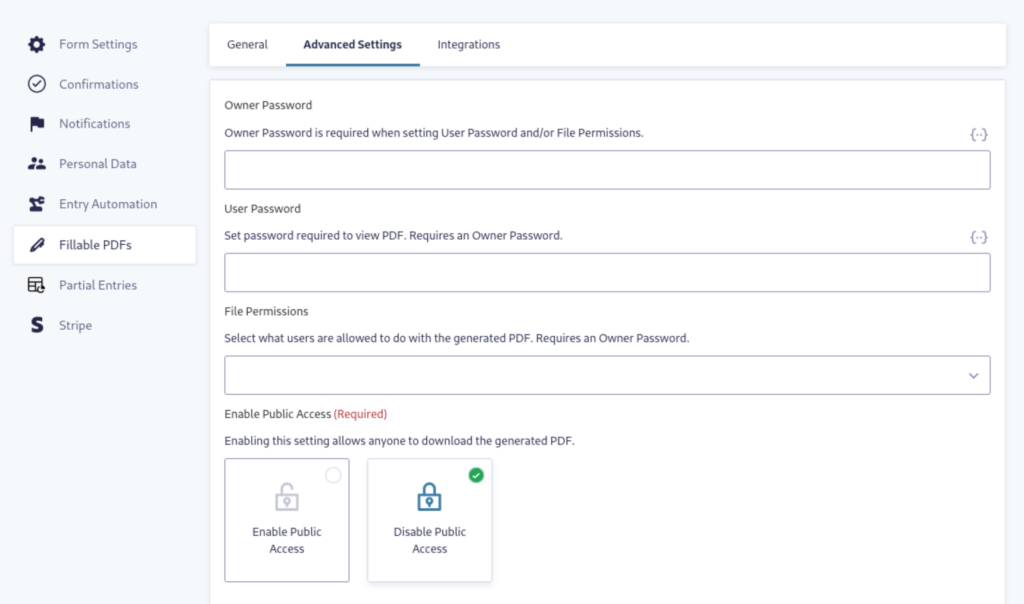
The Owner and User Password settings will allow you to enter a required password to view or make changes to the PDF, respectively.
The File Permissions setting allows you to control what the end user can do with the PDF, including if they can print, modify or copy it.
The Enable Public Access setting defines who can download the PDF: anyone at all, anyone with the link that contains the secure token or the logged in user that submitted the entry.
You can also choose to remove all the interactive form fields from the PDF, preventing the end user from making any modifications to the data entered.
When you’ve got everything configured, click Save Settings to save the feed.
Displaying a Link to the PDF
Now that we have a Fillable PDFs feed configured, any time a user submits the form, the PDF we’ve just configured will be generated.
Using Fillable PDFs’ available merge tags, you can provide a link to the user to download the PDF right from the form confirmation.
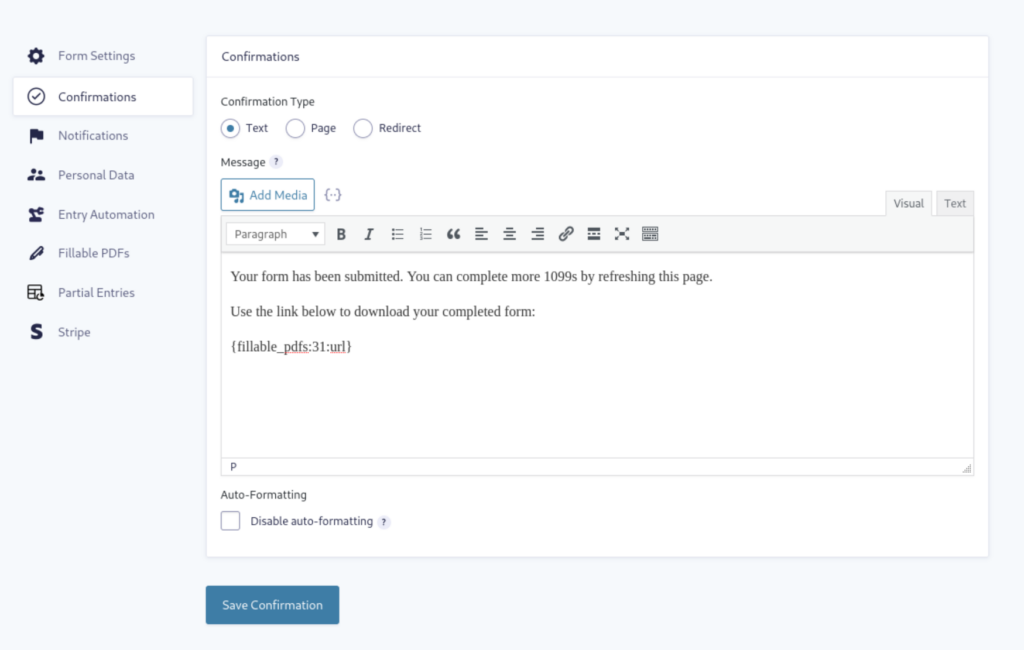
When editing a confirmation, click on the Merge Tags drop down icon. Toward the bottom of the list will be the Fillable PDFs group. Each Fillable PDFs feed you have configured will have three merge tags available: one that displays the PDF’s file name, one with the URL to the file and one that displays a clickable link to the file.
Set up your Gravity Forms PDF system today
Now that you know how to generate and manage Gravity Forms PDFs, you can create a well-oiled machine that exports form entry data into a neatly formatted PDF. All you need is Gravity Forms and Fillable PDFs to create secure, branded documents and automate delivery for contracts, applications, and more. Design your custom PDF template, upload to your site, and map to your form fields — it couldn’t be easier.
Grab your copy of Fillable PDFs and start generating PDFs from Gravity Forms today!