You have Gravity Forms set up on your website. Check. You created some forms. Check. Submissions are coming in. Check.
Now what?
You’ve collected all those entries, but how do you analyze the data? You could go through each entry one by one, but if you’ve received a ton of submissions, that will be a tedious process. If you copy and paste the data into a spreadsheet, that would give you a more manageable report, but it still requires a lot of work.
There’s a much more efficient method. You can use Entry Automation as a powerful Gravity Forms reporting tool.
Start by Exporting Gravity Forms Entries
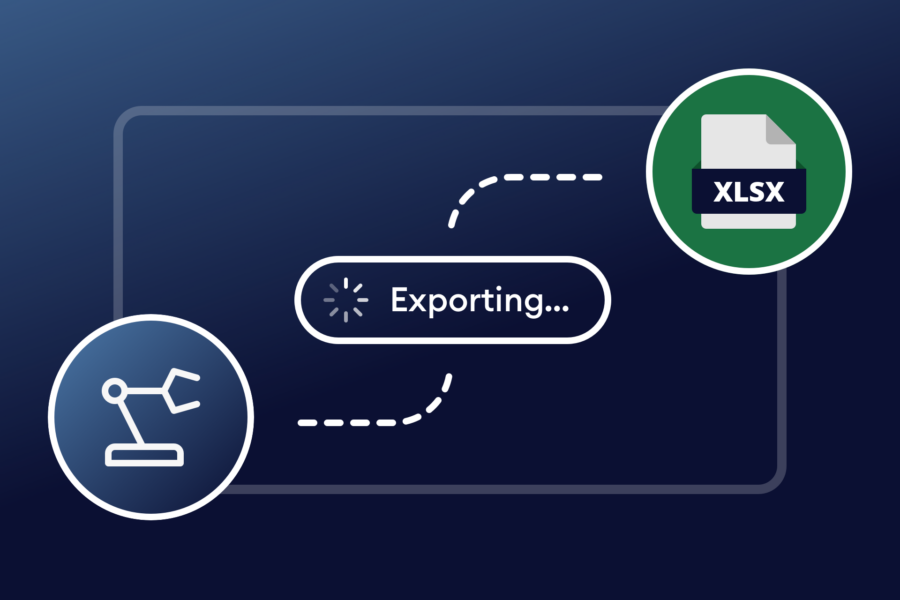
Entry Automation for Gravity Forms is a WordPress plugin that lets you automatically export your Gravity Forms entries. Your form data can be exported as a PDF or other formats like CSV, Excel, and JSON. Additionally, you can have exports emailed to multiple recipients automatically.
Exporting your form data using Entry Automation is easy. To create effective reports that save you time, you can configure a few settings to help make things even more efficient. Let’s walk through the configuration step by step.
Generate Custom Reports with Entry Automation
First, install and activate Entry Automation like any other WordPress plugin. You won’t notice any change to your Forms menu; it’s all in the Form Settings.
Next, make sure you have a form set up and functioning. The type of form isn’t important; it just needs to be able to accept submissions.
Create a Task
You can access the Entry Automation settings in two ways:
- Hover over a form in your Forms list and choose Settings → Entry Automation.
- Select Settings at the top in the form editor and choose Entry Automation.
You need to create a Task that will handle your data exports. Click Add New. Give your task a unique name to differentiate it from others you might create later.
Under Task Type, select Scheduled. While you can export entries manually or on form submission, the most efficient way is to schedule them. That way, you receive multiple entries per export rather than each entry in an individual file.
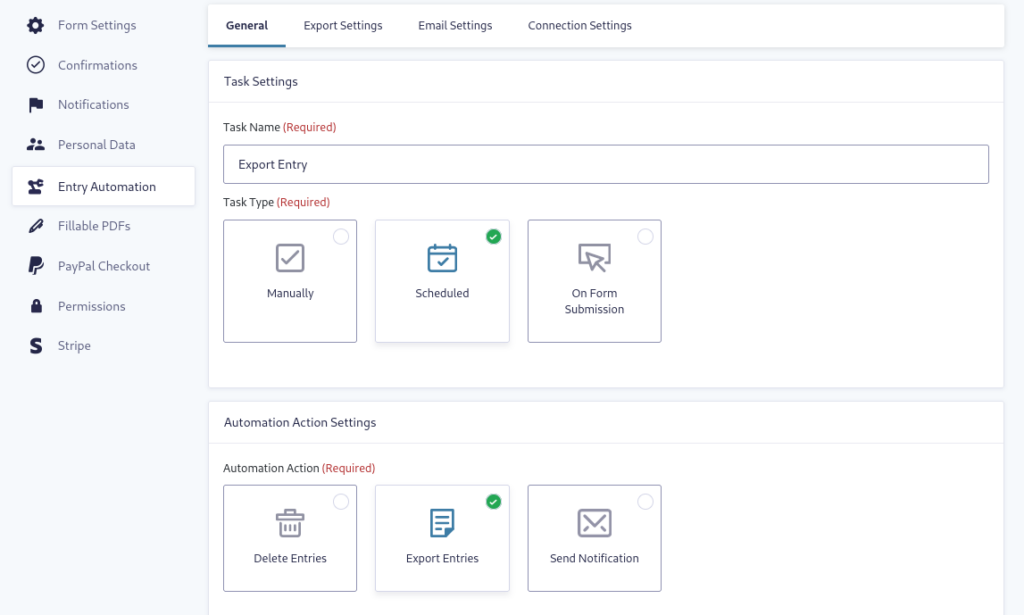
The Automation Action you want to pick is Export Entries.
Your Schedule Settings configuration can be finely tuned to suit your individual needs. Run Tasks every minute, hour, day, week, or month, or set the Frequency to specific days of the week or month.
You can decide which entries will be exported under Target Entries Settings. For example, if you choose All Entries, you’ll receive an exported file for all entries ever submitted. If you just want to get the newest entries, then you’ll want to select All Entries Since Task Last Run. Alternatively, you can set the Custom Date Range and use the Entry Status setting to get super specific about which types of entries will be included in your custom reports.
If you create multiple Tasks, you can generate multiple exports from the same form and tailor them for different team members or departments.
Export File Type
Navigate to the Export Settings tab, and you’ll be able to choose the file type that gets exported.
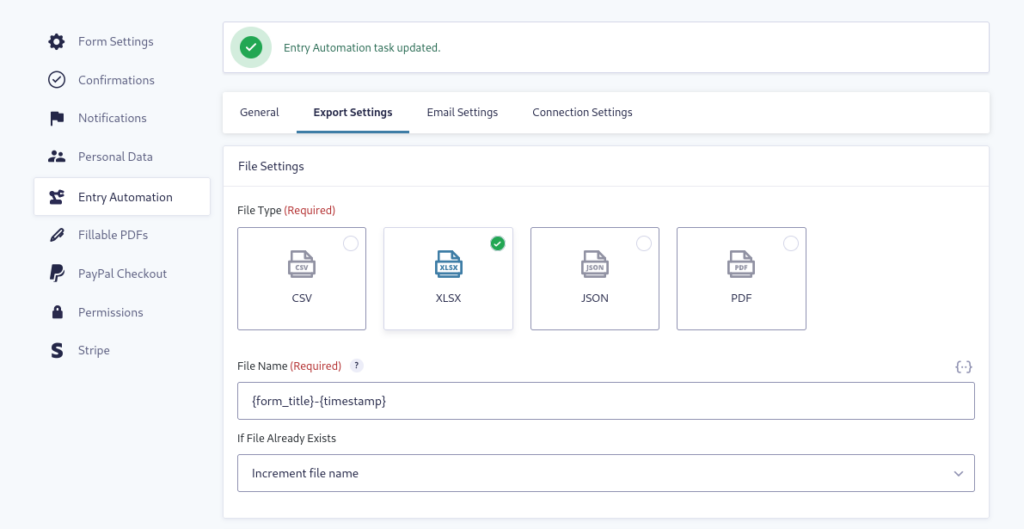
Additionally, you can set the order in which the entries will appear in your report. If you want to include or exclude specific fields from the export, use Field Selection Settings to select or deselect items as you need.
Under Post Export Settings, the Delete Export File toggle allows you to have the exported file deleted after the task is completed, which helps keep precious server space free. Be mindful that you should only choose this option if the export is sent via email or uploaded to remote storage — which we’ll cover later.
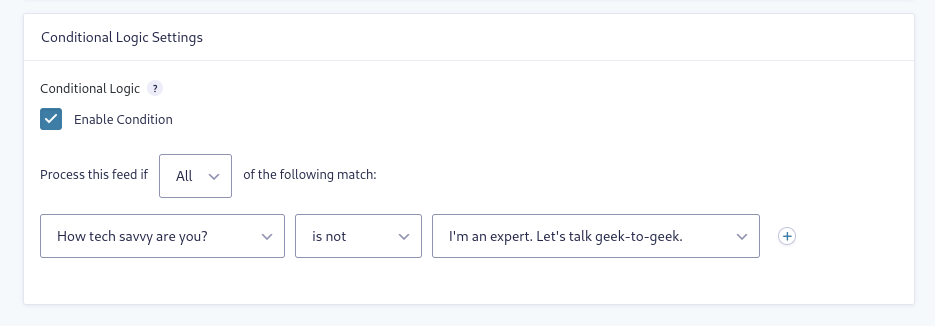
Granular Control Using Conditional Logic
Conditional Logic is another powerful tool available in Entry Automation. Configuring Conditional Logic can help you generate even more detailed reports. For example, if you want to exclude all submissions based on a particular field entry, it’s as easy as selecting the entry and entering a value.
Receiving Your Reports
Now that you’ve set up your export with your custom report, it’s time to retrieve it. There are three ways to get your exported file: on your site, through email, or by uploading it to remote storage.
Download From Your Site
The first way is to simply download the file from your website. As you did during setup, navigate to your form and select Settings → Entry Automation. Hover over a Task and choose Last Exported File. Clicking the link will prompt a download, and you can save the file wherever you like.
Emailing the Reports
To arrange for your file exports to be emailed as attachments, head back into the settings for the particular task you want to edit. Under the Email Settings tab, you can configure the To/From email addresses, Name, Subject, and Message.
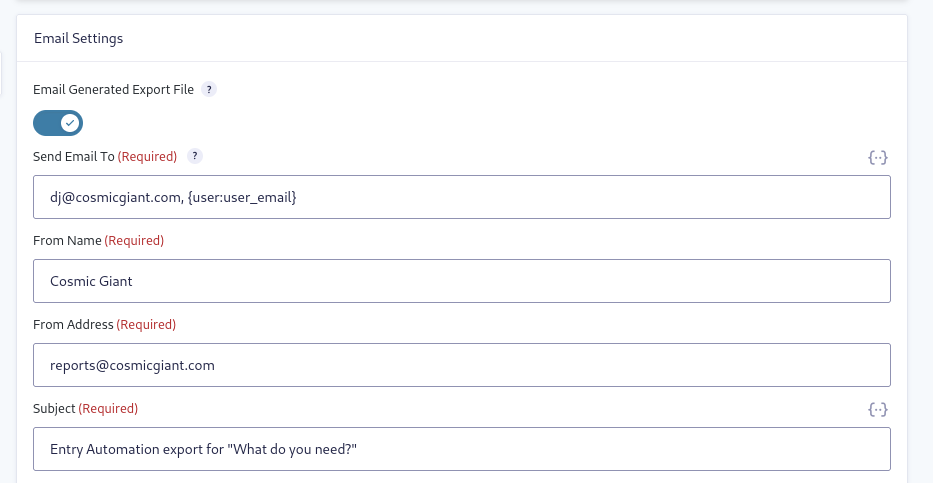
A convenient Merge Tag icon allows you to include email addresses directly from any email form field(s).
Send Reports to Remote Storage
By setting up separate tasks, you can export your data in multiple formats — and the files can be automatically uploaded to your Google Drive, Dropbox account, AWS, or even FTP to a remote server. This can make things extremely efficient when working with large teams.
Read these articles to learn how to configure exporting to different types of remote storage:
Gravity Forms Reporting the Easy Way
You don’t have to torture yourself by sifting through pages of form entries! Now, you can make your forms do all the heavy lifting by automatically generating data exports.
Get the Entry Automation Add-On for Gravity Forms and start receiving customized reports that will help you analyze your data more efficiently.