Did you know that you can export your entry data from Gravity Forms? You can, and it’s pretty easy. The only hiccup is that you can’t save your Gravity Forms export settings. That means that the next time you want to export entry data, you have to configure your export settings all over again. Sound like fun? I didn’t think so.
In this post, I’ll show you not only how to use Gravity Forms and save your entry export settings, but how to make it happen automatically. We’ll use a powerful add-on called Entry Automation.
Saving Your Export Settings with Entry Automation
Entry Automation is the perfect companion for Gravity Forms, as it adds missing functionality such as the ability to save your entry export settings. You can even export your Gravity Forms entries on any schedule you like, automatically. Form data can be exported to PDF or other formats like CSV, Excel, or JSON. Your exports can be automatically emailed to multiple recipients with a custom subject header and message.
How to Set Up Automation and Save Your Settings
Configuring Entry Automation on any Gravity Forms form is easy. Here’s how to do it, step by step.
1. Download and install the add-on
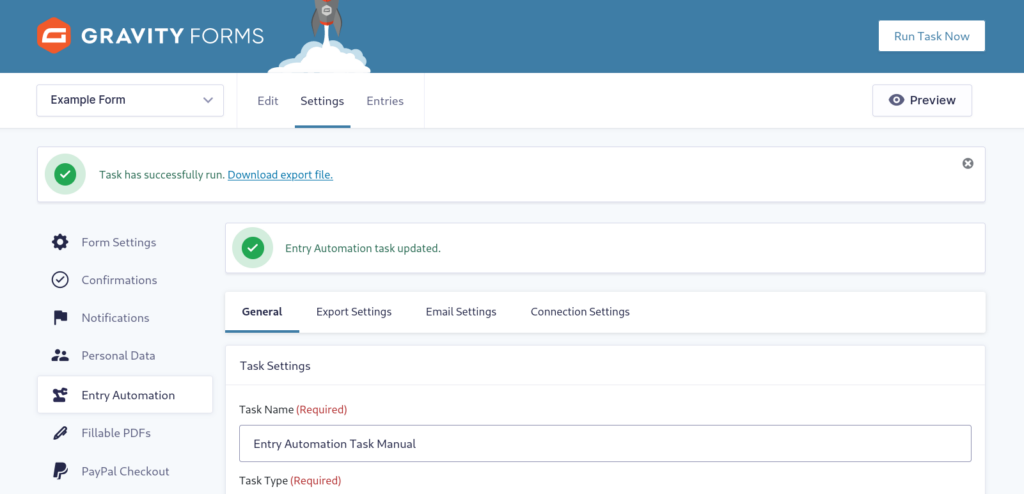
Grab Entry Automation from our site and download the add-on. Install and activate on your WordPress site as you would any other plugin. Once the add-on has been activated, a new Entry Automation tab is added under the Form Settings section on each of your forms.
2. Configure an Export Task
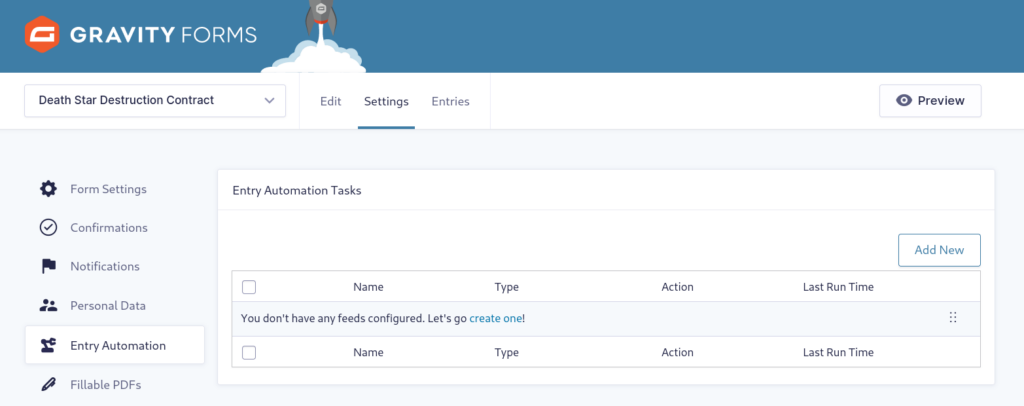
Any time you want to set up export automation with saved settings, you need to create what’s called an Export Task. On the Entry Automation tab of the Form Settings page, you can add new Entry Automation tasks, modify existing ones, and rearrange the order in which they are run by dragging and dropping.
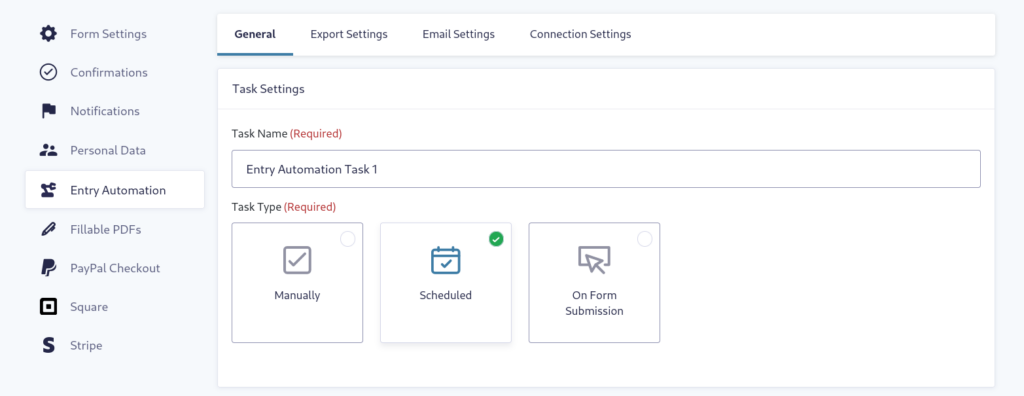
When adding a new Entry Automation task, there are some initial settings fields to configure: Task Name, Task Type, and Automation Action. It can be helpful to use Task Name to describe what that particular task will accomplish. Later you’ll be able to easily identify what each task does if you have multiple configurations.
Task Type allows you to control how the Entry Automation task is run. You can have it run manually, on a schedule, or on form submission.
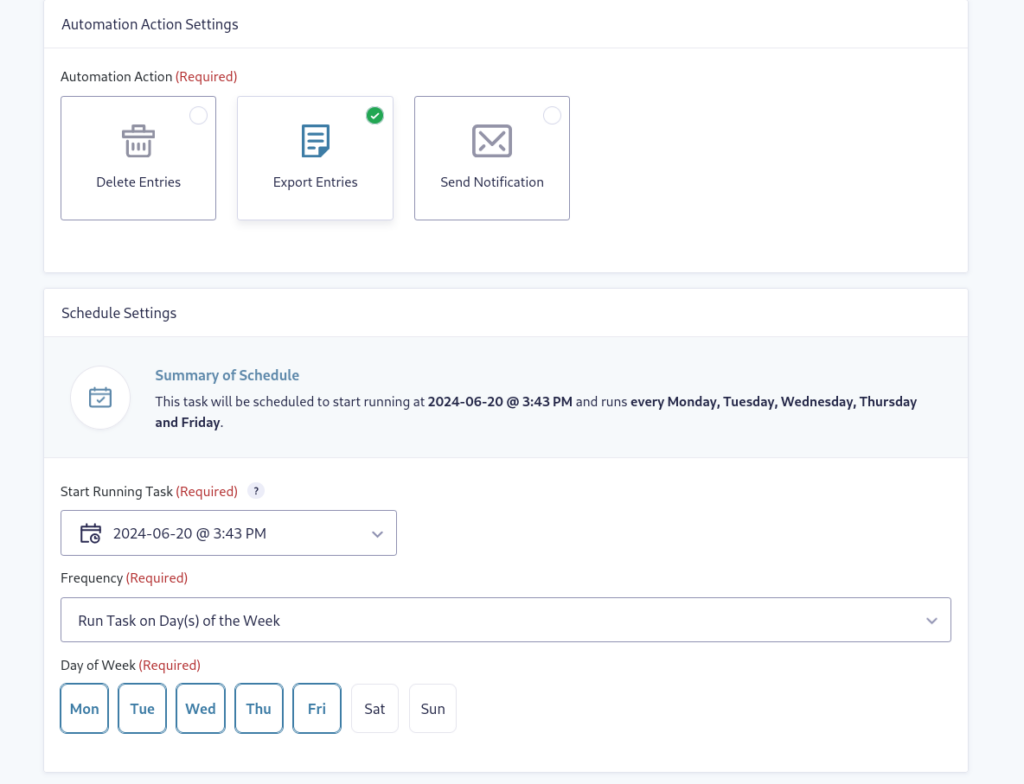
Next, select Export Entries as the Automation Action.
Once you have selected an Automation Action, you can set a schedule for the task. First, set the time you want this task to run in the Start Running Task dropdown calendar. Next, you can set the task frequency in the Run Task Every field.
3. Set the Target Type for Entry Exports
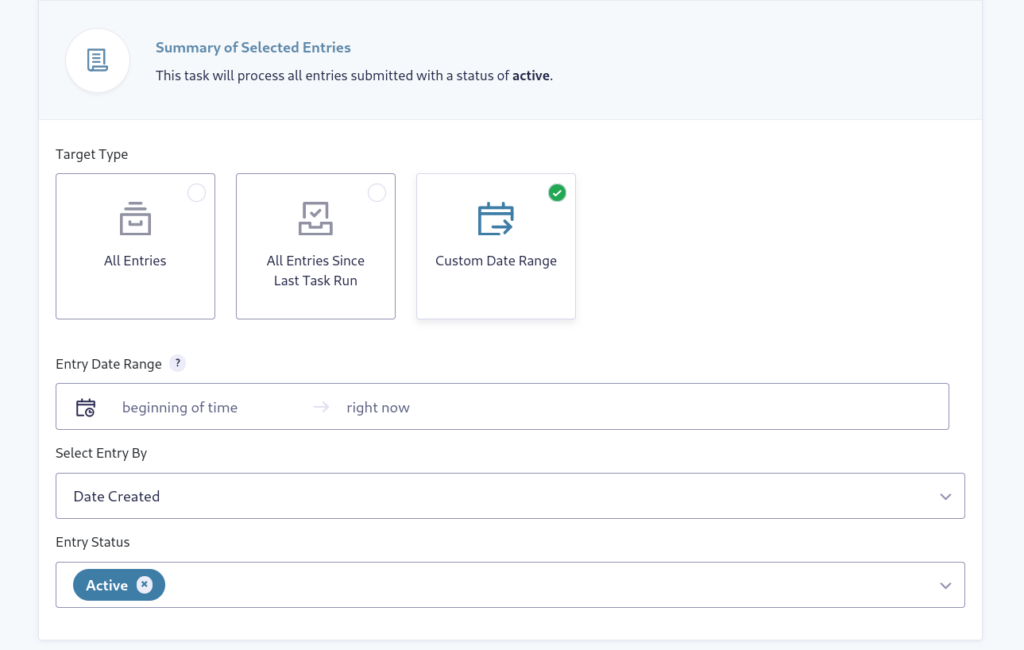
Under Target Type, you have three choices: export All Entries, All Entries Since Last Task Run, or set a Custom Date Range.
You’ll notice that the From and To date range fields under Entry Date Range are pre-populated with “beginning of time” to “right now.” You can set your own date range using plain English phrases (e.g., “yesterday”, “2 hours”, “5 weeks”).
If you want to get all the entries from the past week, set the From date range to 1 week and leave the To date range empty. If you want to get all the entries in the past day, set the From date range to 1 day.
Clicking the Select Entry By drop-down will allow you to choose Date Created, Date Updated, or from the Date field on the submitted form. There are also multiple options for Entry Status available for your task.
4. Set up the Export File
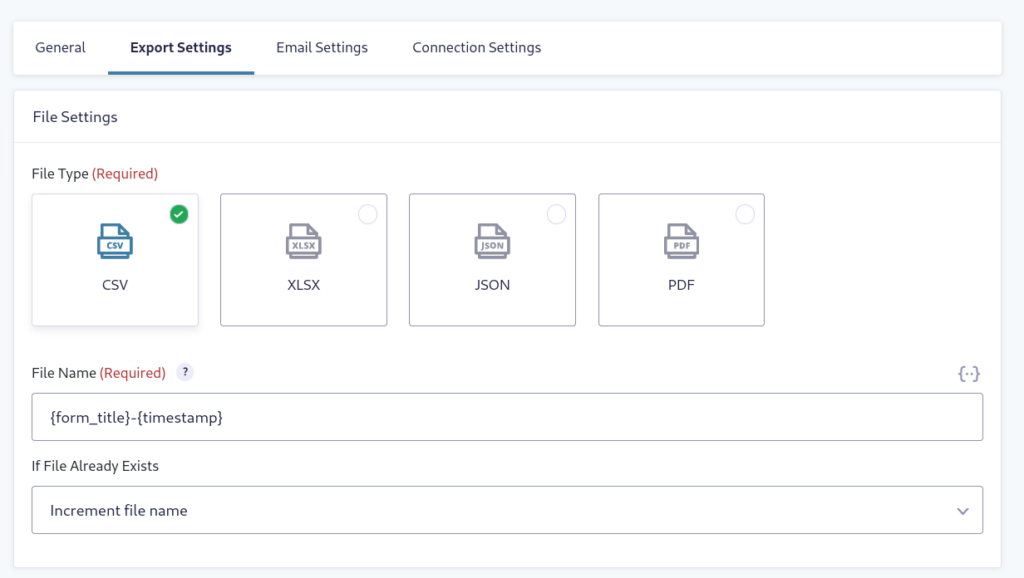
Now it’s time to configure the export file. Navigate to the Export Settings tab where you can select the type of file that should be generated; CSV, XLSX, JSON, or PDF.
Then, fill in the name for the exported file. Merge tags are available and make the super easy to configure, or you can simply enter any file name that makes sense to you.
Under the If File Name Already Exists field, you can also choose to automatically overwrite an existing export file with the same name instead of creating a unique export file, as well as creating an incremented filename if you prefer.
Select which form fields, like the entry id or created_by Gravity Forms fields, you want to be included in your export file. These can be exported into a CSV file or Excel.
Entry Automation saves the automatically exported files to a protected folder in your site’s uploads directory. The exported file can also be emailed to you or anyone on your team.
Finally, you can set the export file to be deleted from your site after it has finished exporting and has been emailed. Speaking of emails, let’s configure that now!
Automatically Email the Export File
Switch to the Email Settings tab. Enable emailing by toggling the switch, and a configuration menu will appear. You can send export files to multiple email addresses by separating each address with a comma. Using the Email merge tag, you can automatically email the file export to the form submitter — as long as they have completed that field on your form.
There are several fields that will help you customize the email settings, making it easier for recipients to understand what they’re getting.
Once you click the Save Settings button your Gravity Forms entries will automatically be exported and emailed to you.
One-Click Functionality
Even if you never intend to run automated tasks, you can still gain a ton in efficiency by setting up tasks in advance and running them manually. Here’s how to do it.
Navigate to Forms→Import/Export. Under Export Entries, select all the fields and metadata you’d like to export from your particular form.
Click Create Entry Automation Task. At the top of the page, click the link to finish setting up your task. Make sure it’s set to run manually, and that’s it. Any time you want to manually run that task, just edit that Entry Automation task and click Run Task Now at the top of the page.
This method essentially saves your export settings so you don’t have to reinvent the wheel each time you want to export data.
Automate Your Entry Exports and Free Up Your Time
Entry Automation makes your life much easier by allowing you to save your Gravity Forms export settings. And, when you set an auto-delete schedule for Gravity Forms entries based on “the shortest time possible,” you’re ensuring that your form is also GDPR compliant.
No more tedious sessions configuring your entry exports. Save your settings and your sanity by configuring Entry Automation to do the manual labor. Get Entry Automation and start automating today!