
If you’re working with important documents, like contracts, permission agreements, applications, or other legal documents, the Gravity Forms signature field is a great way to capture signers’ electronic signatures. It enables you to create a more binding agreement without changing your web design, directly from your WordPress forms!
Key Takeaways
- Limitations of the Gravity Forms Signature Add-On: While the Gravity Forms Signature Add-On allows users to add a signature field to forms and capture signature images stored on the server, it does not facilitate the creation of signed PDF documents.
- Enhance Functionality with Legal Signing: To generate signed PDF documents, use the Legal Signing plugin, which enables the mapping of form fields, including signatures, to a PDF template, resulting in a complete signed document.
- Steps to Gather Signatures in Gravity Forms: Prepare the PDF document template, create a web form that mirrors the fields, add Legal Signing signature fields and a Legal Consent field, and map the form fields.
- Legally Binding Signatures: Legal Signing ensures that collected electronic signatures are legally binding and compliant with regulations in the U.S. and EU.
- Secure Document Handling: The plugin allows for secure storage and distribution of signed documents, including options to attach signed PDFs to email notifications and save them externally as needed.
How to choose between Gravity Forms signature types
Collecting a digital signature in Gravity Forms is fairly easy to do. You just need to install their Signature add-on, which adds a signature field to the form editor. Simply drag it onto your form and your users can add their signature before they click submit.
However, if you’re looking to create signed documents, the Gravity Forms Signature add-on is not enough by itself. This is because all that the digital signature image does is sit inside your WordPress dashboard.
A much better approach is to take that signature information and use it to create a signed PDF document. That way, you can:
- Have an actual signed document, rather than just a signature image sitting in your WordPress database.
- Automatically deliver a signed PDF document to the signer with an email notification.
- Save the signed document outside your WordPress website as needed, like on your local computer or Dropbox.
Below, you’ll learn exactly how to set this up using the Gravity Forms WordPress plugin and the Legal Signing Add-on.
You’ll start with a front-end form that includes the Gravity Forms signature field:

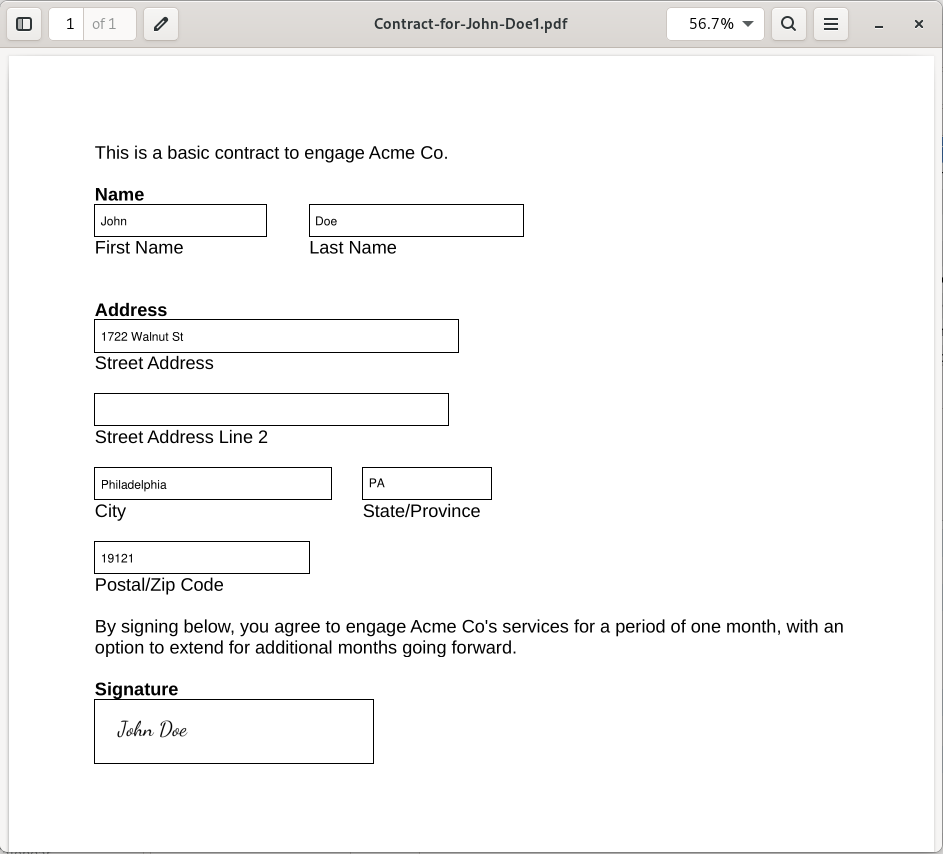
Then, you’ll be able to use the signature information from that form submission to create a signed PDF document:
If you want to add a Gravity Forms e-signature to PDF documents, you’ll need a few tools and WordPress plugins.
- The WordPress Gravity Forms plugin (from Rocketgenius)
- The Legal Signing plugin
Why the Gravity Forms Signature Add-on isn’t enough
The Gravity Forms Signature Add-on will let you add a Gravity Forms signature field to your end-user forms, capture signature information as it is drawn, and convert the image to a PNG to be stored on your server. However, it won’t let you create a signed PDF document.
To take an end-user’s electronic signature and turn it into a PDF document, you’ll also need the Legal Signing plugin.
Legal Signing lets you take some or all of the electronic signature information from a form submission, including an end-user’s real signature, and insert it into your own PDF template while retaining the styling of your PDF.
Setting up signatures in Gravity Forms: Installation and configuration
The Legal Signing plugin gives you the power to quickly and easily map Gravity Forms fields to PDF fields, and generate Gravity Forms forms from your existing PDFs. And because it runs on Gravity Forms, it works in all the ways a Gravity Forms form should – giving you the opportunity to use advanced conditional logic, attach PDFs to notifications, populate image choices, and more.
So let’s take a quick look at how to use Legal Signing and Gravity Forms to capture signatures on forms and instantly create PDFs from them…
Step 1: Prepare your form
Legal Signing makes things easy by allowing you to use your existing forms. All you need is a document template in PDF format with fillable fields, and you’re ready to get started.
Step 2: Create the web form
Next, you’ll create a form using Gravity Forms that includes all the same fields as your real PDF.
Step 3: Add the Signature fields
Simply drag the Legal Signing signature field onto your form like any other. Add a signature field for any participants that you need to sign.
The Legal Consent field requires all signers to consent to signing electronically; you’ll need to include one in your form.
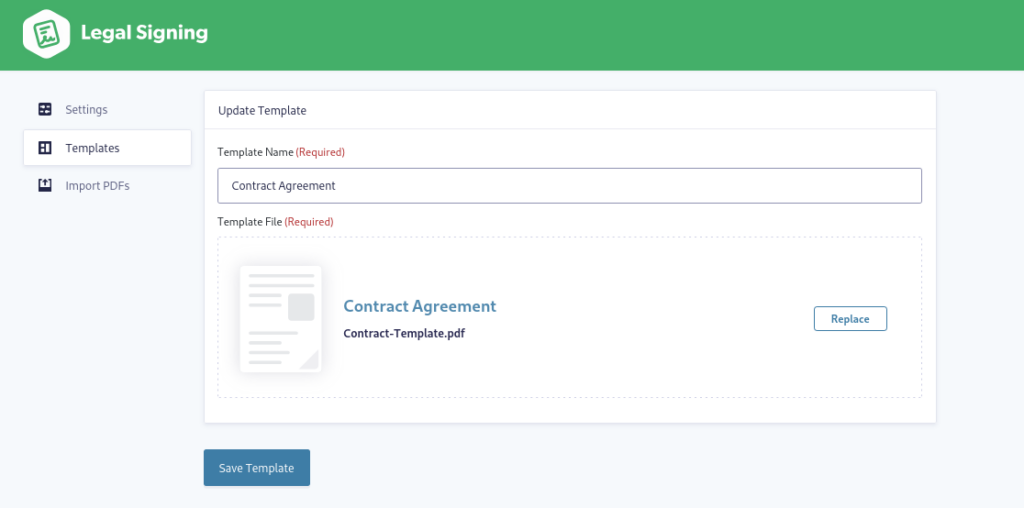
Step 4: Create a Legal Signing template
Under Forms → Legal Signing, select the Templates tab and click Add New. Upload your PDF and click Create Template.
Step 5: Map your form fields
In Gravity Forms under your list of forms, hover over your new form, then choose Settings → Legal Signing. Click Add New in the Legal Signing Feeds screen.
Select your recently-uploaded template, then click Map Fields.
On the next screen, you’ll see your fillable PDF on the left and a menu on the right. On the PDF template, click a field you want to map. On the right, select Form Field, then from the drop-down below, choose the field name that matches it.
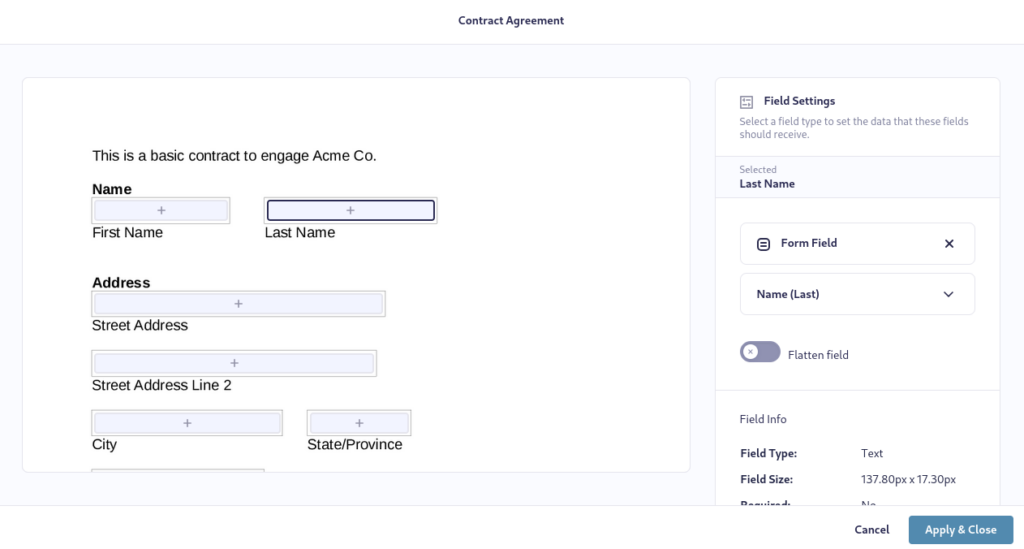
Repeat this process for each field you want to map, then click Apply & Close. Enter an Output File Name and select any email notifications where you want the generated PDF attached.
Save your settings, and you’re done. However, there are more options available that will make your forms richer and more secure.
Customizing your Gravity Forms signature fields
There are some settings you may want to adjust in your signature field. Besides practical things like making the field required, you may want to tweak the appearance of the button or the signature drawing pen. Here are a few tips, by category:
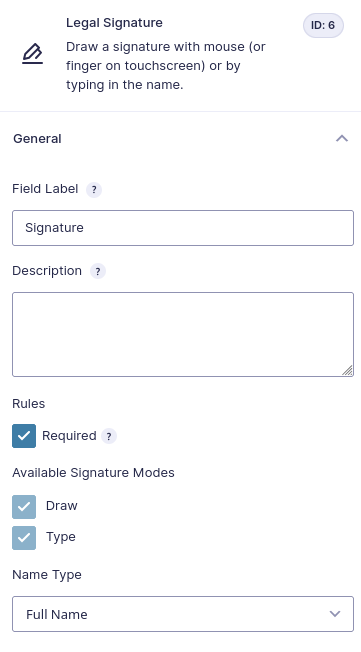
General
There are the usual field settings like Field Label and Description that you can adjust if you like. You’ll likely want to make your signature field required, so check the box under Rules. There are also options for Signature Modes and Name Type.
Appearance
In the Appearance tab, you can change the look of the signature block. For example, if you wanted to make the background purple and the pen color white to match your branding, there are color palette selectors or fields for typing in hex values.
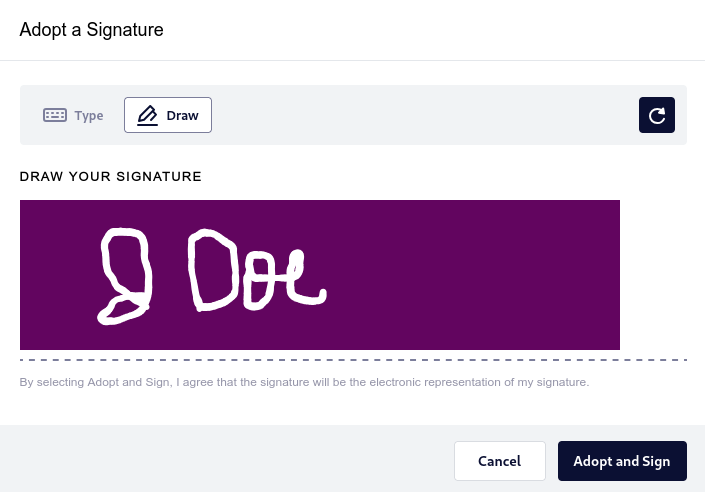
Additionally, there are options for a Custom Validation message, a field to add a custom CSS class, and more.
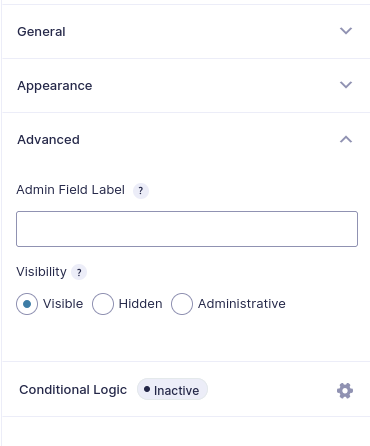
Advanced
The first setting under the Advanced tab is Admin Field Label. This allows you to call the field one thing on the form using the field label and something else in the administration view. For example, the field label your users see could be “Please sign the document here,” whereas when viewing entries it can be the shorter “Signature.”
Setting up automated PDF generation and security
Legal Signing will automatically generate a PDF of the signed document by default, as long as you’ve configured the settings as shown earlier. The PDF can be accessed by logged-in WordPress users at any time under Entries for that form. It can also be attached to an Admin notification email, and you can even set up additional notification emails if you’d like it sent to multiple people.
Security and Privacy
It’s crucial to understand how the security of your generated PDFs works. By default, the PDFs are not accessible to the public. If you want them to be public, or you want others to access them, there are a few additional settings that need to be configured.
In your Legal Signing Feed menu, go to the Advanced Settings tab.
You’ll see that you have the opportunity to add passwords for both Owner and Users. The Owner password is for setting permissions, and the User password is for viewing the PDF that’s generated after signing is complete. Note that an Owner password is required to set file permissions.
Speaking of file permissions, you can choose what users are allowed to do with the generated PDF. You can select from functions like Print High Resolution, Annotate, and more.
An extremely helpful feature — particularly for documents with sensitive, private information — is the ability to disable public access to the exported PDF. This makes the process much more secure.
You can also choose to remove interactive form fields from the PDF, which prevents any end user from making modifications to the data entered on the form.
Creating UETA and ESIGN compliant signature workflows
The signing workflow can be especially helpful when you have multiple signers who need to endorse documents in a particular order.
In the Legal Signing Feeds menu under the Signing Workflow tab, start by enabling the option.
Now you’ll have configure options, such as arranging the order of signers. You can make this totally random, or if you know that you’d like a seller to sign before the buyer (for example), you can set this up using the drop down menus.
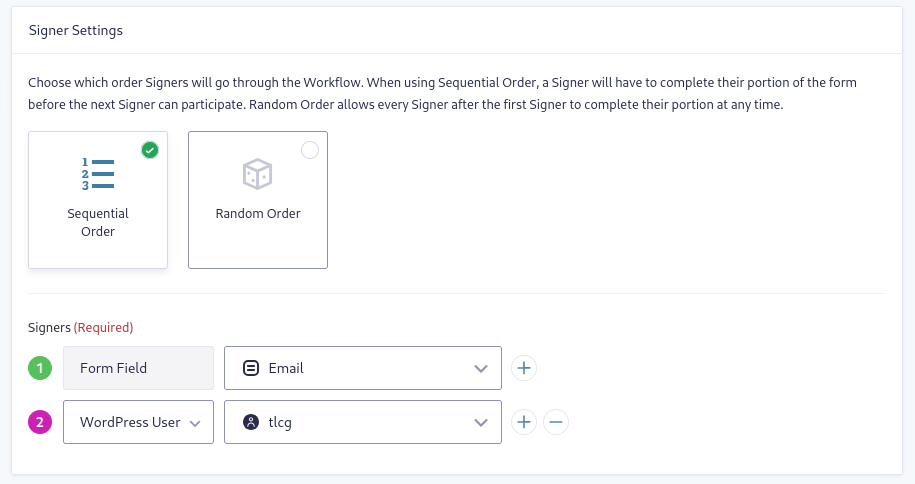
In addition to choosing a signer using a form field on your form, you can also select a specific WordPress user or enter an email address.
Form Field Assignment
An important section to complete in the Signing Workflow is selecting which form fields each Signer is allowed to complete. Without assigning the fields, any signer can complete any unassigned field.
Audit Trail
Legal Signing allows you to attach an Audit Trail Certificate to the generated document. The Audit Trail shows a timeline of all the Signers; when they were notified about signing, when they viewed the form, and when they signed the form. The audit trail will help you stay on top of the signing process.
Signing Schedule
Get as specific as you need, customizing the signing due dates. Choose from a date relative to when the first signer submits the form, or from the date of last signing. You can also choose a custom date and time when the form expires.

Save your settings to lock in your Signing Workflow. With Legal Signing, you can now be sure that all digital signatures you collect are fully UETA and ESIGN compliant.
Start collecting legally binding signatures with Gravity Forms
The Gravity Forms Signature add-on helps you collect e-signatures from your form plugin. But it doesn’t let you use that e-signature to create a signed PDF document, which is a much better approach when you’re dealing with contracts, applications, or other documents where a binding electronic signature is required. That’s where Legal Signing comes in.
With the Legal Signing plugin, it’s not only possible to collect legally-binding Gravity Forms signatures, you can generate official PDFs that can be shared with multiple signers. And because Legal Signing is UETA and ESIGN compliant, you can confidently complete contracts globally and securely.
Get Legal Signing and level up your Gravity Forms signatures!