Real Estate agreements can be complex — every one is unique in some way. If you’re a real estate attorney or Realtor, you know that preparing, reviewing, and collecting signatures on those agreements is time consuming. There’s a lot of jumping between numerous apps and websites. You may not realize that you can process legally-binding real estate agreements in just one place — your WordPress site.
Want to see how easy it is to set this up? Follow the rest of this article and you’ll be surprised how quickly you can have a reliable, secure, and professional system for processing your real estate docs.
Key Takeaways
- Integrate Gravity Forms with Legal Signing: By combining Gravity Forms with the Legal Signing Add-On, users can process legally binding real estate agreements entirely within their WordPress site.
- Prepare the Fillable PDF Document: Begin with an existing real estate agreement in PDF format that includes fillable fields corresponding to the information that needs to be collected.
- Create the Web Form in Gravity Forms: Develop a form in Gravity Forms that includes fields matching those in the PDF agreement.
- Incorporate Signature and Consent Fields: Utilize the Legal Signature field provided by the Legal Signing Add-On to capture electronic signatures from all necessary parties.
- Upload and Map the PDF Template: Upload the prepared fillable PDF to Legal Signing and map the fields from the Gravity Forms web form to the corresponding fields in the PDF template using the visual mapping interface.
- Disable Public Access: Enhance security by disabling public access to the exported PDF, ensuring that only authorized individuals can view the document.
- Implement Signing Schedules: This feature helps in managing the signing process efficiently and ensures timely completion of agreements.
What you need
Let’s assume your website is built on WordPress — a wise choice indeed. And if you’re not already using Gravity Forms, you should snap that up right away. Not only will you need it to process your real estate docs, it’s hands-down the best way to build forms in WordPress.
The third piece of the puzzle is the Legal Signing Add-On. Legal Signing helps you create and sign legally binding contracts with Gravity Forms. It’s secure, compliant, and signers can endorse documents wherever they are – on mobile, tablet, or desktop.
The last thing you’ll need is an existing real estate agreement with fillable fields in PDF format. Even if you don’t have all those things yet, you can still follow along to see how it all works.
How to use Legal Signing to process your real estate agreements
Step 1: Prepare your document
The great thing about Legal Signing is that you can use your existing documents. Once you have your real estate agreement in PDF format with fillable fields, you’re ready to jump into Gravity Forms!
Step 2: Create the web form
Next, you’ll create a form using Gravity Forms that includes all the same fields as your real estate agreement PDF. However, if your prepared form already contains the completed buyer, seller, and other pertinent information, you can skip adding those fields and just focus on the signature section.
For example, you’ll likely want to add fields for the Seller name, email, and date of signing — adding the same fields for both Buyer and Agent.
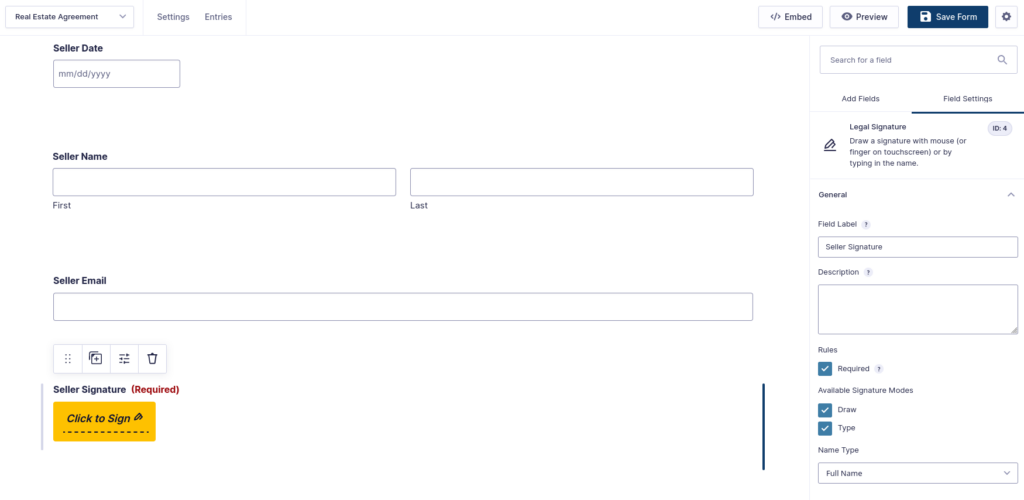
Adding the Signature fields
Legal Signing gives you a handy Legal Signature field that you can simply drag onto your form like any other. Add a signature field for any participants that you need to sign.
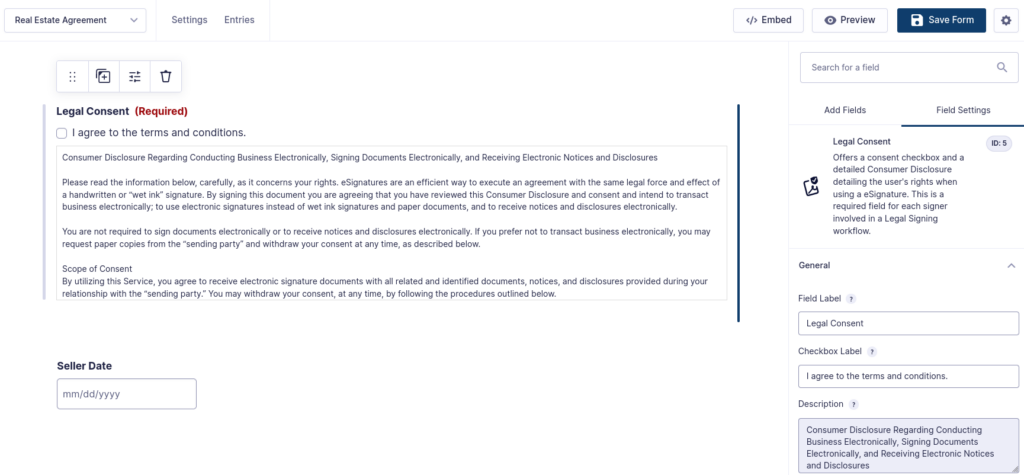
In addition to the signature fields, it’s crucial that you also add a Legal Consent field to your web form. This field requires all signers to consent to signing electronically and accepting the validity of the digital signatures. You only need to add one of these fields — all signers will have the ability to check the box as they sign.
With your web form created, it’s time to upload your PDF.
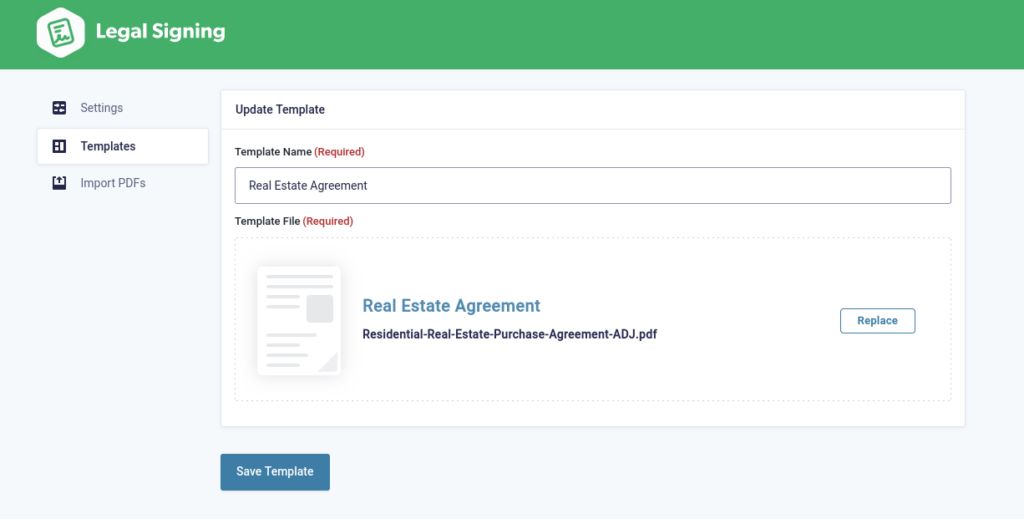
Step 3: Create a template from your PDF
You’ll use your pre-prepared fillable PDF document as a template to map your form’s fields to your newly-created web form. Under Forms → Legal Signing, select the Templates tab and click Add New. Upload your real estate agreement PDF and click Create Template.
Step 4: Map your form fields
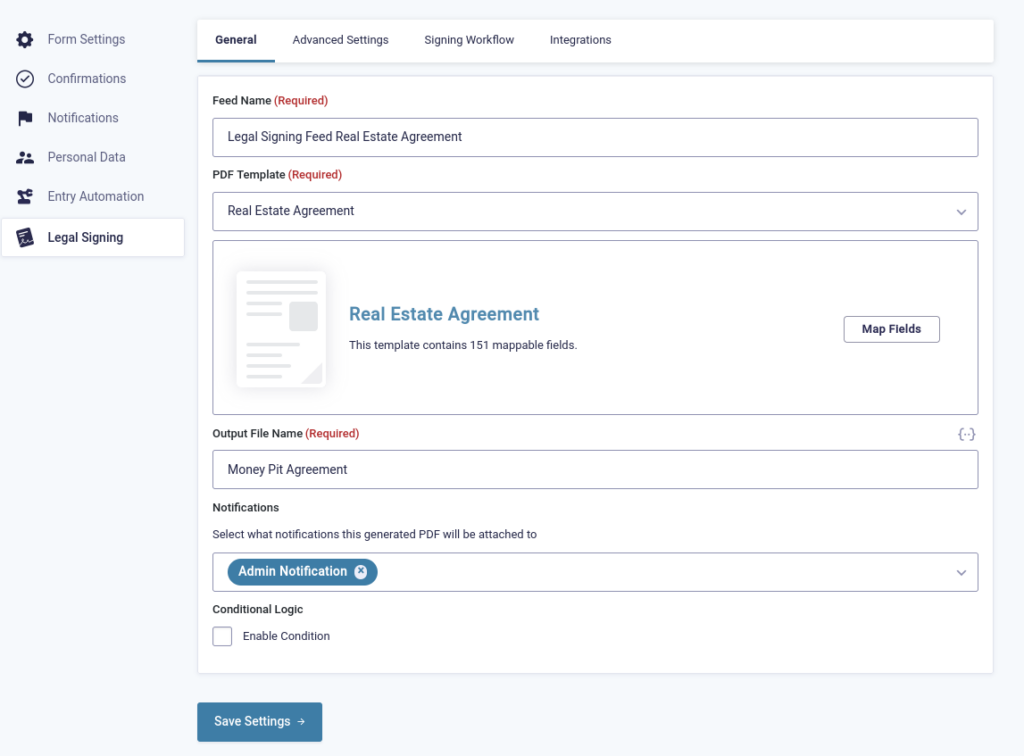
In Gravity Forms under your list of forms, hover over your real estate form, then choose Settings → Legal Signing. Click Add New in the Legal Signing Feeds screen.
Choose the template you’d like to use from the drop-down. This is where you’ll select your real estate agreement template, then click Map Fields.
On the next screen, you’ll see your fillable PDF on the left and a menu on the right. On the PDF template, click a field you want to map. On the right, select Form Field, then from the drop-down below, choose the field name that matches it.
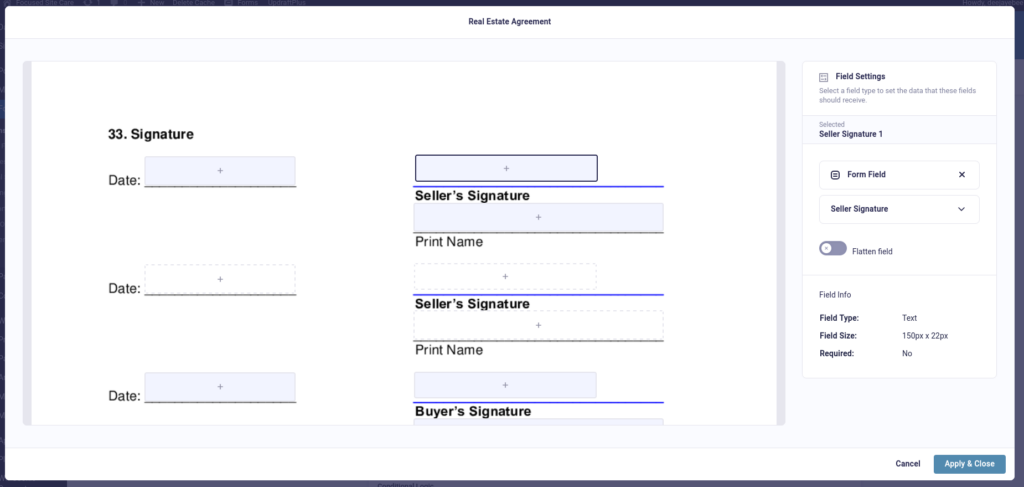
Repeat this process for each field you want to map, then click Apply & Close. Enter an Output File Name and select any email notifications where you want the generated PDF attached.
This is a good time to save your settings!
Step 5: Security and The Signing Workflow
At this point, your form is technically ready to put on a page and sign. However, there’s much more you can do to make the experience more secure and well, official.
Security and Privacy
Staying in your Legal Signing Feed menu, go to the Advanced Settings tab.
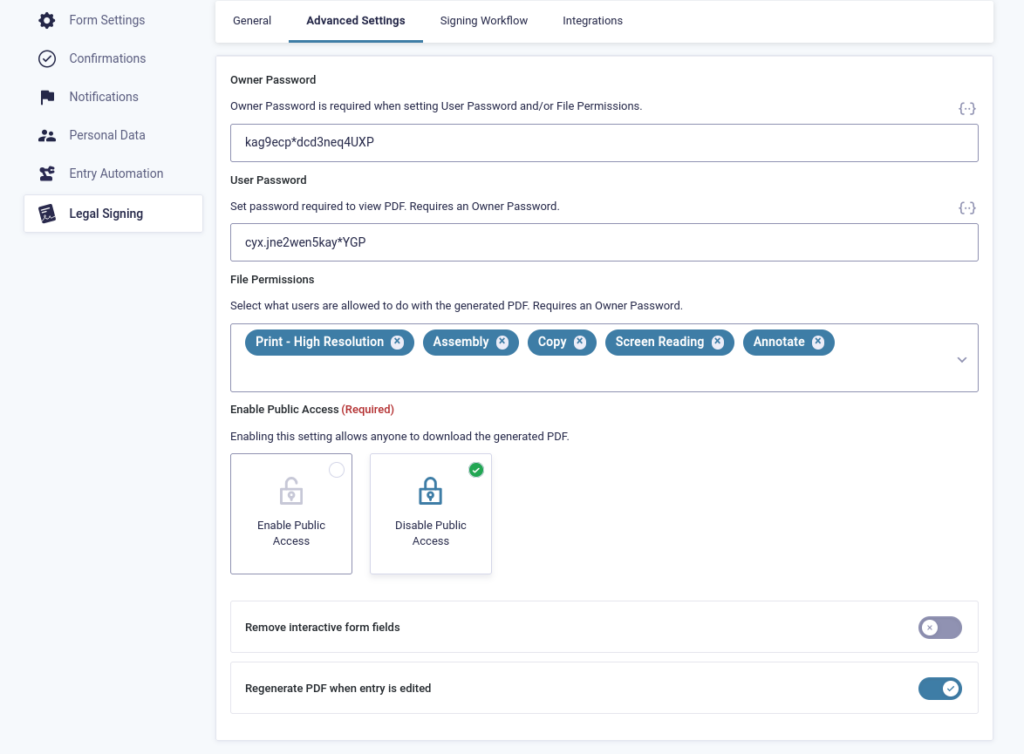
You’ll see that you have the opportunity to add passwords for both Owner and Users. The Owner password is for setting permissions, and the User password is for viewing the PDF that’s generated after signing is complete. Note that an Owner password is required to set file permissions.
Speaking of file permissions, you can choose what users are allowed to do with the generated PDF. You can select from functions like Print High Resolution, Annotate, and more.
An extremely helpful feature, particularly for real estate documents, is the ability to disable public access to the exported PDF. This makes the process much more secure.
You can also choose to remove interactive form fields from the PDF, which prevents any end user from making modifications to the data entered on the form.
The Signing Workflow
Moving to the next tab in the Legal Signing Feeds menu, you’ll notice that Signing Workflow is disabled by default. Simply click to enable it.
Now you have option to configure, such as arranging the order of signers. You can make this totally random, or if you know that you’d like the seller to sign before the buyer, you can set this up using the drop down menus.
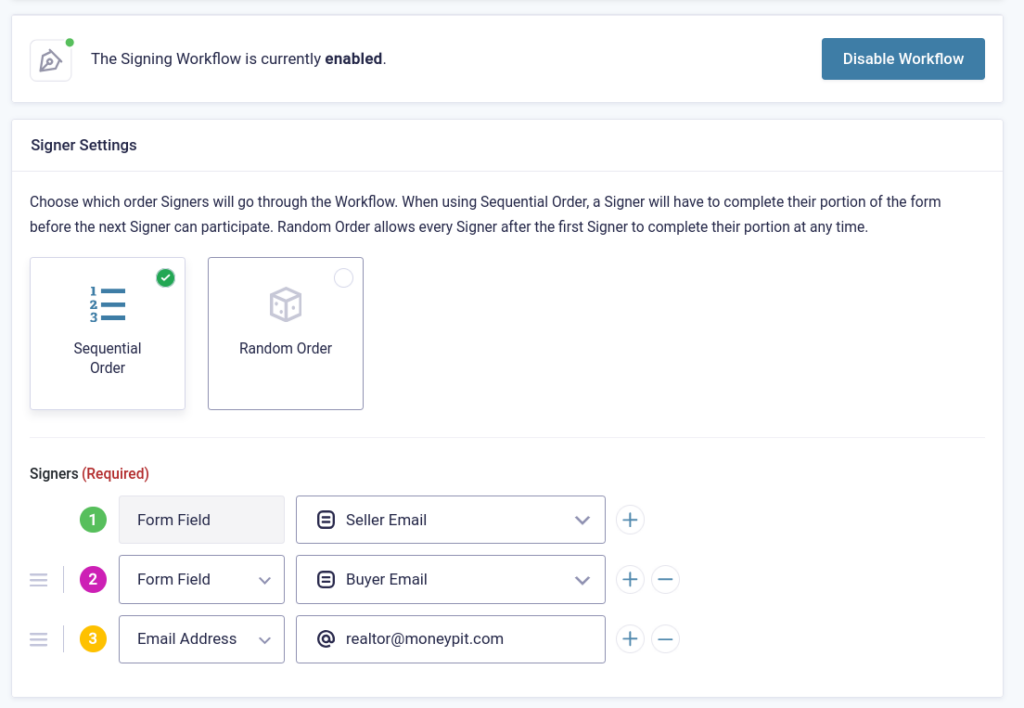
In addition to choosing a signer using a form field on your form, you can also select a specific WordPress user or enter an email address.
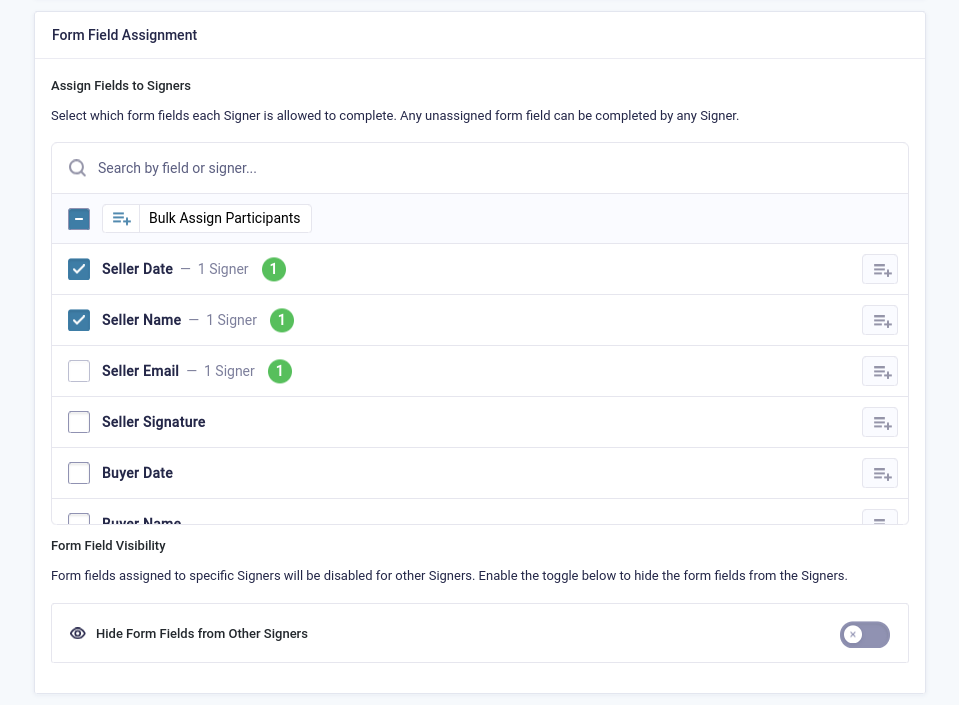
Form Field Assignment
An important section to complete in the Signing Workflow is selecting which form fields each Signer is allowed to complete. Without assigning the fields, any signer can complete any unassigned field, which would make things very confusing for your real estate agreement processing.
Audit Trail
Legal Signing allows you to attach an Audit Trail Certificate to the generated document. The Audit Trail shows a timeline of all the Signers; when they were notified about signing, when they viewed the form, and when they signed the form. In a busy real estate office, this will help you easily stay on top of the signing process.
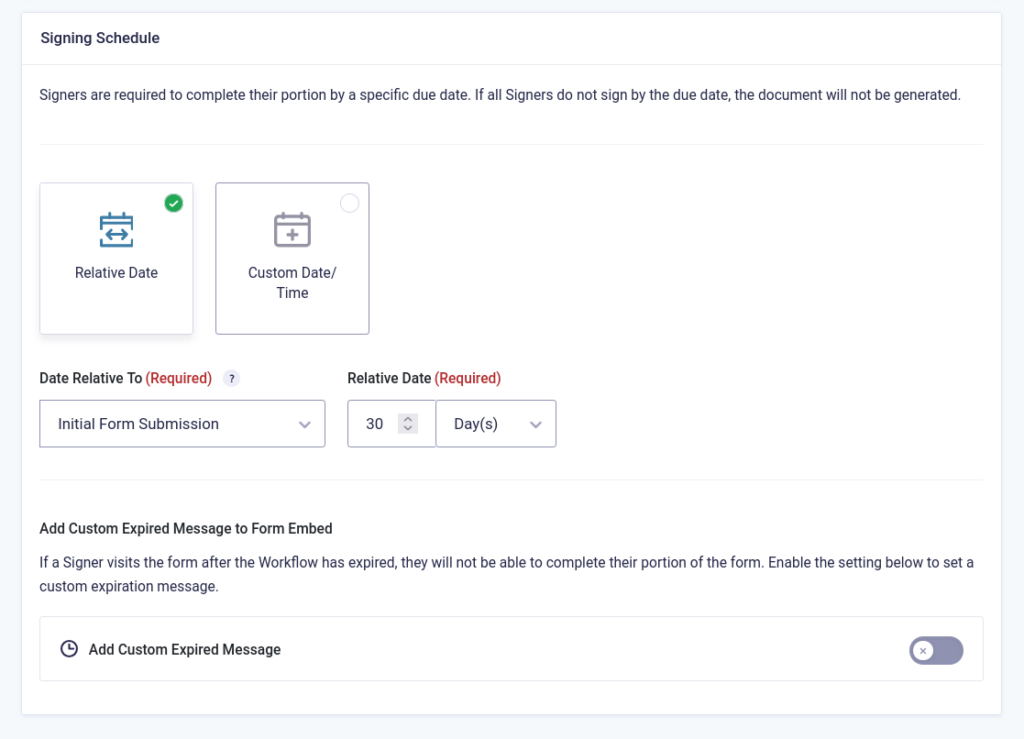
Signing Schedule
You can customize the signing due dates, getting as specific as you need. Choose from a date relative to when the first signer submits the form, or from the date of last signing. For more granular control, you can choose a custom date and time when the form expires.
Click Save Settings, and your Signing Workflow is complete!
Process Real Estate Agreements and More
Congratulations! You now have a powerful and secure way to process real estate agreements on your WordPress site. Plus, it’s super easy for your signers to understand and use.
You can use Legal Signing to process all of your real estate documents and collect legally-binding signatures on any other documents as well. Of course, Legal Signing can be used as a standalone product but if you want a full suite of products that will take your form management to a whole other level, you need to check out our bundle.