Tired of sifting through spam entries on your website forms? You can protect your forms from bogus entries by adding a simple verification field using One-Time Password.
Form verification in WordPress is easy to set up. In this post, I’ll show you how.
What You Need to Get Started
One-Time Password works seamlessly with Gravity Forms, so all you need is Gravity Forms and the OTP plugin installed on your WordPress site.
Once you have One-Time Password activated, you’ll need to fill in your license key. You can find the license key field in Forms → Settings → One-Time Password.
That’s it! Now you’re ready to add submission verification to your forms.
How to Implement Verification on a Form
It’s easy to add a verification field to any form using Gravity Forms. In your existing form, scroll through the Add Fields menu to Advanced Fields. You’ll find the One-Time Password field module. Simply drag it onto your form wherever you’d like.
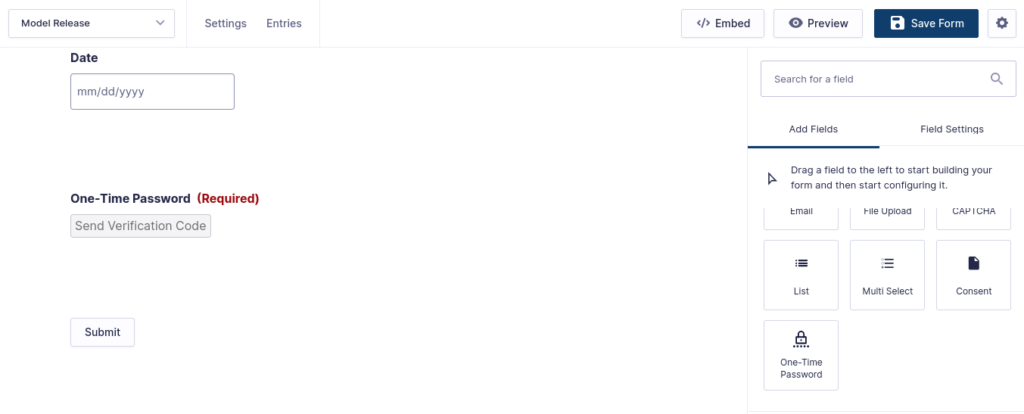
Once the field is in your form, you need to adjust the settings.
Field Label
This is the title of the field that the user will see on the front end. It’s not only helpful to identify the field, it’s a must-have for accessibility.
Description
You can give the user some direction on how the field is used.
Source Field
This is where One-Time Password will get the value of the email field on the form so a verification email can be sent.
Digits
You can set the number of digits required in the verification code.
Expiration
This setting allows you to configure the amount of time before the code expires.
Rules
Toggle the box and the field will be required to submit the form.
Appearance
You can change the appearance of the field by assigning a custom CSS class.
Customizing Notifications
After you save your form with the One-Time Password field configured, a new notification is added to the form. That notification is responsible for sending the code to the end user. It’s pre-populated with a common message, but it can be customized just like any other Gravity Forms notification.
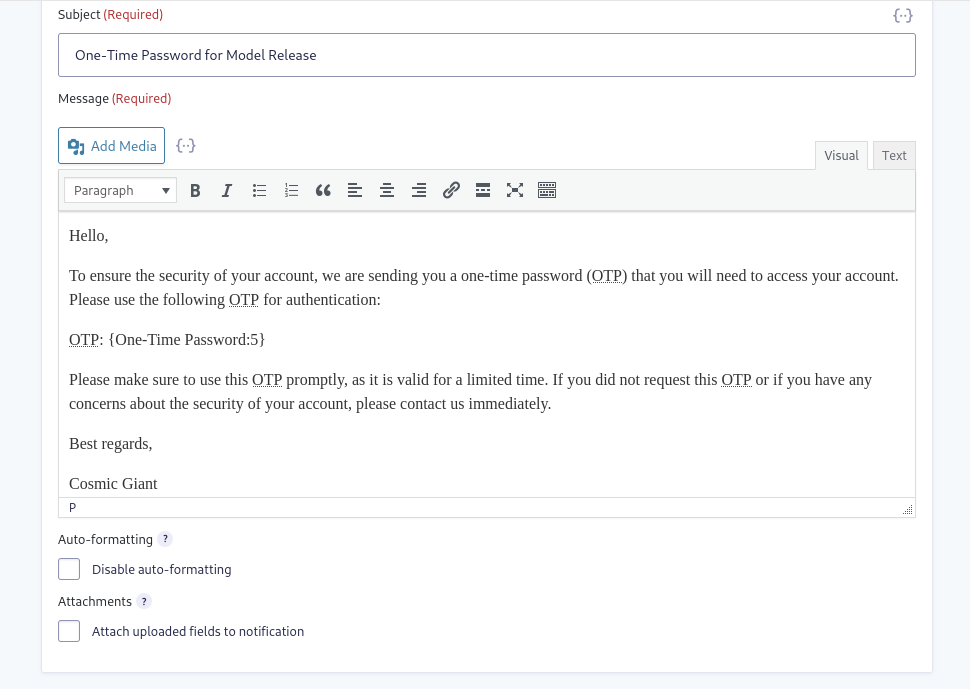
You can change any of the sending properties such as the From email, From Name, Reply To, and Subject. Additionally, the message can be edited to sound more personal, and include any branding you’d like.
Using Conditional Logic with One-Time Password
In addition to securing form submissions, you can also show and hide fields. For example, if there is a field you don’t want visitors to see until they’ve been verified, you can use Conditional Logic to implement the functionality.
First, set up the One-Time Password field as described earlier.
Then, add a new field (or multiple fields) below the OTP verification field. For each field you add, select Conditional Logic at the bottom of the field settings menu. Toggle the button to enable it.
In the menu that appears, choose to Show in the first section. In the section below, select One-Time Password, is, and verified.
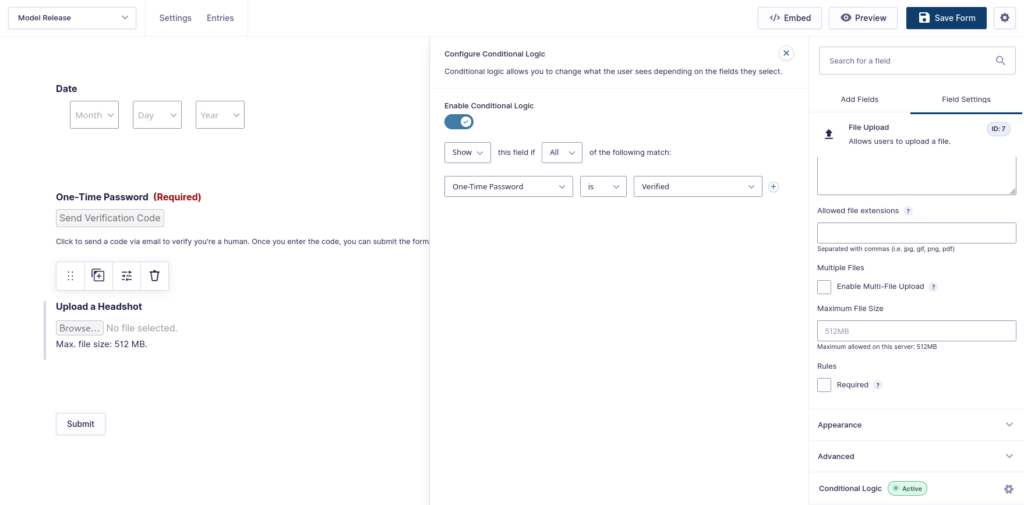
You’ll need to enable and configure Conditional Logic for each field you add after the OTP field.
The User Experience
On the front end, your form will look and work exactly the same as before — with the addition of the One-Time Password field and Send Verification Code button.
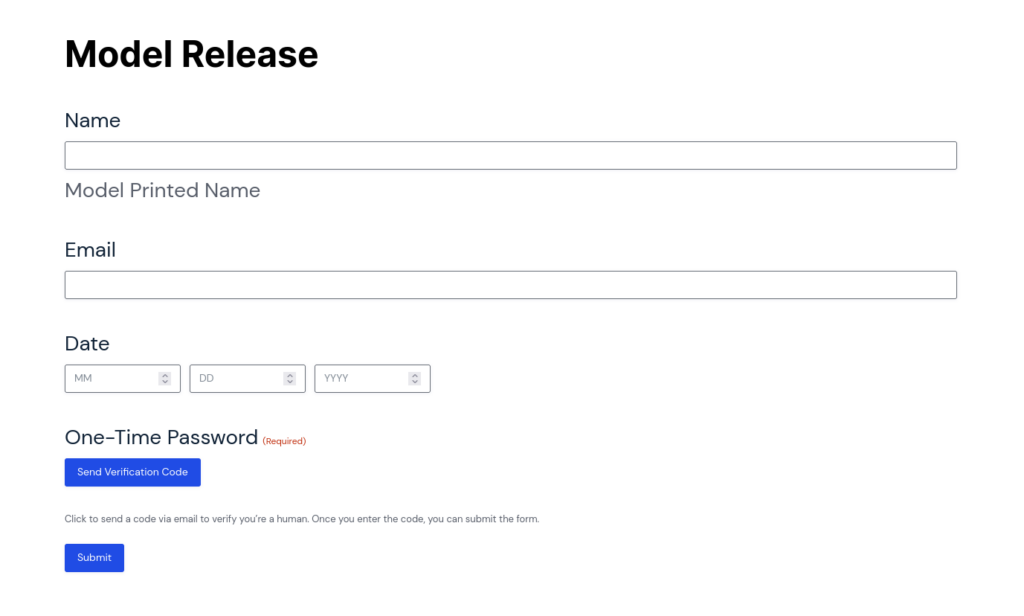
When the visitor clicks the button, they’ll receive a code in their email, as long as they’ve filled out that field on the form.
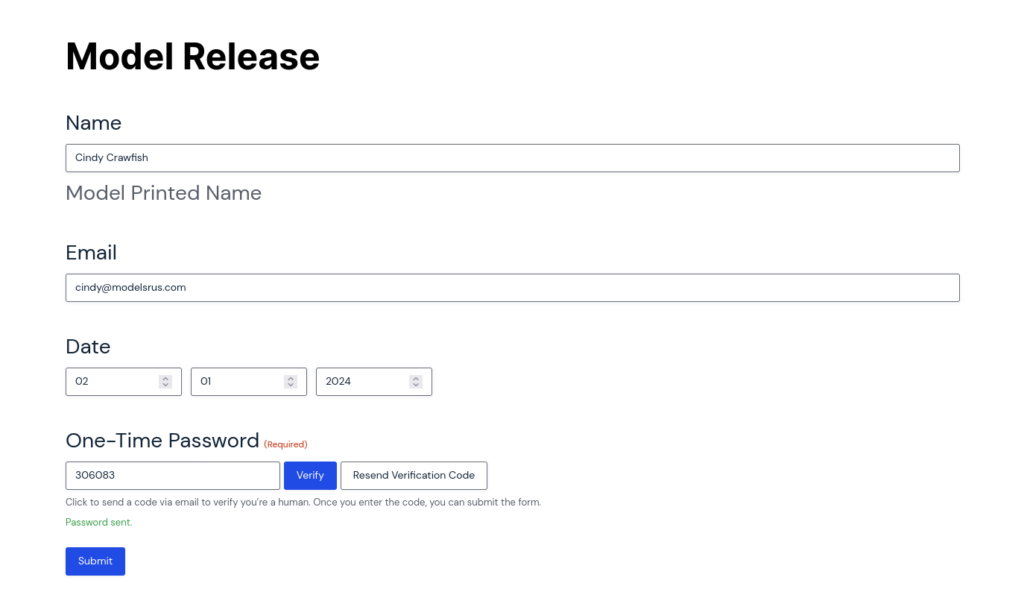
The One-Time Password field will update to allow for the code entry. Once they click the verify button, they’ll be able to submit the form normally.
That’s all you need to do to validate form submissions! Grab One-Time Password now and you can set up form verification on your WordPress site in only a few minutes.