Want to make your WordPress forms more secure? I’ll show you how to do it using an easy verification code interface using a basic user registration form that you can embed into any page of your site.
Before we get into securing your forms, let’s cover some basics about how to build a custom login form.
Key Takeaways
- Build a custom login form: Use Gravity Forms to create a custom login form along with the User Registration Add-On.
- Embed the form: Use a shortcode in a page or post, or use a widget to embed the form in a widgetized area of your site.
- Customize the login page: Modify the form’s appearance and behavior by tweaking the shortcode parameters and utilizing WordPress’s built-in design tools.
- Integrate user registration: Set up a custom registration form using Gravity Forms and map the fields to user registration actions.
- Enhance security: Use One-Time Password to implement verification codes, adding an extra layer of protection to your form.
Building a WordPress login form with Gravity Forms
Building a unique and more secure login form is easy to do. To start, you’ll need Gravity Forms, their User Registration Add-on, and our One-Time Password add-on. One-Time Password was created to protect your forms from spammers by adding a simple verification field. Now you can add that functionality to login forms as well.
I’ll walk you through everything. Let’s get started!
Setting up the Gravity Forms User Registration Add-On
Embed a login form on your site using a shortcode
There are two ways to embed a login form on your site: using a shortcode or a widget. Let’s start with the shortcode. The User Registration add-on adds some shortcode actions that make it easy to customize the form. The parameters are listed on their site, and you can start with an example they provide:
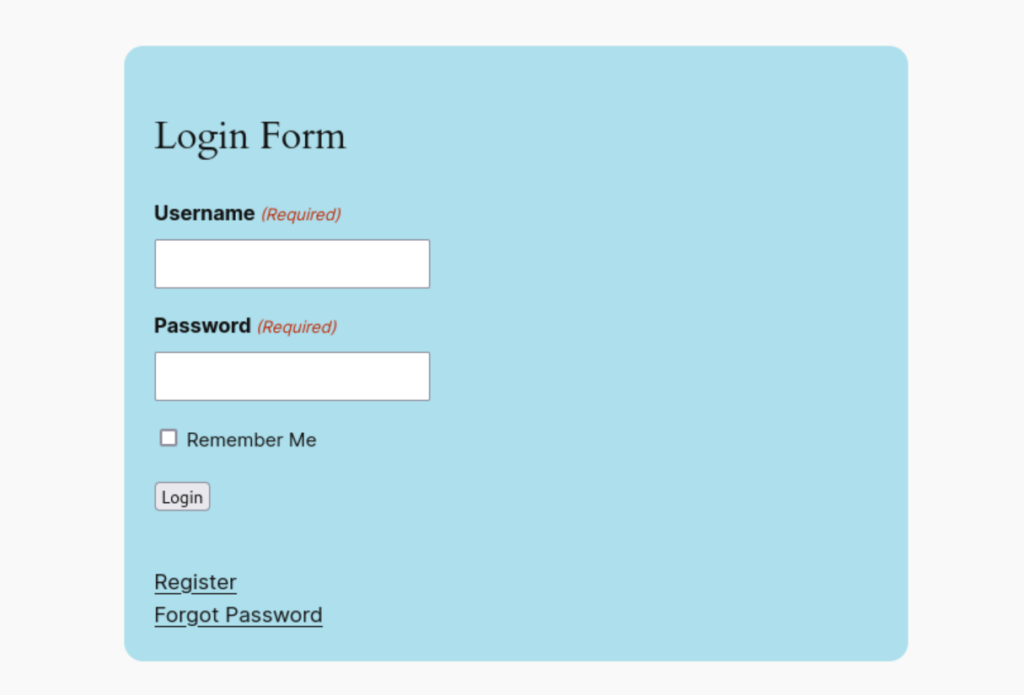
[gravityform action="login" description="false" logged_in_message="Yay! You are logged in!" registration_link_text="Register for my super awesome site" forgot_password_text="Stop forgetting your password" /]Inserting that code in a shortcode block gives you a basic login form.
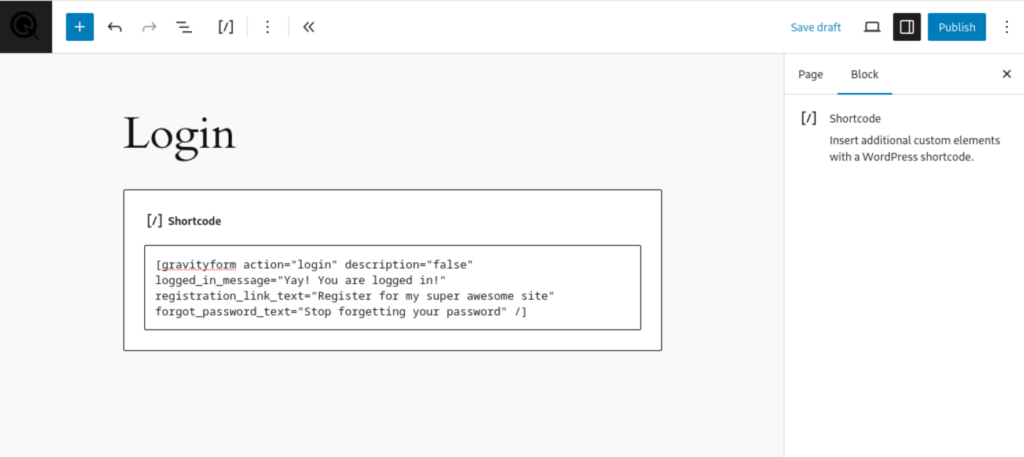
For the front end, you can easily customize the look of the block using WordPress’s built-in design tools.
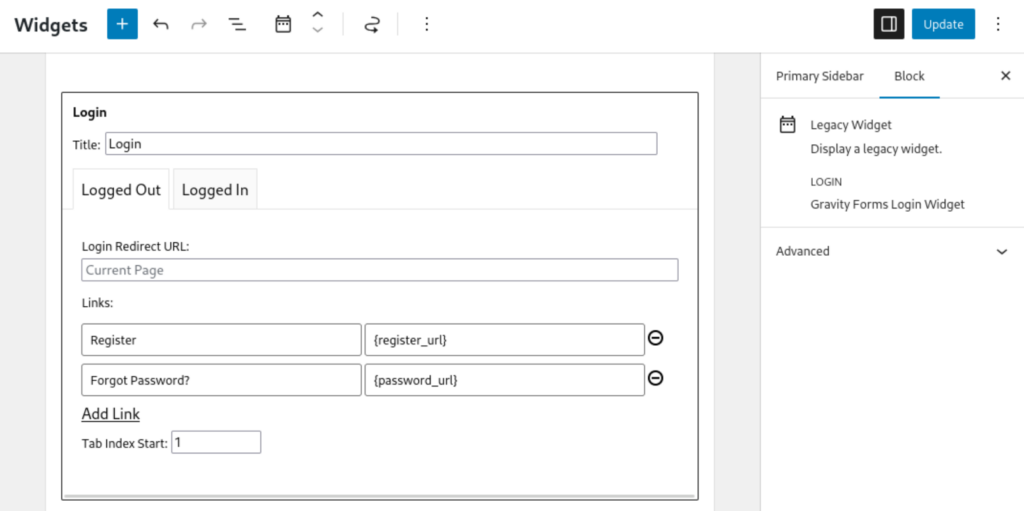
Embed a login form on your site using a widget
If you still use widgets on your WordPress site, there’s an Add-On Login Widget available. You can customize this just like the shortcode version, but instead of adding parameters in code, you can adjust the settings using a simple UI.
Customizing your Gravity Forms login page
Once your basic shortcode or widget is in place, you can tweak, add, or remove different parameters, customizing the form for your needs. For example, you could use logged_in_message to display a custom message, or logged_in_avatar to show the logged in user’s avatar.
Setting up custom redirects
Another example of customizing your login form is including a redirect parameter that takes the user to a specific page when they successfully log in. A redirect can be a powerful marketing tool. For instance, you could redirect users to a landing page during a new product launch when they log in. Or if you have an e-learning site, students can be taken right to the lessons page upon login.
Integrating user registration with your login form
Of course, the User Registration add-on wouldn’t make sense if you couldn’t create a custom user registration form. Let’s do that now.
Create the form
Using Gravity Forms, start with a blank form — or, you can use an existing form if you like. There are a couple of required fields you’ll need to add:
- Username
As long as you’re creating this form, it’s a good idea to add Name and Password fields to make it a more complete registration.
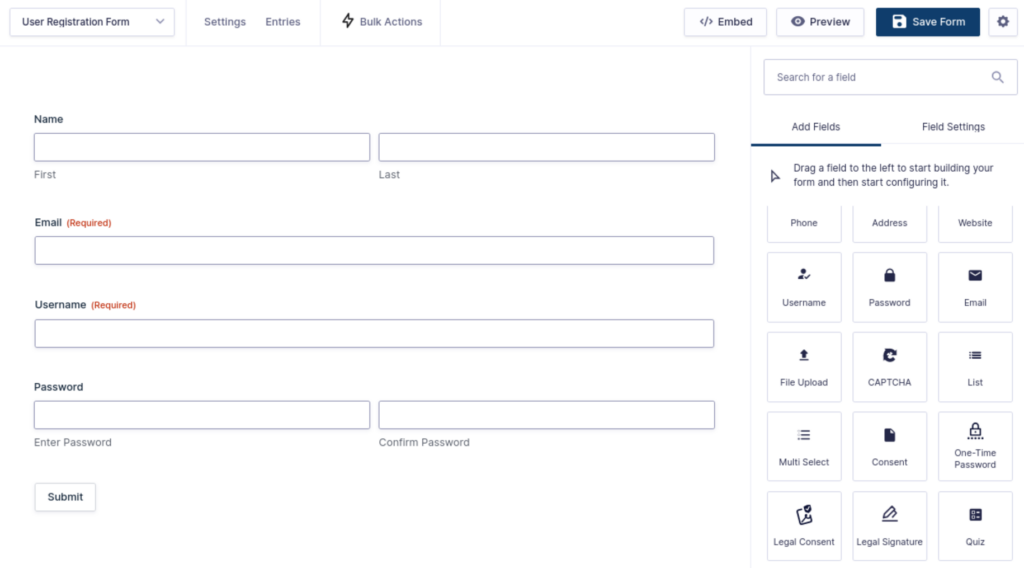
That’s it on the form for now, but to make it work you need to create a feed.
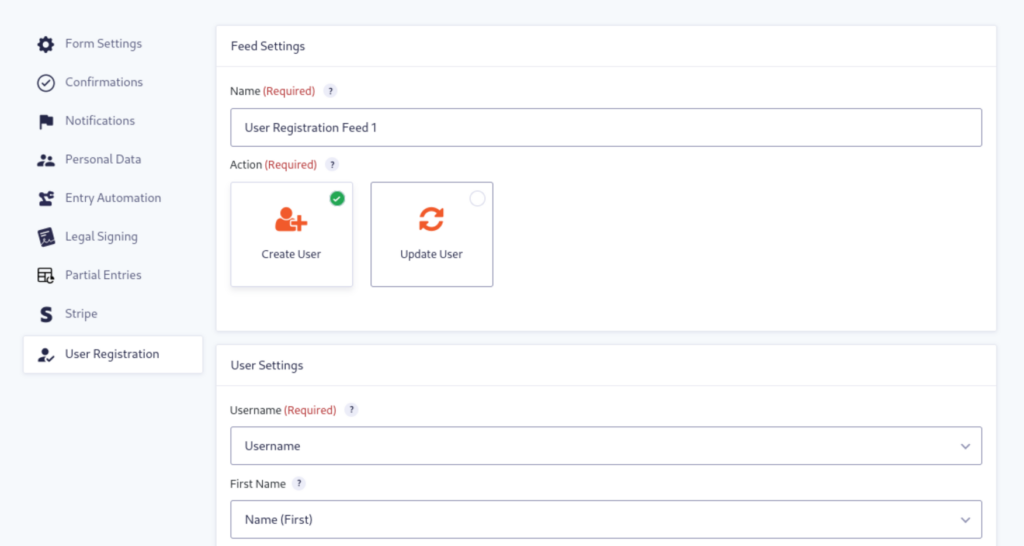
Create a Feed
In your form editor, navigate to Settings → User Registration, then Click to Add New to get started. Configuring the feed is mostly intuitive, but here are some short explanations for the various settings:
Name
Give your feed a name that works for you, or leave it at the default.
Action
You have the option to either Create User or Update User. You have to choose one or the other for the form, but you can create additional forms and feeds if you want to combine the two functionalities on a single page. In this example, I chose Create User.
User Settings
These settings are fairly self-explanatory. Essentially you’re matching up fields in the feed with fields on your form.
User Meta
A completely optional setting that allows you to map form fields to meta values in the database. For example, you could create a registration_form key and match it with the value Form Title, which adds additional data to User Meta when they submit the form.
Additional Options
Here you can choose to send new account notifications via WordPress or through a form notification that you set up separately.
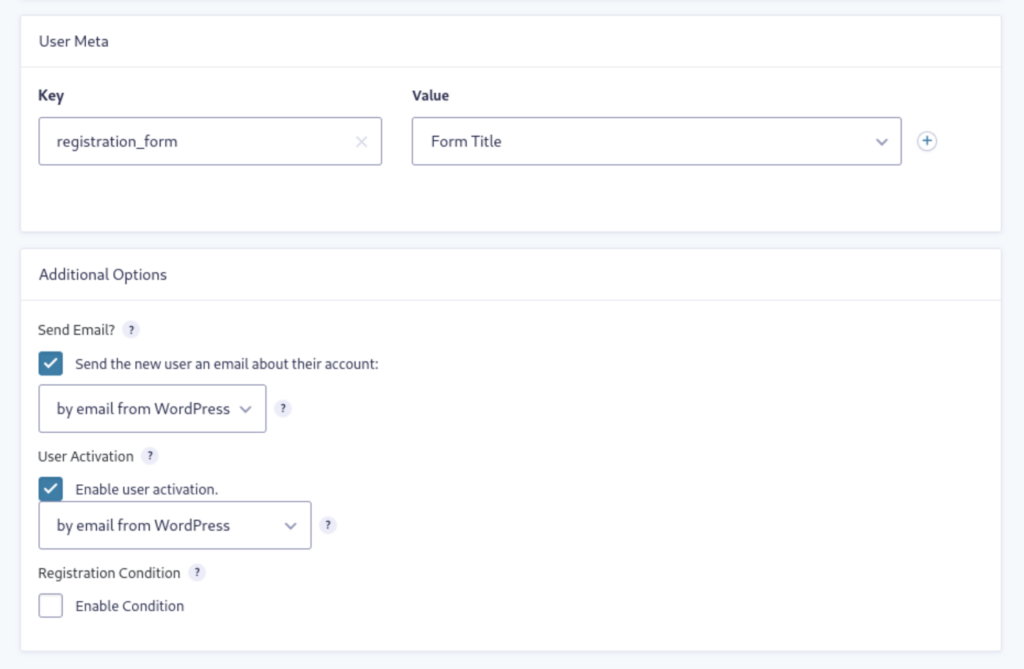
Note that when User Activation is disabled, an administrator will have to activate new accounts manually from the Pending Activations page.
Custom registration page
Want to bypass the default WordPress registration page for all new users? Create a new page and embed the registration form. Then head over to Forms → Settings → User Registration.
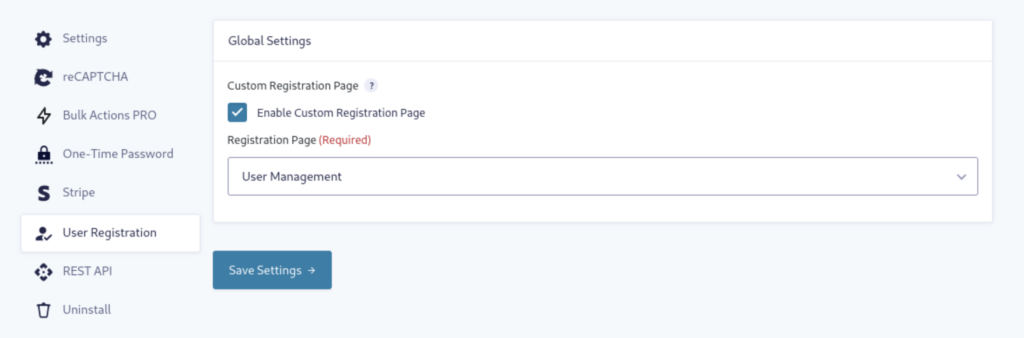
Click to enable the feature, then select your preferred registration page from the dropdown menu.
We’ve covered the basics of creating a login and user registration form to make this a comprehensive tutorial. Now let’s get into the meat of the article and talk about making these forms more secure!
Making the login form more secure
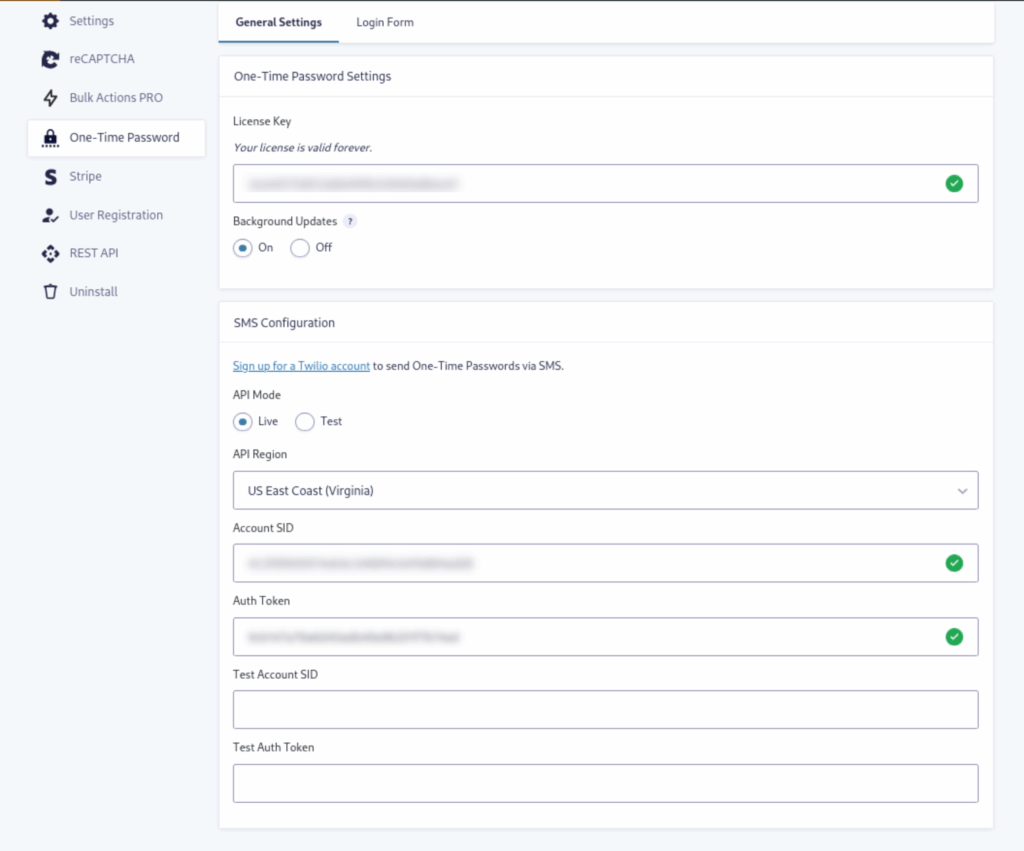
You should have One-Time Password installed and activated. Then navigate to Forms → Settings → One-Time Password. In General Settings, you can add your license key if you haven’t already, and choose if you’d like to have updates run in the background.
Email or SMS
One-Time Password allows you to send verifications via email or SMS. Email functionality is ready to go out of the box, but if you’d like to use SMS you’ll need to sign up for a Twilio account. Once you’re signed up, you’ll see an Account ID and Auth Token in your Twilio dashboard. Copy and paste those into the appropriate fields on your WordPress site in the One-Time Password General Settings menu. There are a few more steps to configuring your Twilio account, and for that you can follow our more detailed tutorial.
Note that although Twilio gives you some starting funds as a trial, there are additional costs of using SMS over time. You will be paying for your usage of Twilio and their service, which is independent of One-Time Password. CosmicGiant does not charge any fees for using SMS.
Now let’s get verification working on your login form.
Step 1: Enable OTP on the login form
Click the toggle to enable the feature that will show the One-Time Password field on your login form. A new menu will appear on the page. Fill in your preferred Field Label, or leave it at the default.
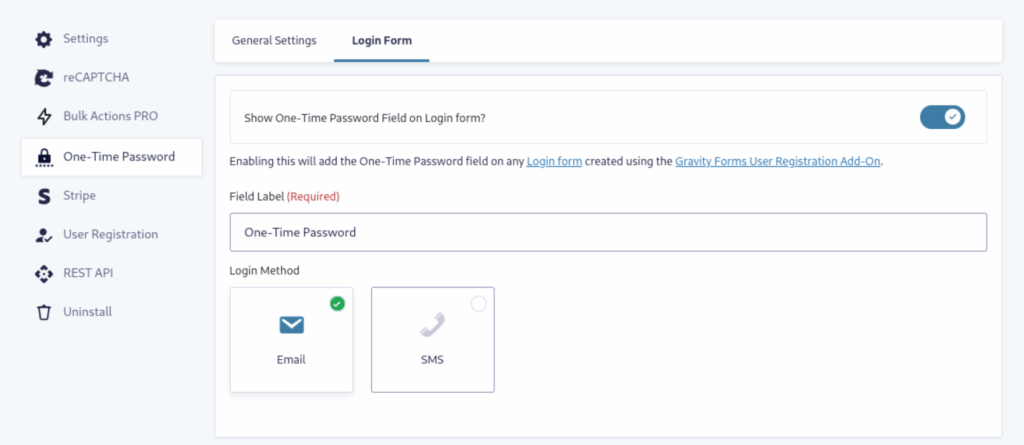
Step 2: Choose Login Method
For the login form, you’ll need to select either Email or SMS as the verification code delivery method. There are separate settings for each, and you can customize the messages in either method.
If you visit the page where you embedded the login form earlier, you’ll now see the One-Time Password field incorporated into the form.
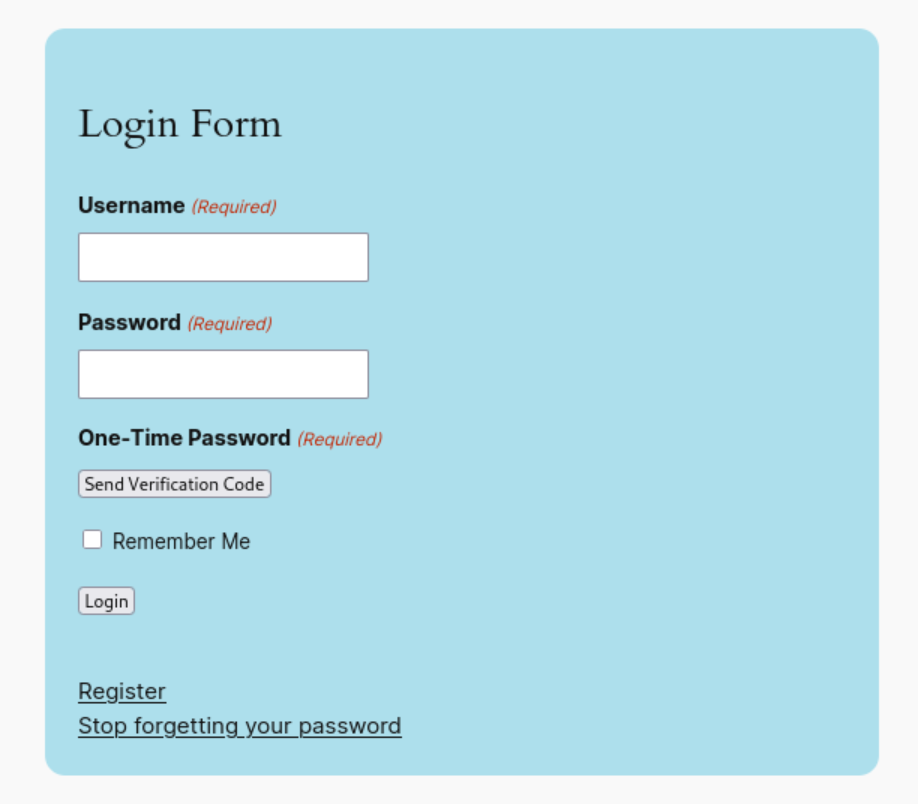
The functionality is simple. When a registered user clicks Send Verification Code, they’ll receive a code via your chosen method, Email or SMS. Once they enter the code, they can login normally.
Making the registration form more secure
As long as you’re creating a more secure login form, you may as well secure your registration form as well. This is super easy to do. Enter edit mode on your form. On the right under Advanced Fields, you’ll find the One-Time Password field. Drag it onto your form.
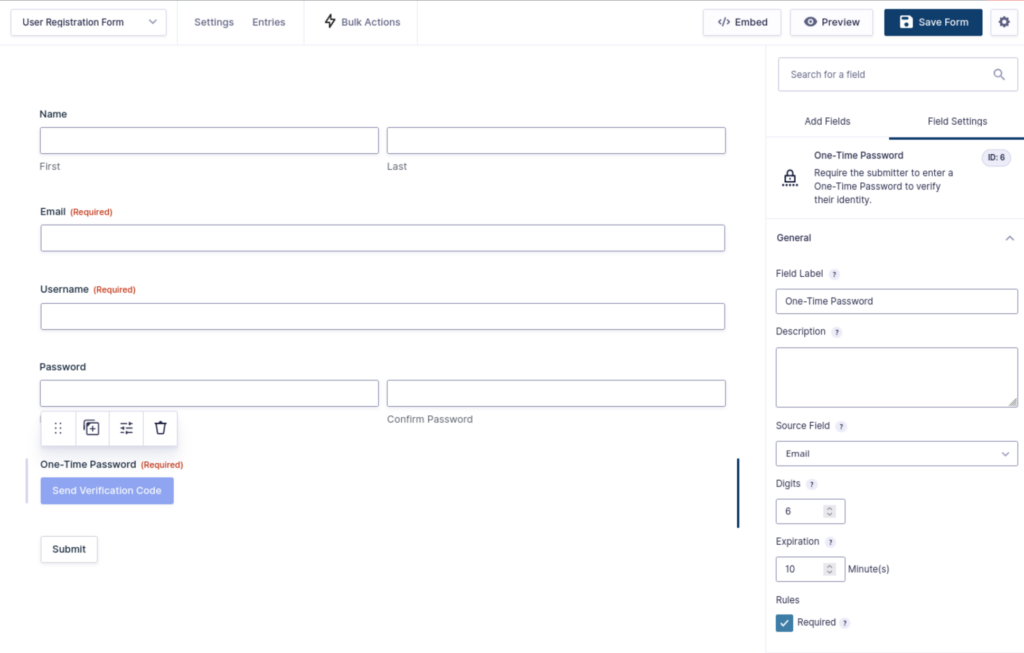
Under Source Field, you’ll decide if you want to send the verification code via Email or SMS. If you don’t see SMS as a choice in the dropdown, make sure you’ve added a Phone field to your form. You’ll also need to have your Twilio account fully configured as I mentioned earlier.
You can customize the code by entering the number of digits for the length, and the amount of time in minutes the code will expire.
Create your custom login solution with Gravity Forms
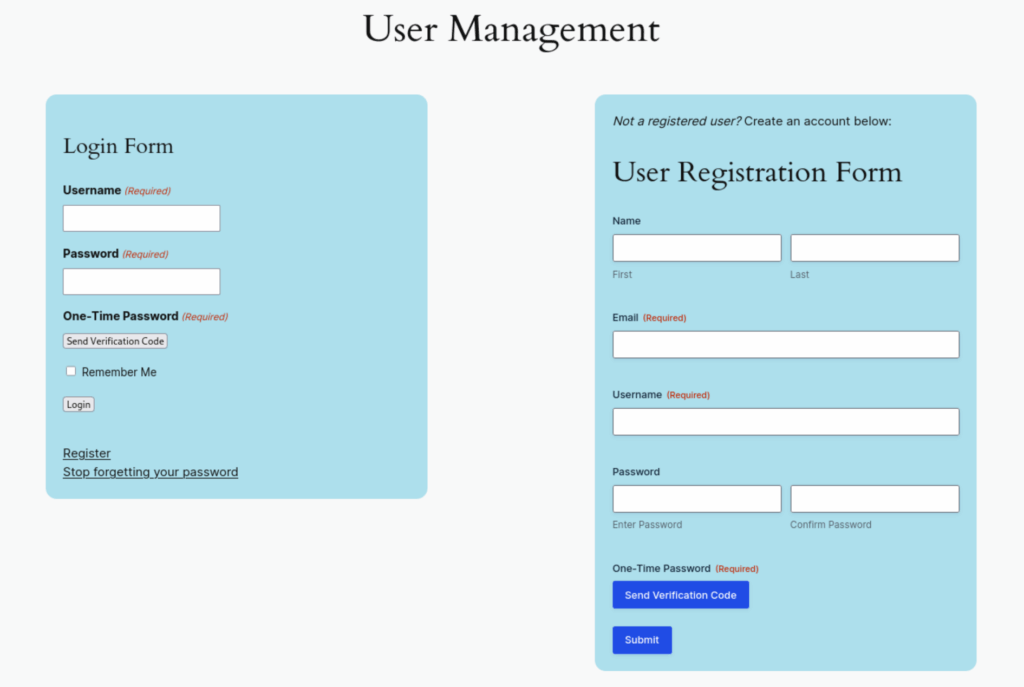
If you like, you can display both forms together on one page, creating a one-stop User Management page that includes the more secure One-Time Password verification feature.
With Gravity Forms and One-Time Password, you can now create a login form that fits in better with your site’s branding and functionality, combined with a more secure user login and registration solution.
Stop the bogus form entries and verify your form submissions with One-Time Password!