Key Takeaways
- Why Secure WordPress Forms?: Your forms collect sensitive data that needs to be kept private.
- Common Vulnerabilities in WordPress Forms: SQL injection, XSS, CSRF, unrestricted file uploads and misconfigured permissions are very common in WordPress forms.
- Essential Security Measures: Detailed ways to mitigate those common vulnerabilities.
- Advanced Security Techniques: Add-ons like One-Time Password and Advanced Permissions offer a higher level of WordPress form security.
- Document Generation Security: The Fillable PDFs add-on has tools to make generated PDFs more secure.
- Compliance: Gravity Forms can help meet GDPR requirements, but HIPAA requires more attention to achieve compliance.
The importance of securing WordPress forms
Do you know if your WordPress forms are secure? You may be collecting lots of potentially sensitive, private data through your website and it’s crucial that you understand how to protect it — for both you and your visitors. Not only is it important to implement excellent security to meet GDPR requirements, your form submitters deserve to know that their information is safe from data breaches. In this article, I’ll cover all the info you need to maintain secure forms in WordPress.
Common vulnerabilities in WordPress forms
First, let’s go over five of the most prevalent security vulnerabilities.
1. SQL injection attacks in form submissions
An SQL injection attack is just what it sounds like: attackers inject malicious SQL code through form fields to manipulate the database. If successful they can potentially view, modify, or delete sensitive data. Login, signup, and contact forms are the most popular entry points for SQL injection attacks.
2. Cross-site scripting
Cross-site scripting (XSS) occurs when attackers inject malicious scripts into forms (such as comment or contact forms), which then execute in the browsers of users who view the compromised page. This can lead to data theft, session hijacking, or redirection to malicious sites.
3. CSRF attacks targeting form data
Cross-Site Request Forgery (CSRF) attacks trick authenticated users into submitting unwanted actions via forms, such as changing account settings or performing transactions without their knowledge.
4. Unrestricted file uploads
Forms that allow users to upload files can be exploited if they do not restrict file types or scan for malware. Attackers may upload malicious files (e.g., PHP shells) to gain control of the site.
5. Misconfigured permissions
Forms that inadvertently grant excessive permissions or expose sensitive actions can lead to privilege escalation or unauthorized changes.
Essential security measures for WordPress forms
Now that I’ve told you about some vulnerabilities, it’s only fair that I explain how to mitigate them!
1. Prevent SQL injection attacks
One easy solution for protecting against SQL injections is installing a web application firewall. This can be done through your web host — the better ones offer this as part of your hosting package. Another preventative measure is changing the default WordPress database prefix in the wp-config.php file.
2. Block Cross-site scripting (XSS)
When you use Gravity Forms, you’re already ahead of XSS attacks. Gravity Forms validates and sanitizes user input both on the server and frontend by default. This means that, for most field types, the plugin checks and cleans submitted data to ensure only expected values (such as valid emails) are accepted, reducing the risk of malicious scripts being submitted through form fields.
3. Implement CSRF tokens
Once again, Gravity Forms has you covered with CSRF protection. However, it doesn’t use traditional “CSRF tokens” as a separate field in the form. Instead, it leverages WordPress nonces, which serve the same purpose as CSRF tokens.
4. Hinder unrestricted file uploads
Gravity Forms blocks certain dangerous file types by default, but best practice is to restrict uploads to only the extensions you expect to receive (e.g., pdf, jpg).
5. Fix misconfigured permissions
First, you should do a full audit of all users and their roles. Reduce users to the minimum level of WordPress access required to do their work or interact with your site. You can go one step further in securing access to your form data by using Advanced Permissions with Gravity Forms. I’ll show you how to do that later on in this article, so stay tuned!
Here are a couple more actions you can take to secure forms in WordPress:
Implementing SSL/TLS encryption for WordPress forms
You need to ensure that all data submitted through your forms is transmitted securely using HTTPS. Here are a few ways to do that:
- Obtain and install an SSL/TLS certificate from a trusted Certificate Authority (CA) or your hosting provider. Some hosts offer free SSL certificates via Let’s Encrypt.
- Configure WordPress to use HTTPS.
- Go to Settings → General and update the “WordPress Address (URL)” and “Site Address (URL)” to use https:// instead of http://.
- Use a plugin like Really Simple SSL to automatically detect your SSL certificate and update your site configuration to enforce HTTPS.
All form data will now be encrypted in transit by SSL/TLS as long as your site is accessed over HTTPS. This ensures that sensitive user data (e.g., login credentials, contact form inputs) is protected from interception.
Input validation and sanitization techniques for form fields
For standard fields, Gravity Forms performs basic sanitization, but you can extend or override this in custom field classes.
- Always validate and sanitize user input on the server side, even if you use client-side validation.
- Use Gravity Forms’ built-in validation and sanitization methods whenever possible.
- For custom logic, utilize the appropriate hooks and methods as shown above.
- Test your validation thoroughly to ensure it works as intended and does not inadvertently block valid input or allow unwanted data.
Enhancing security with CAPTCHA in WordPress forms
Adding CAPTCHA to your Gravity Forms is a straightforward process and is essential for protecting your forms from spam and automated bot submissions. Gravity Forms supports Google reCAPTCHA (v2 and v3) as well as Really Simple CAPTCHA.
Here’s how to add CAPTCHA, step-by-step:
1. Choose Your CAPTCHA Type
Gravity Forms natively supports:
- Google reCAPTCHA v2 (Checkbox and Invisible)
- Google reCAPTCHA v3 (via the official Add-On)
- Really Simple CAPTCHA (if the plugin is installed)
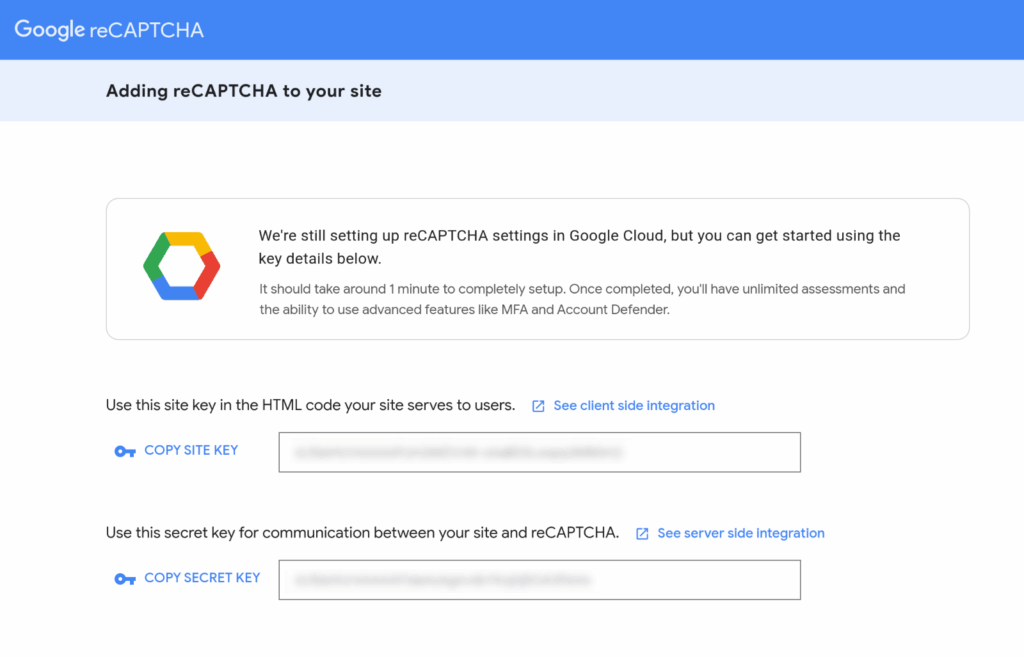
2. Obtain Google reCAPTCHA API Keys
Go to the Google reCAPTCHA Admin Console. Register your site and select the desired reCAPTCHA type (v2 or v3). Add your domain and generate the Site Key and Secret Key.
3. Configure reCAPTCHA in Gravity Forms
For reCAPTCHA v2:
In your WordPress dashboard, go to Forms → Settings → reCAPTCHA. Enter your Site Key and Secret Key under the v2 settings. Choose the reCAPTCHA type (Checkbox or Invisible). This is a global setting for all forms.
For reCAPTCHA v3:
Install the official Gravity Forms reCAPTCHA Add-On (Forms → Add-Ons → reCAPTCHA Add-On → Install/Activate).
Go to Forms → Settings → reCAPTCHA. Enter your v3 Site Key and Secret Key. Set your score threshold and choose whether to display the reCAPTCHA badge.
4. Add the CAPTCHA Field to Your Form
In the form editor, locate the CAPTCHA field under the Advanced Fields section. Drag and drop the CAPTCHA field into your form.
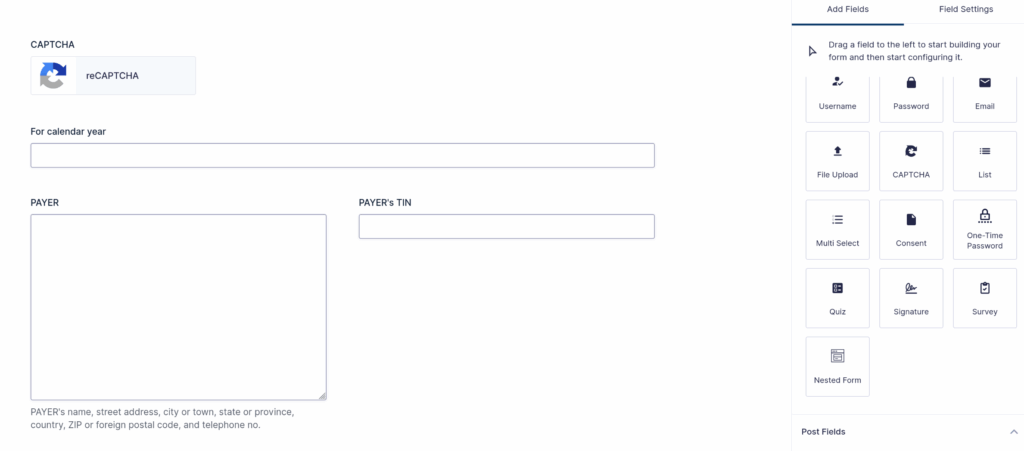
For v2, you can add the CAPTCHA field directly to any form. For v3 (which is invisible), it works in the background and does not require a visible field.
5. Save and Test Your Form
Click Update to save your form. Test the form on your site to ensure the CAPTCHA appears and functions as expected.
Advanced WordPress form security techniques
We’ve covered some pretty basic stuff about securing forms in WordPress. Now let’s get a little more advanced and implement some security measures that will make hackers cry.
One-Time Password verification for enhanced protection
If you get a lot of submissions on your website forms, you probably encounter a lot of bogus entries. Sorting through all that spam to get to the legitimate entries can be a pain.
With One-Time Password you can protect your forms from spammers by adding a simple verification field. Before a user can submit the form, they’ll click a button to send a verification code via email. Once verified, the form can be submitted.
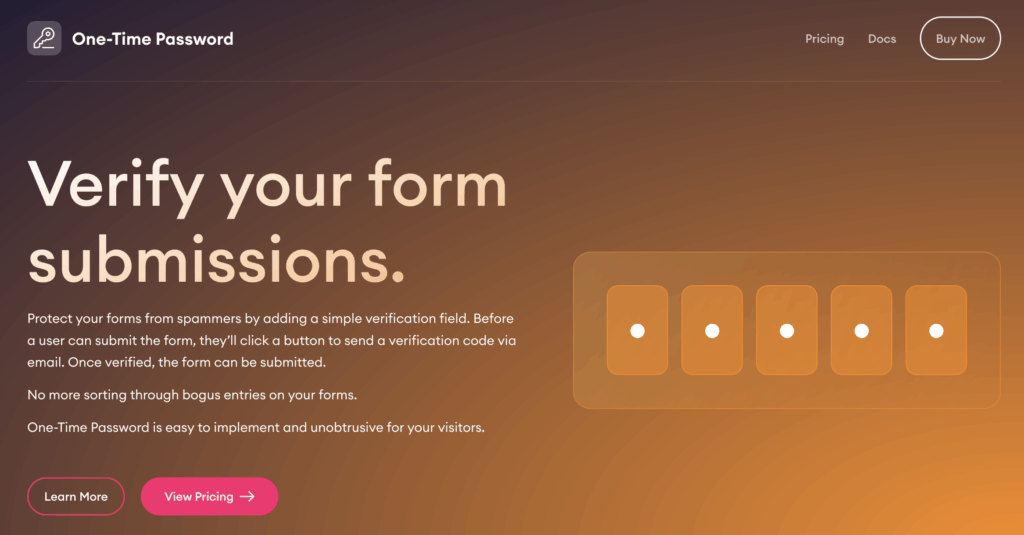
It’s easy to implement — no coding required!
Additional advanced security methods for WordPress forms
Now it’s time to talk about what I mentioned earlier: fixing and customizing user permissions. This is another no-code solution that will go a long way to prevent data breaches in your WordPress forms
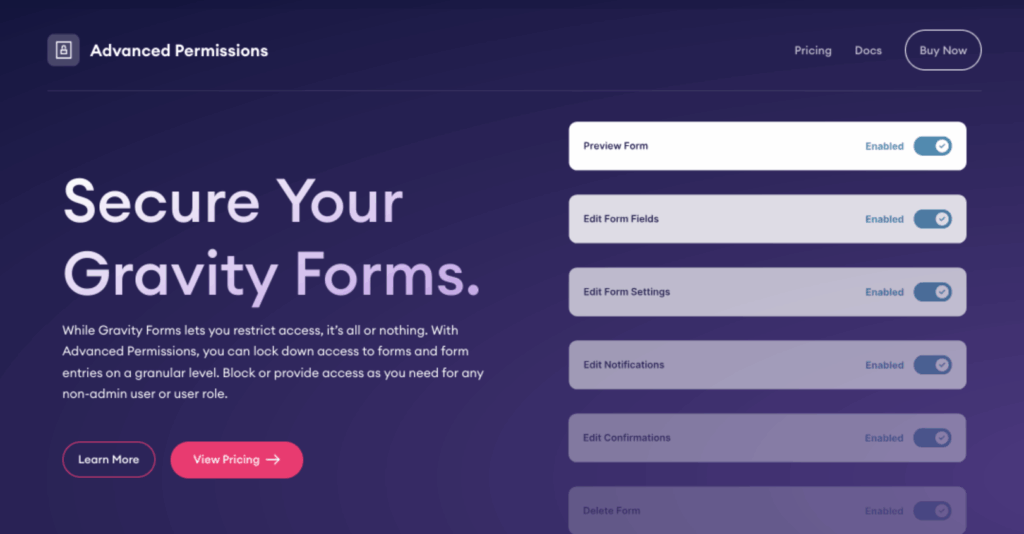
Securing sensitive data in WordPress forms
You might be working hard to keep your form data secure, but there’s one element that’s a challenge to control: other people. When you have multiple users on your WordPress site, it’s impossible to manage security on their end. If they have access to form data and their account is compromised, you could be in for a world of trouble.
The solution? Set up controls for users and roles in advance!
With Advanced Permissions, you can granularly control who can view or edit each field and setting in your Gravity Forms, applying rules per user or role, and even using conditional logic for dynamic restrictions. This ensures that users only see and interact with the parts of forms and settings relevant to them, significantly enhancing security and usability.
Implementing field-level and setting-level restrictions
Sound good? Here’s how you can implement these restrictions:
1. Install and Activate Advanced Permissions
Ensure Gravity Forms is installed and activated. Purchase, install, and activate the Advanced Permissions add-on from Cosmic Giant. After activation, a new Permissions option appears under the Gravity Forms menu in your WordPress admin.
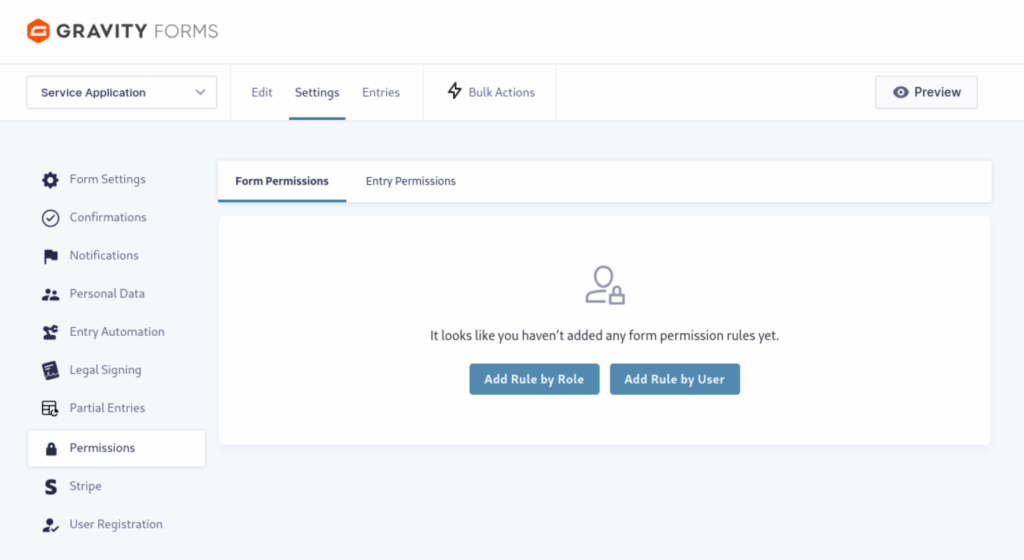
2. Access Permissions Settings
In the WordPress admin, go to your desired form. Click on Settings in the top menu bar, then select Permissions from the dropdown.
3. Create and Configure Rulesets
Field-Level Restrictions
Within the Permissions interface, you can specify which user roles or individual users have access to each field in the form.
For example, you can:
- Hide specific fields from certain user roles (e.g., only admins see a “Notes” field).
- Allow editing of certain fields only for specific users or roles.
This is managed by setting each capability (inherit, enable, or disable) for each field and user/role.
Setting-Level Restrictions
Similarly, you can restrict access to form settings, notifications, confirmations, and integrations.
For each form setting or configuration area, you can:
- Allow or block editing/viewing access for specific roles or users.
- Prevent non-admins from altering critical form configurations, making forms “client proof.”
For example, say you have someone in the Contributor role on your site. You only want them to write posts, but not edit forms, and you only want them to see form entries from other Contributors. First, disable all Form and Entry Permissions for that role.
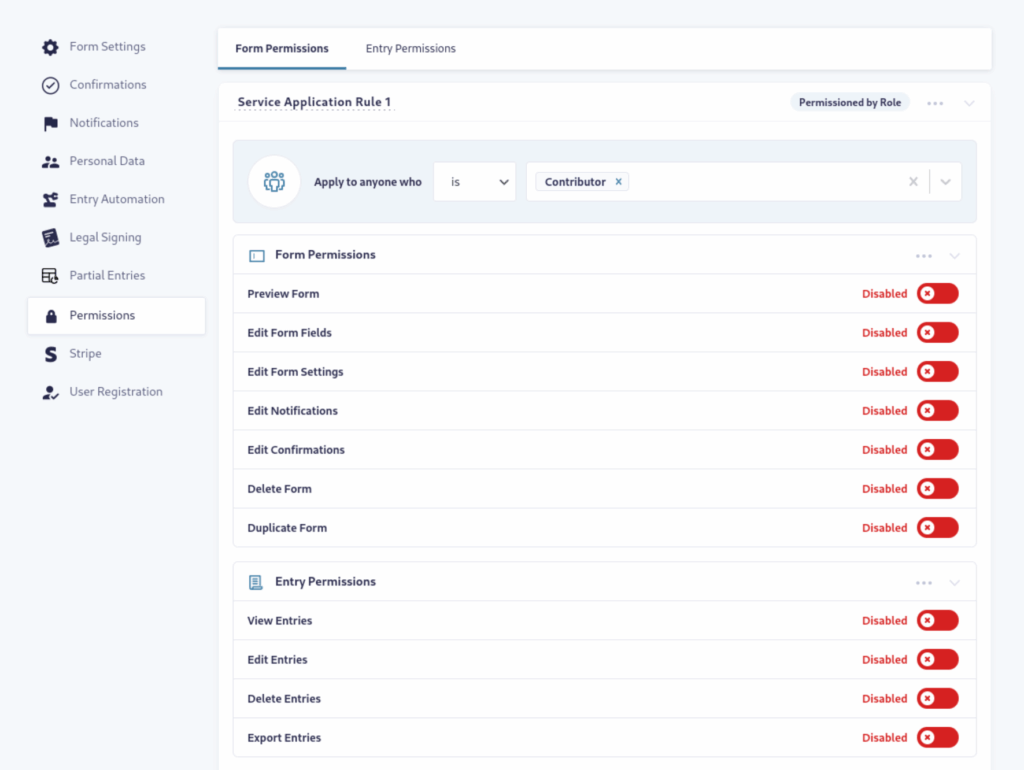
Then, switch to the Entry Permissions tab. There, you can set up specific rules for viewing entries.

4. Apply Conditional Logic (Optional)
Advanced Permissions supports role-based conditional logic, allowing you to dynamically show or hide fields and settings based on the currently logged-in user’s role.
This enables complex scenarios, such as showing financial fields only to users in the “Finance” role. You can get as granular as you want with conditional logic!
5. Save and Test
After configuring your rulesets, save your changes. Test by logging in as different users/roles to verify that access is restricted as intended.
User role-based access control for form data
Using Advanced Permissions, you create the rules for users and roles for each form in advance.
If you create many forms, you may not have time to set up individual permissions for each one immediately. For this you can set up default permissions, which will be automatically applied to each new form. Navigate to Forms → Advanced Permissions → Default Permissions.
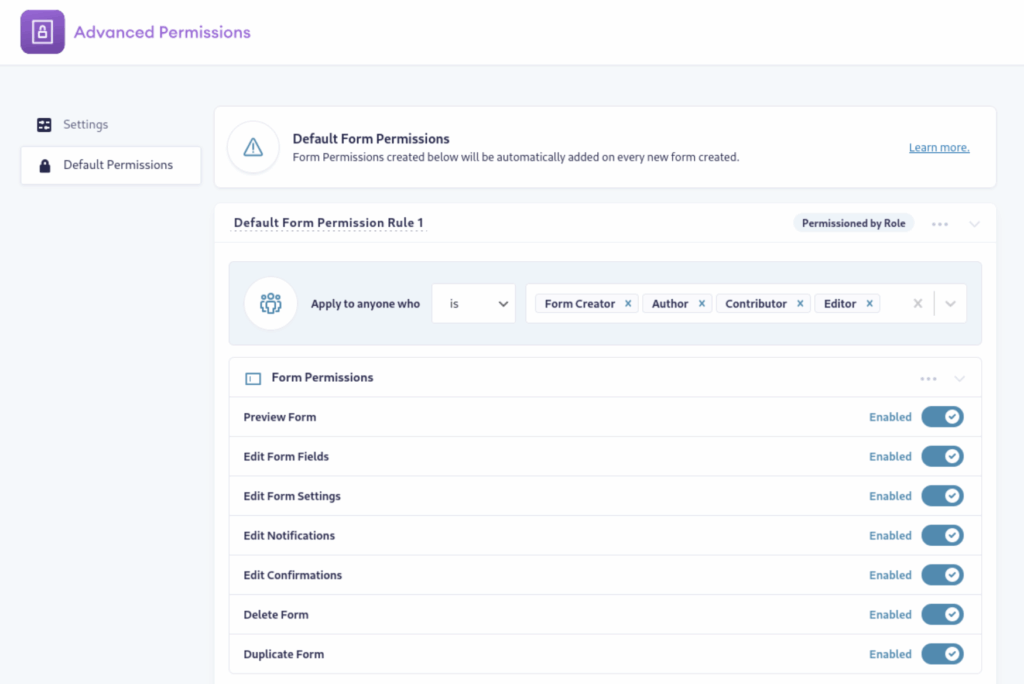
You can set up rules just as you did for individual forms. In this area you can even control permissions for other add-ons you use with Gravity Forms.
Enhancing WordPress form security for document generation
Everything we’ve discussed so far has assumed that your users submit a form and you make sure the submitted data is secure. But what if you’re generating PDF documents from your web forms? In that case, there are a few more considerations to make.
Secure e-signatures and PDF generation in forms
The easiest, most secure method for generating PDFs is to use Fillable PDFs, an add-on that lets you store generated PDFs locally and send them to your team and customers automatically.

You can use your own templates — no need to reinvent the wheel and there’s nothing extra to purchase. Fillable PDFs is easy to use. The basic steps are:
- Upload your premade PDF form template (created using Adobe Acrobat or similar).
- Create a form using Gravity Forms, with fields that match your template.
- Map the fields in your template to the web form.
- Set up notifications so the generated PDFs get emailed wherever you like.
The add-on uses the existing Gravity Forms UI, so setting up PDF generation will feel very intuitive.
Protecting form submissions with password encryption
Once you have your form set up to generate PDFs, you can implement some extra security that will keep the public from accessing the PDFs and user data.
In your form, navigate to Settings → Fillable PDFs → Advanced Settings.

At minimum, check the box under Disable Public Access. That will prevent anyone who is not logged in to your site from downloading the PDF.
For even better security, enter passwords in the Owner and User fields. Then you can set File Permissions to allow any actions users are allowed. Once the PDF is generated, anyone opening it will need to enter the password.
When you combine Advanced Permissions with Fillable PDFs, you’re well on your way to preventing data breaches in your WordPress forms.
Compliance and WordPress form security
Securing your forms and GDPR compliance go hand-in-hand. Let’s talk about how to meet GDPR and HIPAA requirements using Gravity Forms.
Meeting GDPR requirements in form data collection
Gravity Forms provides some built-in features that help meet GDPR requirements, such as:
- A “Personal Data” tab in Form Settings, allowing integration with WordPress’s Export and Erase Personal Data tools.
- Admins can select specific fields to be anonymized, enhancing privacy for sensitive data.
- Gravity Forms allows you to prevent the storage of IP addresses.
- Consent checkboxes can be added to forms to ensure users provide explicit permission before submitting personal data.
At its core, WordPress also provides features to help you manage user data rights and respond to access or deletion requests, ensuring compliance with GDPR requirements.
Export Personal Data
WordPress includes a tool to export a user’s personal data. You can access this by navigating to the Tools menu in your WordPress dashboard and selecting Export Personal Data. Here, you can process requests from users who want a copy of their data. The system will send an automated confirmation email to the requester. Once confirmed, WordPress generates a downloadable ZIP file containing the user’s data.
Erase Personal Data
Similarly, you can handle deletion requests by choosing Erase Personal Data under the Tools menu. After confirmation, this process removes the user’s information from your website.
Both of these methods work fine for handling requests manually. For a more detailed tutorial and to learn how to automate the process, read our article, Make WordPress Forms Meet GDPR Requirements.
Ensuring HIPAA compliance for healthcare-related forms
Gravity Forms is not inherently HIPAA-compliant. Its default configuration stores unencrypted data and lacks BAA coverage. For full HIPAA compliance—including legal, administrative, and technical requirements — we recommend using a specialized HIPAA forms plugin, such as HIPAA FORMS by Code Monkeys LLC, which is designed specifically for HIPAA compliance, provides encrypted storage, and offers BAA coverage.
Important: Consult a HIPAA compliance expert to validate your setup. There are strict rules regarding HIPPA, and you don’t want to risk a fine for non-compliance.
Implement robust WordPress form security measures today
Protecting your WordPress forms from data breaches isn’t difficult, it just requires an understanding of where the vulnerabilities lie and how to mitigate them.
By using core WordPress tools, creating forms with Gravity Forms, and utilizing add-ons like Advanced Permissions and Fillable PDFs, you can ensure that your users’ sensitive data stays private.