Accepting and displaying user-submitted posts on your site (for example, in a WordPress frontend post table) is a great way to generate user engagement. There are tons of ways you can accept and use user-submitted posts to grow your business, boost conversions, or engage visitors.
For example, if you can encourage visitors to submit events, get listed in your member directory, or submit documents to your document library. The possibilities are virtually endless!
In this article, we’ll show you how you can use Gravity Forms paired with Entry Automation to accept user-submitted posts from visitors and then display them in a WordPress frontend post table with Posts Table Pro.
Collecting and Displaying User-Submitted Posts in WordPress
If you’re running a website that has a large following, you might consider setting up a system that allows visitors to submit content to you. This is a great way to generate user engagement, build a community, and grow your brand.
Here are just some ideas for collecting user-submitted content (including post submissions!):
- Events. If you have an event listings website, you can encourage visitors to submit events through your website. You could ask users to send event details such as the event name, venue, and date.
- Member directory. If you run a membership site or a local club (e.g., a sports club), you might want to give members the option to get listed on your website. One way to do this is by creating a member directory that lets members submit their own information through a simple contact form.
- Documents and files. If you’re running a business or educational institute, you might want to let staff or students upload documents to a document library. You can then make these documents and files available for download.
- User-generated content. With any use case where you’re using user-generated content or guest posts – perhaps a travel blogging community, a local news site, or a fiction writing group – frontend post submission is a great way to allow users to contribute content with a simple submission form, rather than requiring them to use the WordPress backend.
Gravity Forms, Entry Automation, and Posts Table Pro make it easy for website owners to collect and display user-submitted content in a WordPress front-end post table. You can also use the Advanced Permissions plugin to control who has access to your forms.
We’ll use “user-submitted content” and user-submitted posts” interchangeably: this will work with any WordPress post type, which includes posts, pages, and custom post types.
How to Display User-Submitted Posts in a WordPress Front-End Post Table
In this section, we’ll explain how you can use the functionality of Gravity Forms with Entry Automation to create a frontend post submission form to collect user-submitted posts and then use the Posts Table Pro plugin to display it in a WordPress front-end post table.
This is an entirely no-code solution designed to work with any WordPress Theme, meaning that whatever your level of PHP/CSS/HTML knowledge, you’ll be able to start accepting user-submitted posts in no time.
For this tutorial, we’ll assume you already have all three WordPress plugins installed and activated on your WordPress site.
Step #1: Collect User-Submitted Posts
The first step is to use Gravity Forms to create a front-end form that users can submit content through. For this tutorial, we’ll create a form that lets users submit events, but you can use a similar method to accept any kind of post content.
Go to Forms → New Form from the WordPress admin panel.
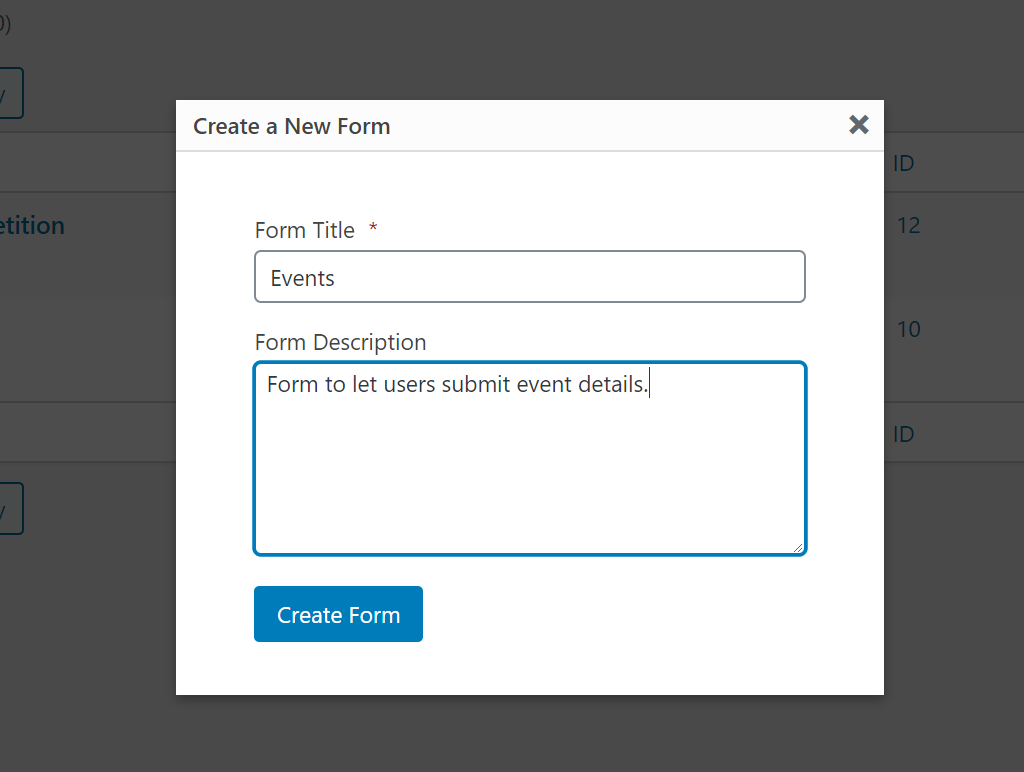
Give the form a title and description, and click the Create Form button.
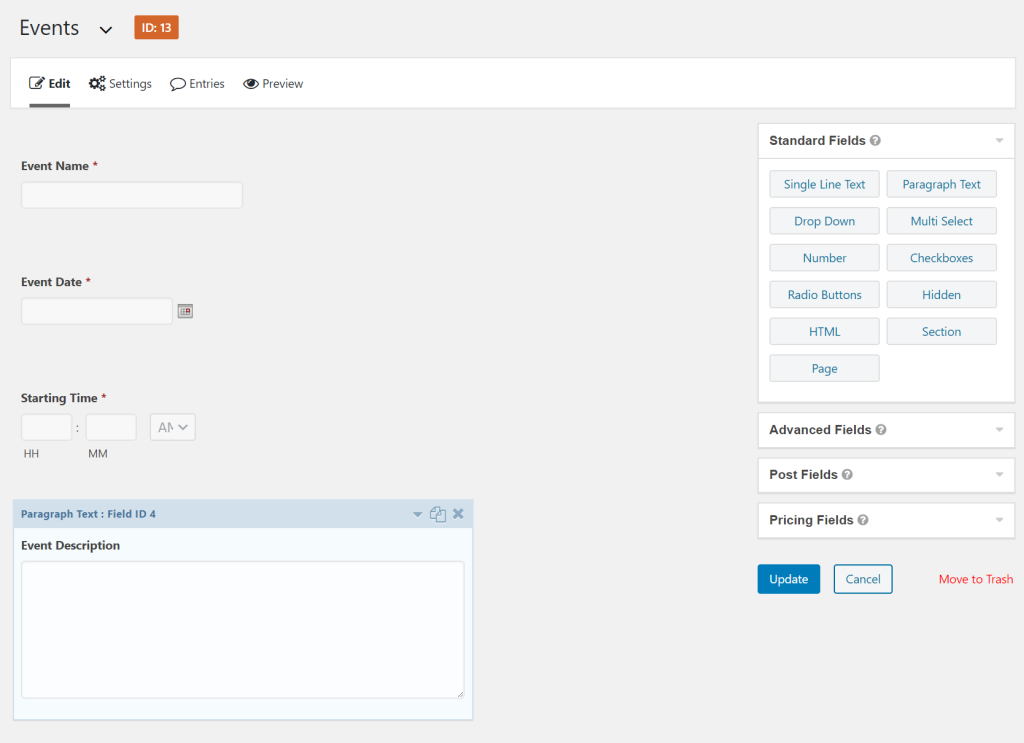
You’ll be redirected to the Gravity Forms drag-and-drop form builder. Use the form fields on the right-hand side of the page to create your front-end form. It might look something like this:
You can use a pre-existing form template or use the drag-and-drop builder to create your own form from scratch. For the time being, you don’t need to worry about changing any of the form settings.
Click the Update button to save changes and continue.
Create a new page in WordPress and use the Form block to add your new frontend posting form:
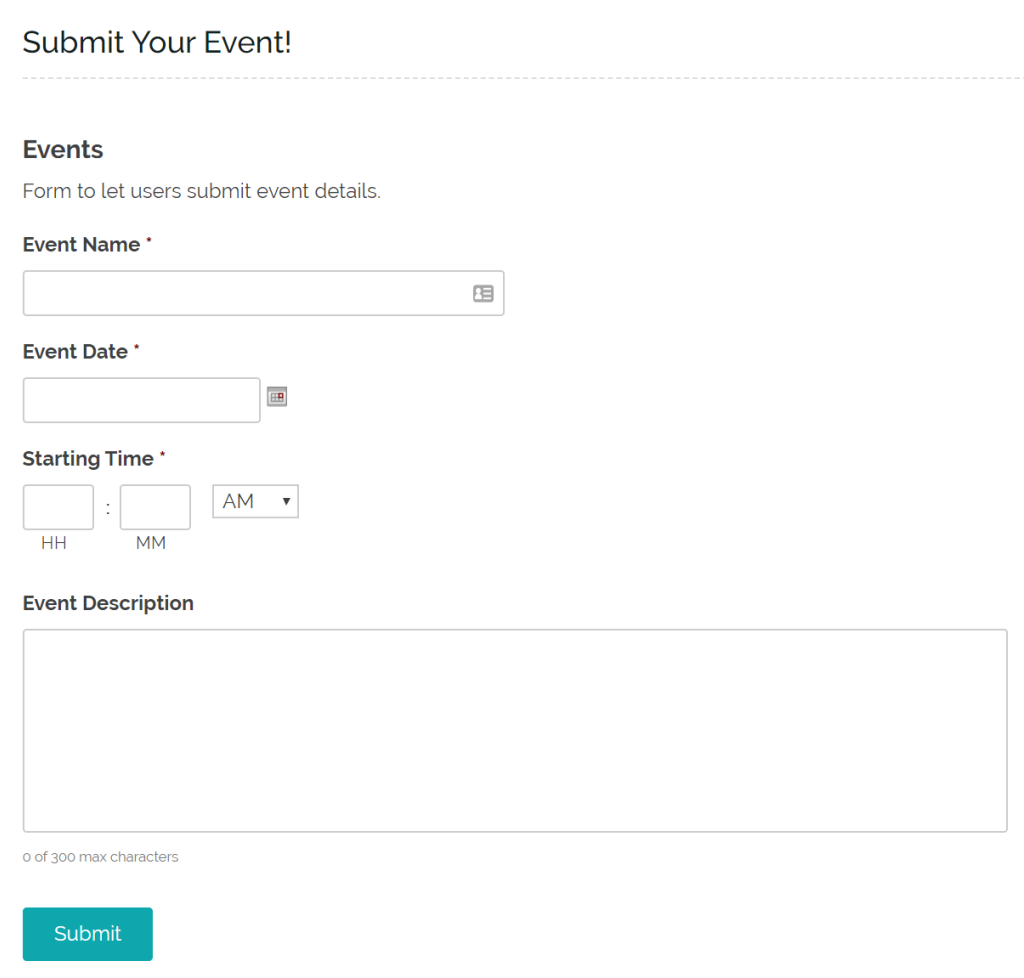
Your site’s visitors will be able to use this form to submit event details. You can then use the Entry Automation plugin to automatically export your submissions whenever a new one is added. Here’s how:
Go to Settings → Entry Automation from your form and click the Add New button. Give the task a name and select the On Form Submission task type.
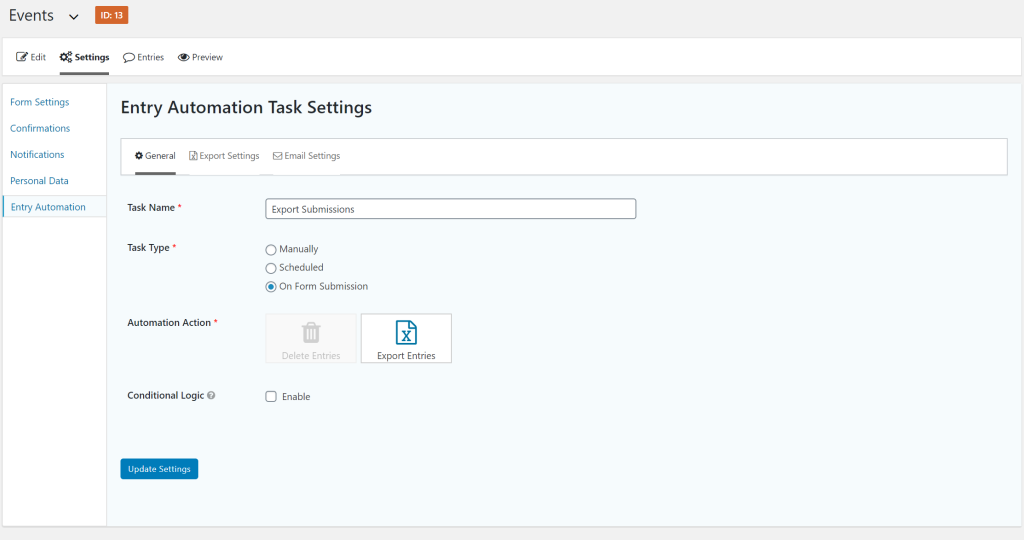
Next, set Automation Action to Export Entries. Finally, click the Update Settings button.
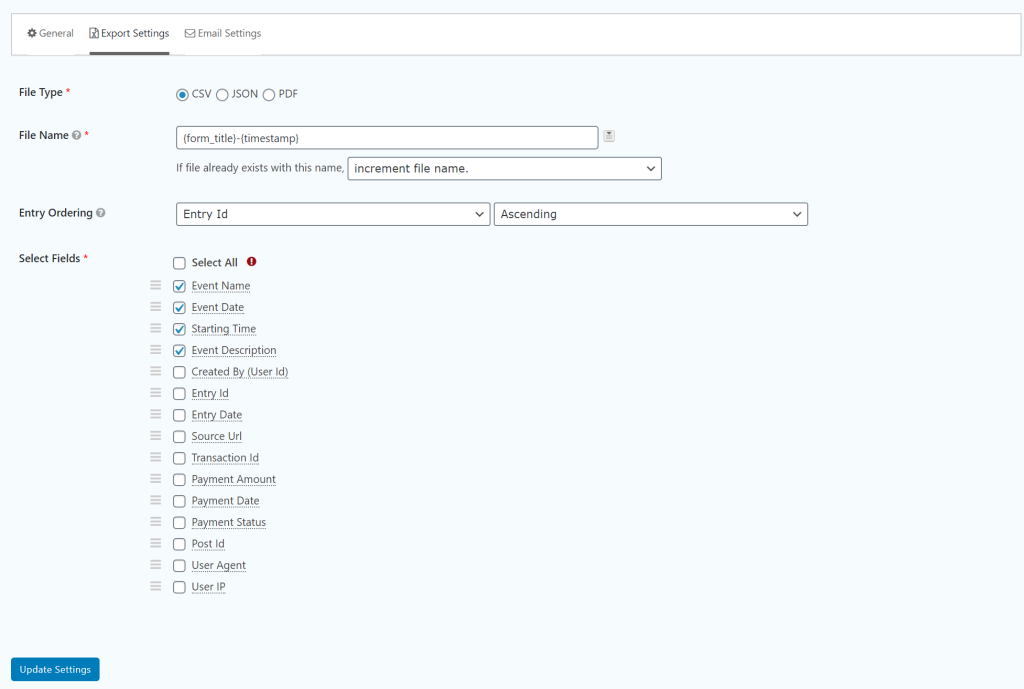
Configure the Export Settings by selecting a file type (CSV, JSON, or PDF), selecting a file naming convention, and selecting the fields you’d like to export.
Note: You can also use the Entry Automation plugin for GDPR compliance, as well as automatically sending email notifications to users who submit new posts.
Click Update Settings to proceed.
Step #2: Store the Content as a WordPress Post
Whenever a user fills out and submits the form, the event details will be emailed to you, stored in the WordPress database, and exported as a CSV, JSON, or PDF file (depending on how you configured the Entry Automation plugin).
However, you’ll need a way to store the user-submitted posts directly as a WordPress post or custom post type. This way, you can automatically display the event details in a WordPress front-end post table instead of doing it manually.
Store Content as a WordPress Post
The easiest way to store user-submitted posts as WordPress posts is by using the Gravity Forms Post Fields. All you have to do is tweak your form to use the Post Fields instead of the Standard Field type.
Accepting and displaying user-submitted posts on your site (for example, in a WordPress front-end post table) is a great way to generate user engagement. There are tons of ways you can accept and use user-submitted posts to grow your business, boost conversions, or engage visitors.
For example, if you can encourage visitors to submit events, get listed in your member directory, or submit documents to your document library. The possibilities are virtually endless!
In this article, we’ll show you how you can use Gravity Forms paired with Entry Automation to accept user-submitted posts from visitors and then display them in a WordPress front-end post table with Posts Table Pro.
Collecting and Displaying User-Submitted Posts in WordPress
If you’re running a website that has a large following, you might consider setting up a system that allows visitors to submit content to you. This is a great way to generate user engagement, build a community, and grow your brand.
Here are just some ideas for collecting user-submitted content (including post submssions!):
- Events. If you have an event listings website, you can encourage visitors to submit events through your website. You could ask users to send event details such as the event name, venue, and date.
- Member directory. If you run a membership site or a local club (e.g. a sports club), you might want to give members the option to get listed on your website. One way to do this is by creating a member directory that lets members submit their own information.
- Documents and files. If you’re running a business or educational institute, you might want to let staff or students upload documents to a document library. You can then make these documents and files available for download.
- User generated content. With any use case where you’re using user generated content or guest posts – perhaps a travel blogging community, a local news site, or a fiction writing group – frontend post submission is a great way to allow users to contribute content with a simple submission form, rather than requiring them to use the WordPress backend.
Gravity Forms, Entry Automation, and Posts Table Pro make it easy for website owners to collect and display user-submitted content in a WordPress front-end post table. You can also use the Advanced Permissions plugin to control who has access to your forms.
We’ll use “user-submitted content” and user-submitted posts” interchangeably: this will work with any WordPress post type, which includes posts, pages, and custom post types.
How to Display User-Submitted Posts in a WordPress Front-End Post Table
In this section, we’ll explain how you can use the functionality of Gravity Forms with Entry Automation to create a frontend post submission form to collect user-submitted posts and then use the Posts Table Pro plugin to display it in a WordPress front-end post table. For this tutorial, we’ll assume you already have all three WordPress plugins installed and activated on your WordPress site.
Step #1: Collect User-Submitted Posts
The first step is to use Gravity Forms to create a front-end form that users can submit content through. For this tutorial, we’ll create a form that lets users submit events, but you can use a similar method to accept any kind of post content.
Go to Forms → New Form from the WordPress admin panel.
Give the form a title and description and click the Create Form button.
You’ll be redirected to the Gravity Forms drag-and-drop form builder. Use the form fields on the right-hand side of the page to create your front-end form. It might look something like this:
You can use a pre-existing form template, or use the drag-and-drop builder to create your own form from scratch. Click the Update button to save changes and continue.
Create a new page in WordPress and use the Form block to add the new form to it. It should look something like this on the front-end:
Your site’s visitors will be able to use this form to submit event details. You can use the Entry Automation plugin to automatically export your submissions whenever a new one is added. Here’s how:
Go to Settings → Entry Automation from your form and click the Add New button. Give the task a name and select the On Form Submission task type.
Next, set Automation Action to Export Entries. Finally, click the Update Settings button.
Configure the Export Settings by selecting a file type (CSV, JSON, or PDF), selecting a file naming convention, and selecting the fields you’d like to export.
Note: You can also use the Entry Automation plugin for GDPR compliance.
Click Update Settings to proceed.
Step #2: Store the Content as a WordPress Post
Whenever a user fills out and submits the form, the event details will be emailed to you, stored in the WordPress database, and exported as a CSV, JSON, or PDF file (depending on how you configured the Entry Automation plugin).
However, you’ll need a way to store the user-submitted posts directly to a WordPress post or custom post type. This way, you can automatically display the event details in a WordPress front-end post table instead of doing it manually.
Store Content as a WordPress Post
The easiest way to store user-submitted posts as WordPress posts is by using the Gravity Forms Post Fields. All you have to do is tweak your form to use the Post Fields instead of the Standard Field type.
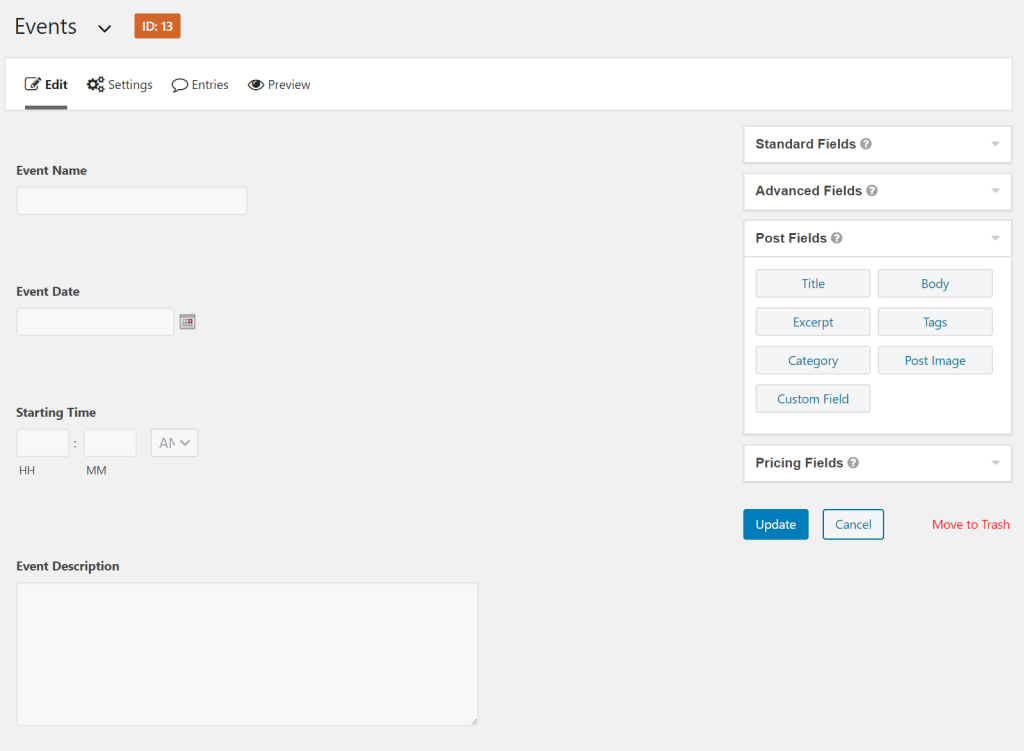
Following our example, we replaced:
- Single Line Text with Title
- Date with Custom Field (set to Date)
- Time with Custom Field (set to Time)
- Paragraph Text with Body
In this instance, we’re just using a very few simple text fields, but you can make full use of Gravity Forms’ custom form fields to suit your needs – for example, adding a file uploader field to allow users to set a featured image for their post, adding checkboxes so users can choose the post status of their submitted post, as well as fields for post author, post title, and so on. Gravity Forms gives you unlimited form customization potential, so feel free to experiment and build a form that suits your needs.
Click the Update button to continue.
Store Content as a WordPress Custom Post Type
Another way to store content directly to WordPress is by creating a custom post type. You can do this using the Gravity Forms + Custom Post Types plugin. We recommend using the free WordPress plugin Pods to create new custom post types, custom taxonomies, and advanced content types in WordPress.
Following our example, you might create a custom post type called Event Submissions. You can then follow the step-by-step instructions provided on the plugin page to map the fields in your form to the custom post type. New posts submitted through the WordPress frontend form will automatically map themselves to this new content type.
Step #3: Display User-Submitted Posts in a WordPress Front-End Post Table
Now that the user-submitted post is being saved directly to WordPress, the final step is frontend publishing. For this, we’ll use the Posts Table Pro plugin to create a WordPress front-end post table.
Head over to Settings → Posts Table Pro from the WordPress admin panel and configure the following settings:
Set the Post type to post using the dropdown menu. If, however, you created a custom post type, use the dropdown menu to select the correct slug.
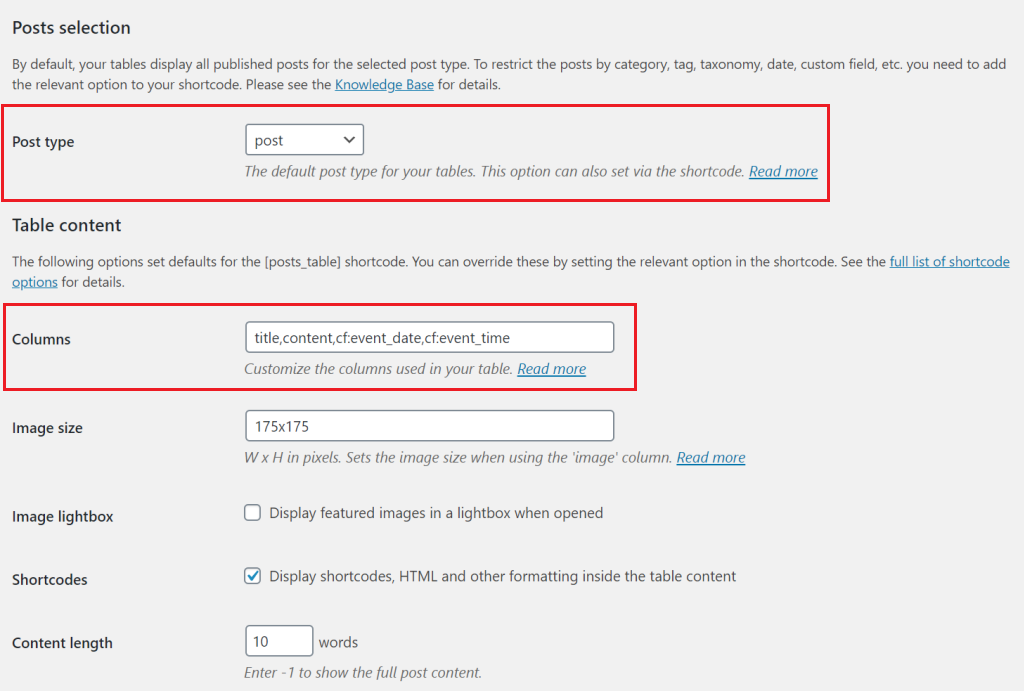
Use the Columns option to set the columns you’d like to display in the WordPress front-end post table. For example, for our event listings site, we might want to display the event name, date, starting time, and description.
Feel free to configure Table loading, Sorting, and Table controls settings however you’d like based on the type of content you’re collecting and how you’d like to display it on the front-end.
Once you’re done, click the Save Changes button to continue.
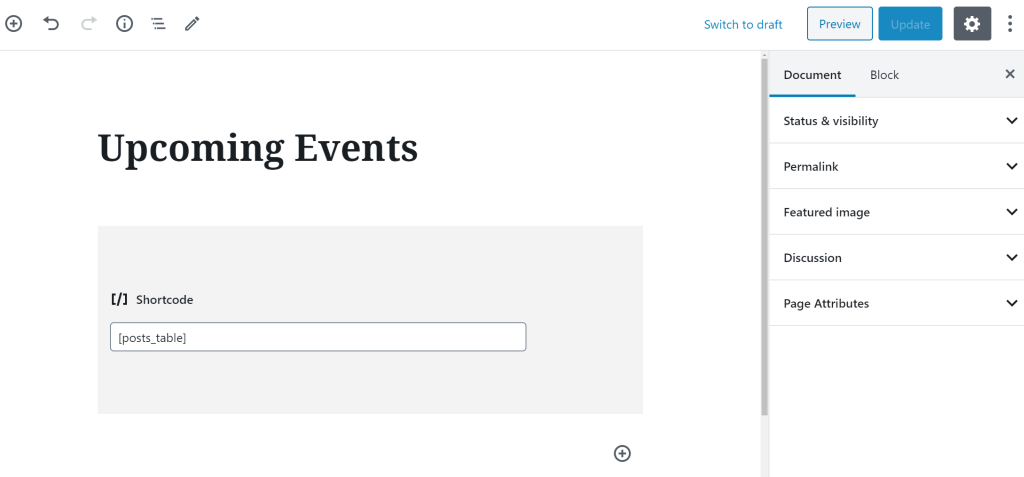
Create a new page to display the WordPress front-end post table. Add the shortcode [posts_table] to a shortcode block and click the Publish… button. Your page should look something like this on the front-end:
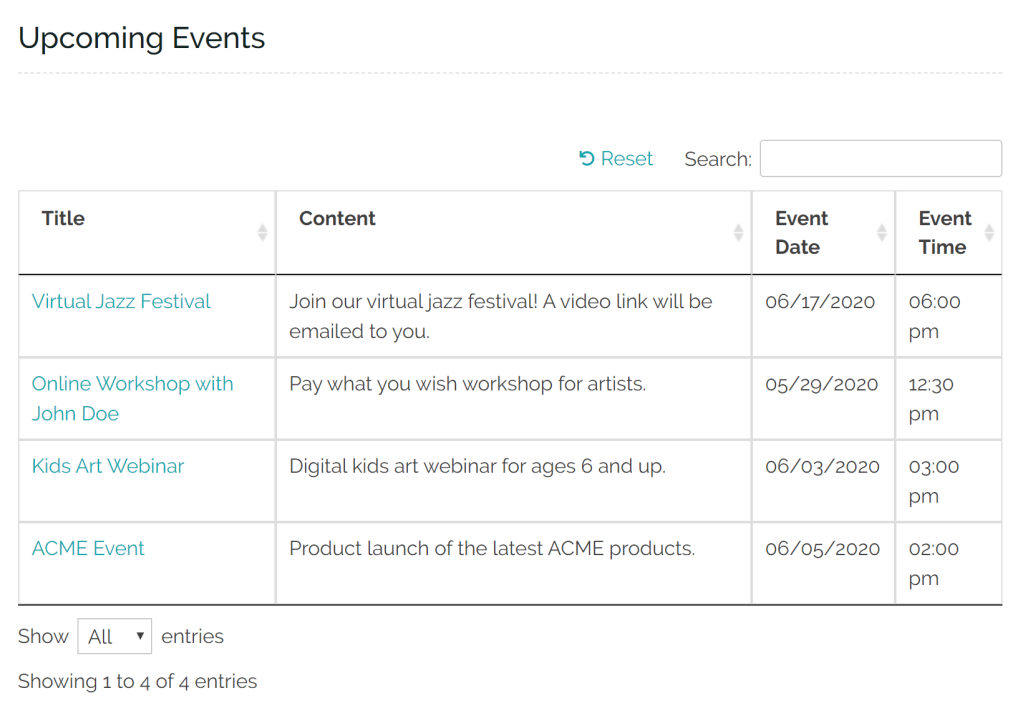
The Posts Table Pro plugin lets you display as many WordPress front-end post tables as you’d like. You can choose which content to display in each table based on category, taxonomy, custom fields, date, and more.
Bonus: Control Who Has Access to Your Form
Depending on the type of form you’re creating and the sort of user-submitted content you’re collecting on your WordPress website, you might need to control who has access to your forms. The easiest way to do this is by using the Advanced Permissions plugin.
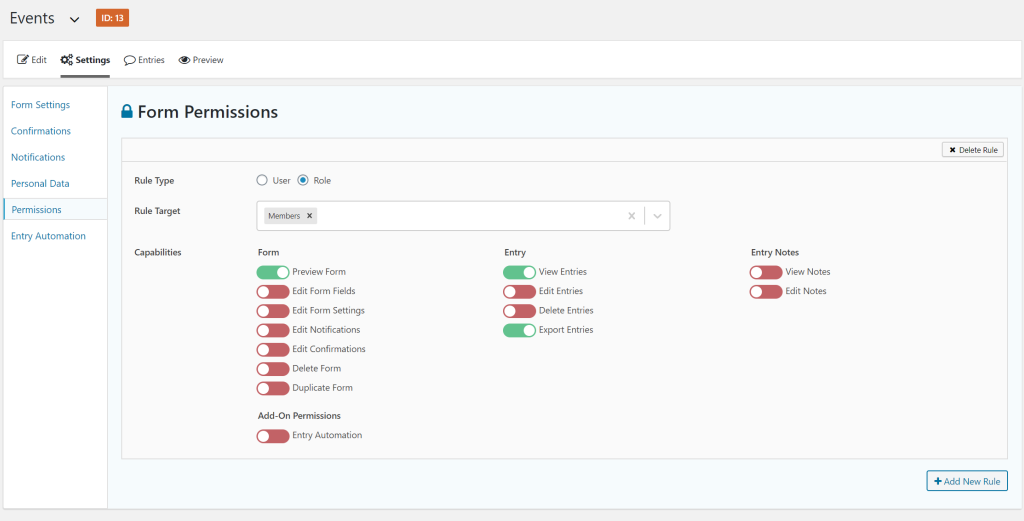
Go to Settings → Permissions from your form and click the Click here to create your first permissions rule link.
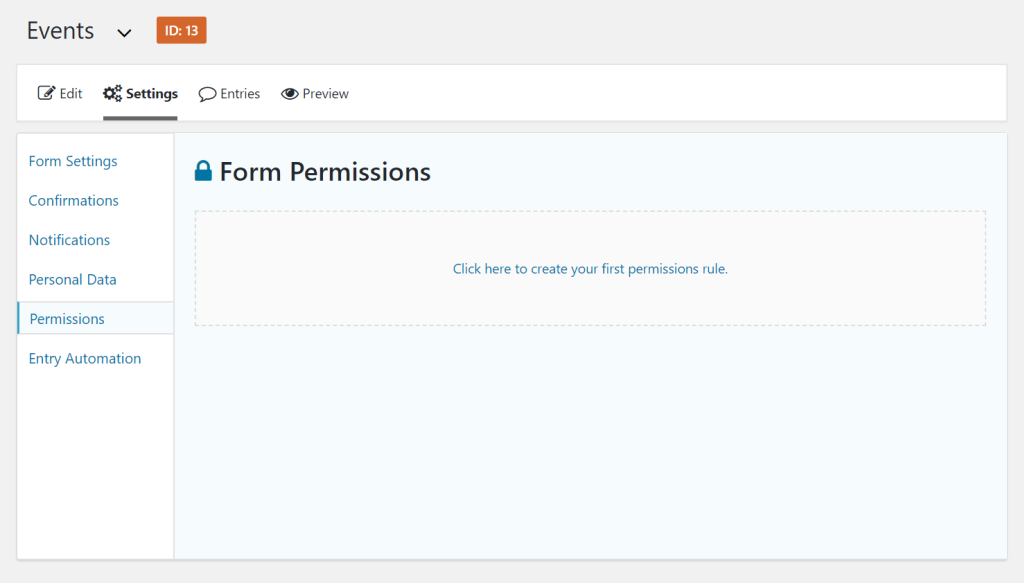
You can choose to restrict access to specific users or by user roles. Once you’ve set the Rule Target, simply enable the Capabilities you’d like to assign them. This will then apply a validation check on users on the page and only allow users with certain roles to, for example, submit posts through the forms. Users who aren’t logged in won’t be able to submit posts, and users of a certain other role type will be able to submit forms through the frontend but not through /wp-admin. You can configure your form permissions however you like.
Start Accepting User-Submitted Posts Today
The Gravity Forms plugin makes it easy to start accepting user-submitted post. Pair it with Posts Table Pro to display the user-submitted content in a WordPress front-end post table.
To take things to the next level, you can use Advanced Permissions to control who has access to your forms and Entry Automation to remain GDPR compliant and export entries to either a CSV, JSON, or PDF file.
Ready to start accepting user-submitted posts? Get Posts Table Pro and Advanced Permissions today!
.
Following our example, we replaced:
- Single Line Text with Title
- Date with Custom Field (set to Date)
- Time with Custom Field (set to Time)
- Paragraph Text with Body
Click the Update button to continue.
Store Content as a WordPress Custom Post Type
Another way to store content directly to WordPress is by creating a custom post type. You can do this using the Gravity Forms + Custom Post Types plugin. We recommend using the free Pods plugin to create a new custom post type in WordPress.
Following our example, you might create a custom post type called Event Submissions. You can then follow the step-by-step instructions provided on the plugin page to map the fields in your form to the custom post type.
Step #3: Display User-Submitted Posts in a WordPress Front-End Post Table
Now that the user-submitted post is being saved directly to WordPress, the final step is to display it on the front-end. For this, we’ll use the Posts Table Pro plugin to create a WordPress front-end post table.
Head over to Settings → Posts Table Pro from the WordPress admin panel and configure the following settings:
Set the Post type to post using the dropdown menu. If, however, you created a custom post type, use the dropdown menu to select the correct slug.
Use the Columns option to set the columns you’d like to display in the WordPress front-end post table. For example, for our event listings site, we might want to display the event name, date, starting time, and description.
Feel free to configure Table loading, Sorting, and Table controls settings however you’d like based on the type of content you’re collecting and how you’d like to display it on the front-end.
Once you’re done, click the Save Changes button to continue.
Create a new page to display the WordPress front-end post table. Add the shortcode [posts_table] to a shortcode block and click the Publish… button. Your page should look something like this on the front-end:
The Posts Table Pro plugin lets you display as many WordPress front-end post tables as you’d like. You can choose which content to display in each table based on category, taxonomy, custom fields, date, and more.
Bonus: Control Who Has Access to Your Form
Depending on the type of form you’re creating and the sort of user-submitted content you’re collecting, you might need to control who has access to your forms. The easiest way to do this is by using the Advanced Permissions plugin.
Go to Settings → Permissions from your form and click the Click here to create your first permissions rule link.
You can choose to restrict access to specific users or by user roles. Once you’ve set the Rule Target, simply enable the Capabilities you’d like to assign them.
Start Accepting User-Submitted Posts Today
The Gravity Forms plugin makes it easy to start accepting user-submitted posts. Pair it with Posts Table Pro to display the user-submitted content in a WordPress front-end post table.
To take things to the next level, you can use Advanced Permissions to control who has access to your forms and Entry Automation to remain GDPR compliant and export entries to either a CSV, JSON, or PDF file.
Ready to start accepting user-submitted posts? Get Posts Table Pro and Advanced Permissions today!