Setting Up a Send Notification Task
Introduction
A Send Notification task allows you more control over your standard Gravity Forms notifications.
With this action type selected in a task, you can set up advanced routines around your notifications such as delaying notifications, setting up reminder notifications, initiating a drip style marketing campaign to the submitter, bulk resending notifications with more granular filtering than available in core Gravity Forms, the list goes on. In this documentation article we’ll walk through all the core settings modules available when setting up a Send Notification task.
Configuring General Task Settings
The General settings tab of a Send Notification task contains most of the baseline settings you’ll use to set up the framework of the task including items like the Task type, how often your Task will run, and what entries will get included when it runs.
Task Settings
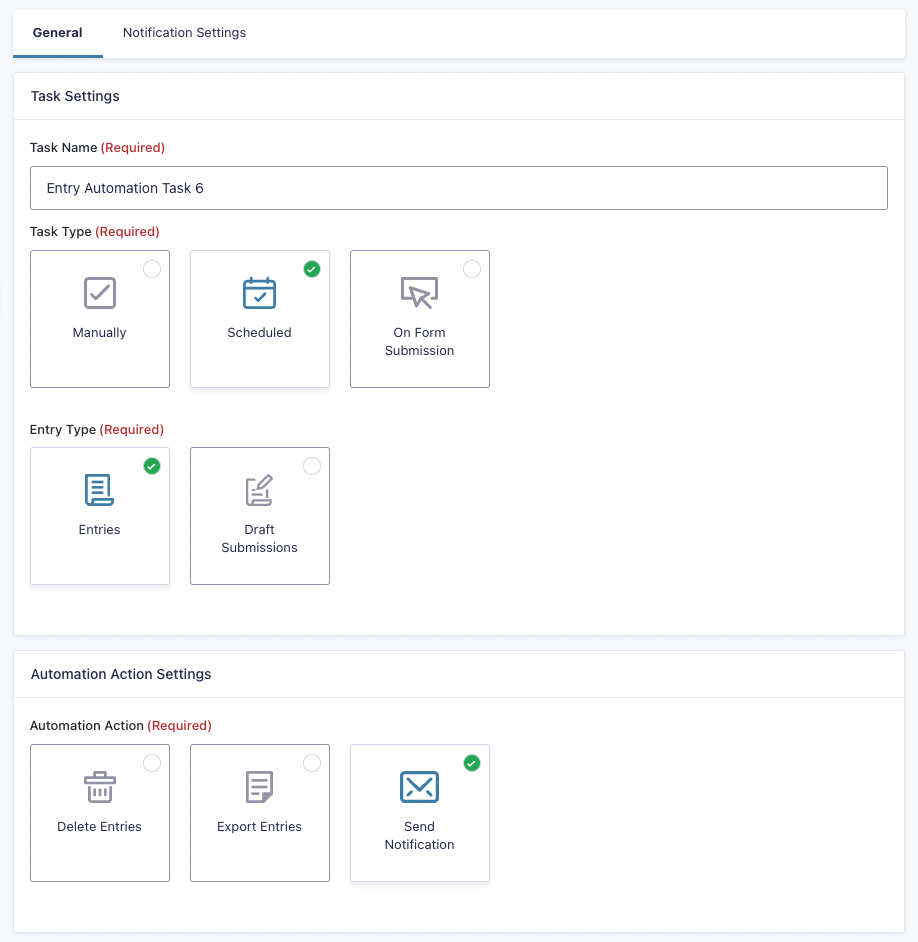
Here you’ll configure a few baseline settings of the task including its name and what basis you’d like it to run on. To get started:
- If desired, rename the task from the default generated name.
- Select your task type. You can choose between the following options:
- Manually – The Task can only be run manually via the “Run Task Now” button available when editing a Task.
- Scheduled – The Task will run on a schedule that is configured within the Task.
- On Form Submission – The Task will run each time the form is submitted.
Automation Action Settings
This section allows you to select what you want your Task to do, since we’re talking about the Send Notification action here you’ll want to select the Second Notification choice.
Schedule Settings
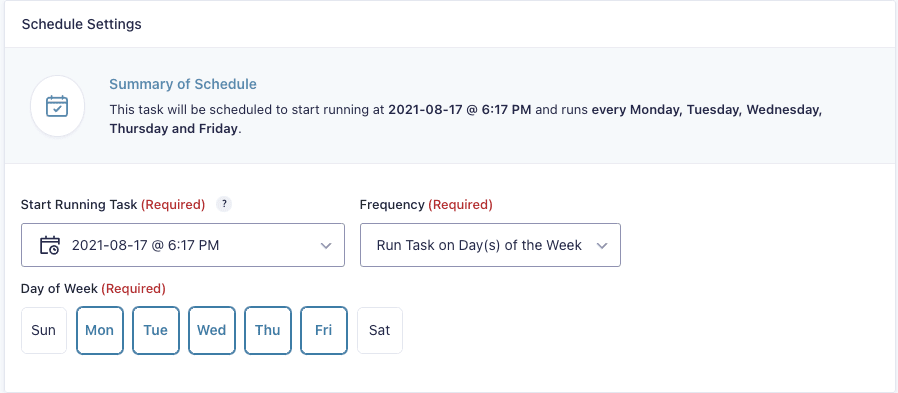
If running a Task with the Scheduled type selected, the Schedule Settings section will be available in the General settings tab.
Here you can control how often and when the task will run and send your selected notification.
- Set your desired first run time for the task, all future tasks will begin running relative to this time based on the frequency you choose.
- Configure your frequency the task will run in the Frequency dropdown. You can choose from:
- Run Task Every… – Allows you to set a custom interval of Minutes, Hours, Days, Weeks, or Months at which the task should be run, e.g. every 1 Hour or every 2 Days.
- Run Task on Day(s) of the Week – Allows you to set which days of the week the task will be run, e.g. you can set up a Task that only runs every Monday, Wednesday, and Friday.
- Run Task on Day(s) of the Month – Allows you to set which days of the month the task will run, e.g. you can set up a task that only runs on the 1st, 15th, and 31st of each month. (Note: In this example if the current month has less than 31 days the task will still run on the correct equivalent day relative to the amount of days in the month.)
- Once you’ve configured your schedule, you’ll want to double-check the Summary of Schedule at the top of the settings box to verify the description of the schedule output there matches your desired schedule.
Target Entries Settings
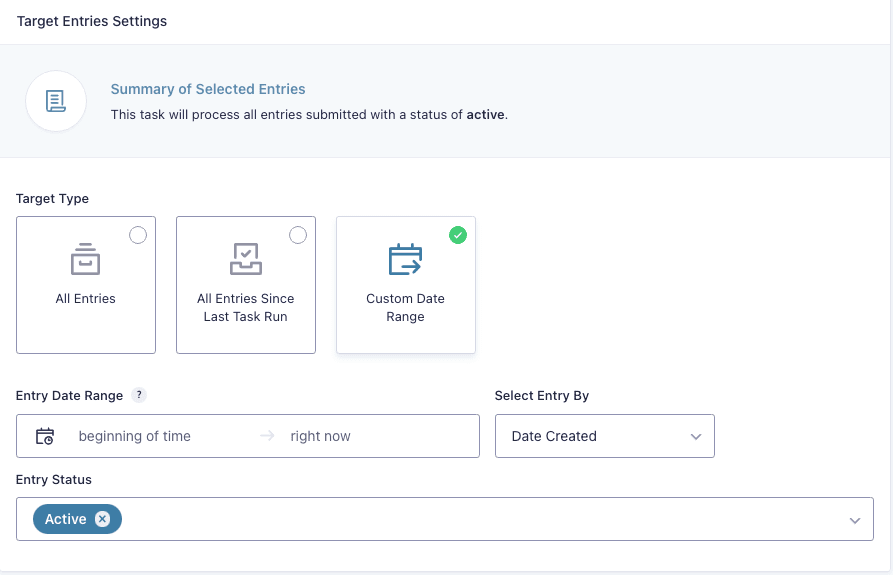
When using a Manual or Scheduled Send Notification task, you’ll have the Target Entries Settings section available to you in the General settings tab.
Here you’ll have a few options to determine which entries will be processed when the selected notification is processed via the task, all three have a common Entry Status setting for further filtering:
- All Entries – Processes all entries.
- All Entries Since Last Task Run – Processes all entries that have not been processed since the last runtime of the task occurred.
- Custom Date Range – Allows you to set up a custom date range to determine which entries should be processed in regards to the selected notification. For more detail on this setting, please see our documentation on Understanding the Date Range
Configuring Notification Settings
The Notification Settings tab plays host to the settings for the notification that will be processed when the task is run. Here you’ll configure things like the notification delivery type, which notification will be processed, and also override many aspects of the notification if desired.
Notification Settings
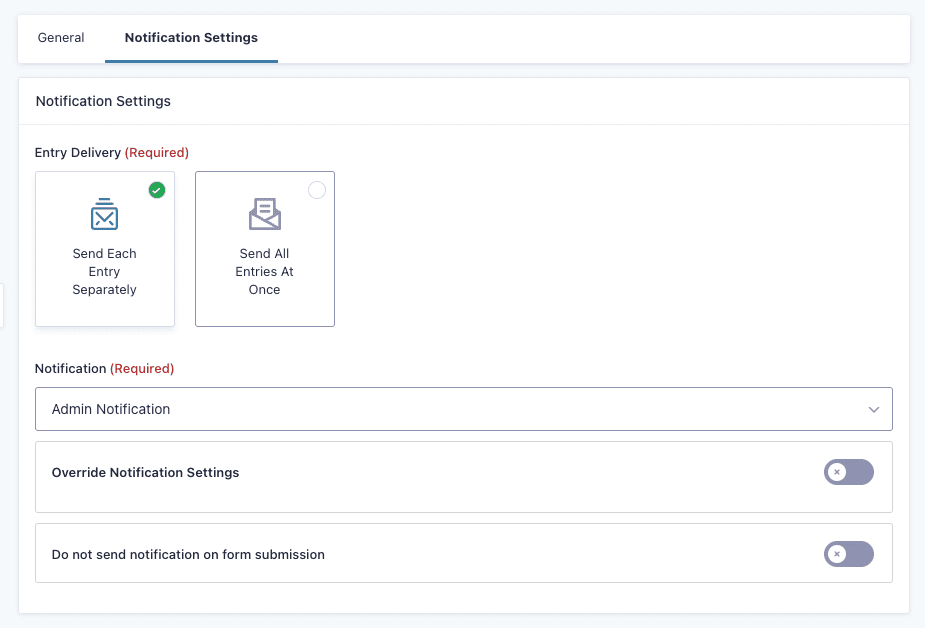
Entry Delivery
Here you can control how notification delivery will be handled when the task is run, you have two options to select from here:
- Send Each Entry Separately – Each processed entry will be sent the notification individually, this is similar to the default behavior in Gravity Forms.
- Send All Entries At Once – A single notification will be sent that will contain data on all entries processed via the task. This is informally known as a “Digest” notification. An example of when you would want to use this is sending a daily notification containing the data from all entries that came in the day before. So rather than getting individual notifications all day when submission occurs, you can receive a single one containing the data from all the notifications you would have received.
Notification
This is where you’ll select which notification the task will use when it runs, these are set up via Gravity Forms’ built in notification settings for a form.
Override Notification Settings
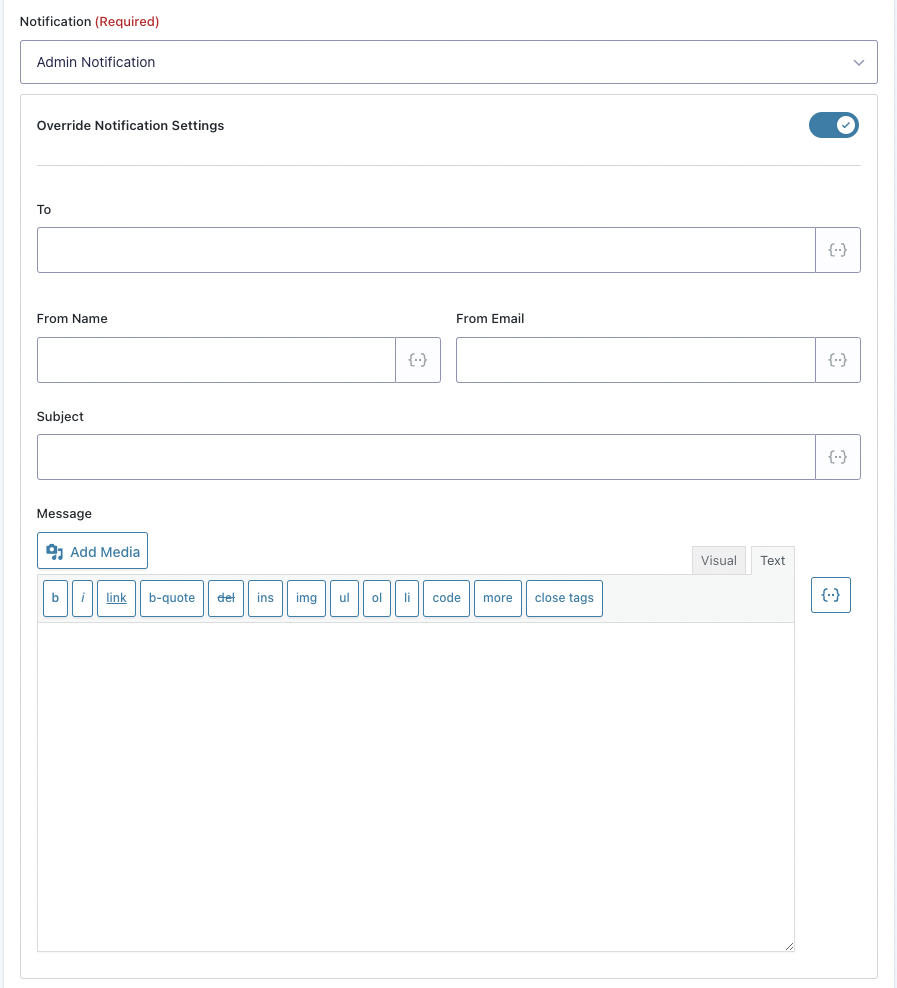
When enabled this toggle allows you to override many aspects of the selected notification’s standard configuration items such as the To and From addresses, the message content, etc.
Overriding allows you to do quite a few powerful things, one example would be to set up a drip style marketing campaign directly in Gravity Forms. You could set up multiple Send Notification tasks for a form, set up your entry date range to select a cascading number of days for each task, i.e. one task emails the user after one day, the second after three days, and a third after a week. You can then select the same notification in each task but override and add totally different message content when each instance of the task runs to update your marketing copy.
Note: When the Entry Delivery setting is set to Send All Entries At Once and the selected notification configuration isn’t using a specific email address or the {admin_email} merge tag as its To address, the override will be enabled by default. This is because you must use either a specific email or the {admin_email} merge tag as the To address for these “Digest” type emails, they are more intended to go to the site admin or someone specific at your organization, not users that fill out your forms. You’ll also have additional configurations with this delivery type that fit with a digest style notification such as custom header and footer settings inputs that will wrap the included data.
Do not send notification on form submission
When enabled this toggle will suppress the selected notification if it is set on the default form submission event in the notification’s settings. Instead, in this case an on form submission notification would only be processed as part of this task running.
My Notifications aren’t being sent or delivered
While we do filter the selected notification, and there is some additional overhead added by Entry Automation as far as triggering a notification via a task, notification generation and handoff to your sending server is still 100% handled via the core Gravity Forms plugin, we just hook in and filter those notifications.
If your task is being run and you’re not seeing those notifications in your inbox, it is very likely a configuration issue or an issue downstream from Gravity Forms and Entry Automation as both plugins do not actually send notifications, our combination here just generates raw email objects, it is up to the rest of your system to handle the sending. Once the notification is successfully handed off to the email server by Gravity Forms and the core wp_mail() function, neither plugin has control over that notification and its deliverability at that point.
If you’re having trouble with deliverability, we recommend taking a look through Gravity Forms’ Troubleshooting Notifications documentation article as it contains a number of best practices around email configuration that should be abided by to best ensure your deliverability.