Exporting From Multiple Forms
With the Multiple Forms Extension for Entry Automation, we’ve added enhancements to the one off entry exporting in Gravity Forms to allow you to combine data from multiple forms and export to CSV.
Note: The Multiple Forms Extension is only available to Professional and Agency tier Entry Automation license holders.
To get started, navigate to the Forms > Import/Export > Multiple Forms Export page in your WordPress admin panel.
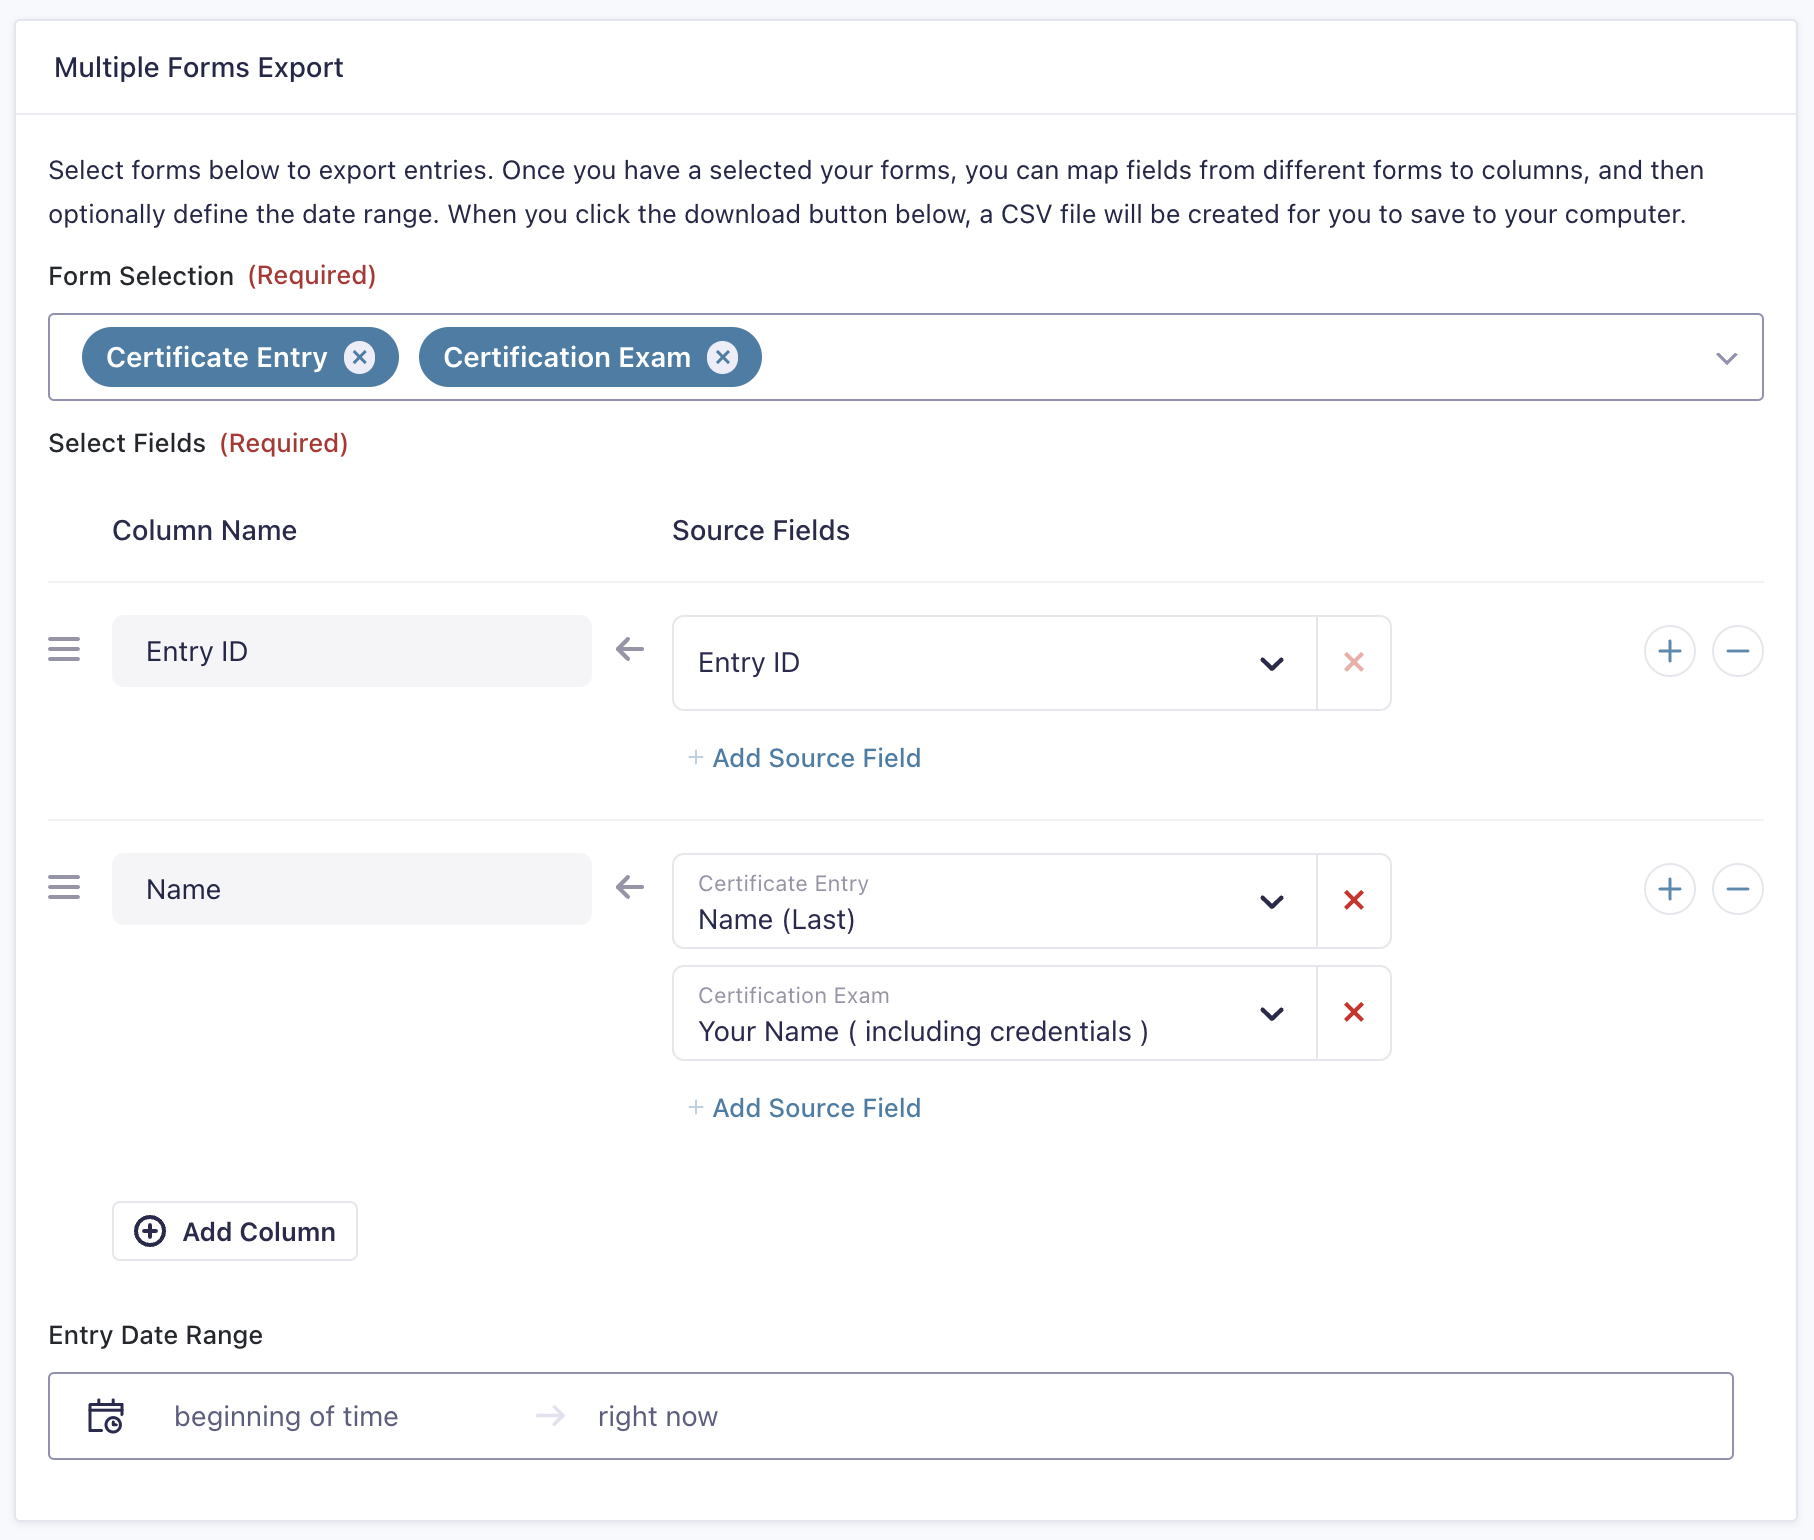
Here you’ll see a multi-select dropdown, allowing you to select any number of forms across your entire Gravity Forms install to export data from into one combined file.
After selecting one or more forms, you’ll have to add your first column to the export file, which the settings UI will prompt you to do. Once a column is added, give it a name and in the dropdown to the right you can start selecting the source fields or entry meta you’d like to pass into the column when the export file is generated.
When adding a source field to a column, you are permitted the following selections:
- If exporting form field data, you can select one field per form you have targeted by the task, i.e. if you have two forms selected in your General settings tab that the task is targeting, you can select one field from each form in any given column you’ve added here.
- If exporting entry meta data like entry ID, entry date, etc. you can select only one of these per column and they cannot be combined with fields from any form targeted by the task. (Note: only standard entry meta is supported in version 1.0 of the Multiple Forms Extension, any custom entry meta or entry meta added by another third-party add-on will not be available for selection here)
Once you’ve met the criteria for either of the above for a given column, options will begin to go into a disabled state which can include things like not being able to add an additional source field to the column once a maximum is reached, not allowing you to select more than one field for a single form, etc.
Once you have one column sorted, you can use the buttons available in the UI to add another and repeat the process of adding source fields until you have a skeleton of how you’d like the export file to look when the task runs.
Columns can be organized in the desired order by the drag and drop handle towards the left of the column name settings input.
Entry Date Range
This setting allows you to set a date range for which entries will be processed when the export occurs. This setting when left totally blank will default to exporting everything from the beginning of time up until the moment the export is processed.
For more information on the date range setting and what is possible, check out our documentation on understanding the date range.
This feature only does one off exports, what you configured is not saved if you navigate away, and only exports data to CSV. If you’d like more granular control over when a task runs, the file format, settings persistence, etc. you will want to set up a proper Multiple Forms task.