Displaying Documents on a Page
With Legal Signing, you can display links to generated documents outside of the form submission flow. This is possible through the Legal Signing block, available in the WordPress block editor.
If you’re not using the WordPress Block Editor, you can still utilize the block by using the Reusable Blocks Extended plugin to create sets of reusable blocks that can be inserted via traditional shortcodes.
You can also check out our Document Hub block which will display all sessions tied to the logged in user in addition to any already generated documents associated with their user.
Adding a Block to Your Page
- Open the page or post you want to display generated documents on.
- Click the plus sign to add a new block.
- In the Search for a block, type legal.
- Under Embeds, click on Legal Signing. This will insert the Legal Signing List block.
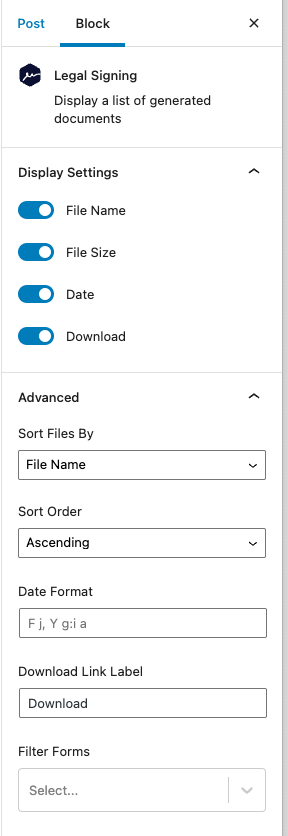
- Click on the block to change the block options. Individual columns can be renamed by clicking on the column header.
Any generated documents found that were created by the logged in user will be displayed in the table. If no generated documents could be found when displaying the block, the table will not appear.
Block Options

Display Settings
This allows you to toggle which columns to display: File Name, File Size, Date Created and Download Link. If the Download Link column is disabled, the File Name will become the link.
Sort Files By and Sort Order
Select how the generated documents should be sorted and in which direction.
Date Format
Set a custom format for the Date Created column. Defaults to WordPress time format.
Download Link Label
Change the text for the Download Link column. Defaults to Download.
Filter Forms
Select which forms to display generated documents from. Defaults to all forms.