Uploading Documents to Google Drive
Using the Google Drive Integration for Legal Signing, your documents can be sent to your Google Drive after a document has been generated via Legal Signing.
Note: The Google Drive integration is only available to active Professional and Agency tier Legal Signing license holders.
Authenticating with Google Drive
There is no additional plugin to install to activate the Google Drive Integration, but you do need to initially authenticate Legal Signing with your Google account to get started.
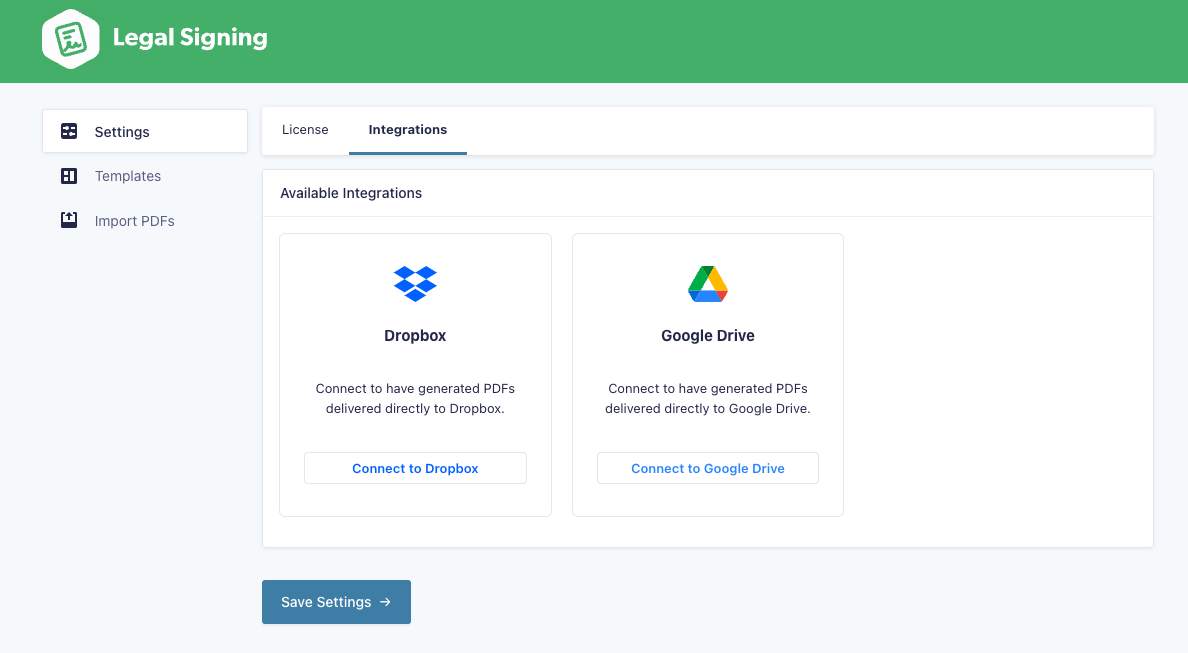
To authenticate, navigate to the Forms > Legal Signing page in your WordPress admin and the navigate to the Integrations settings tab.
In the list of available integrations, find Google Drive and click the Connect to Google Drive button.
Note: The Google Drive integration is only available to active Professional and Agency tier Legal Signing license holders. Personal license holders will instead be given a button to upgrade to a Professional license in order to use the integration.
Complete the authentication with Google following the on-screen prompts that are served to you. Once you’ve completed the process successfully you’ll be redirected back to the global Legal Signing settings page, if all went well you should now see a Disconnect from Google Drive button for the Google Drive Integration in the Integrations settings tab.
Setting Up the Google Drive Integration
Now that you’ve successfully authenticated with Google in your Legal Signing settings, you’ll need to set up your Legal Signing feed(s) to enable the upload to Google Drive and specify where the generated documents will be stored in your Google Drive.
To do this, navigate to Forms > FORM NAME > Settings > Legal Signing page in your WordPress admin and either add or edit a Legal Signing feed.
Navigating to the Integrations settings tab will display any Integrations you’ve set up allowing you to toggle those on for the feed.
Setting the Google Drive toggle in this list to the enabled state will pop out a few new settings:
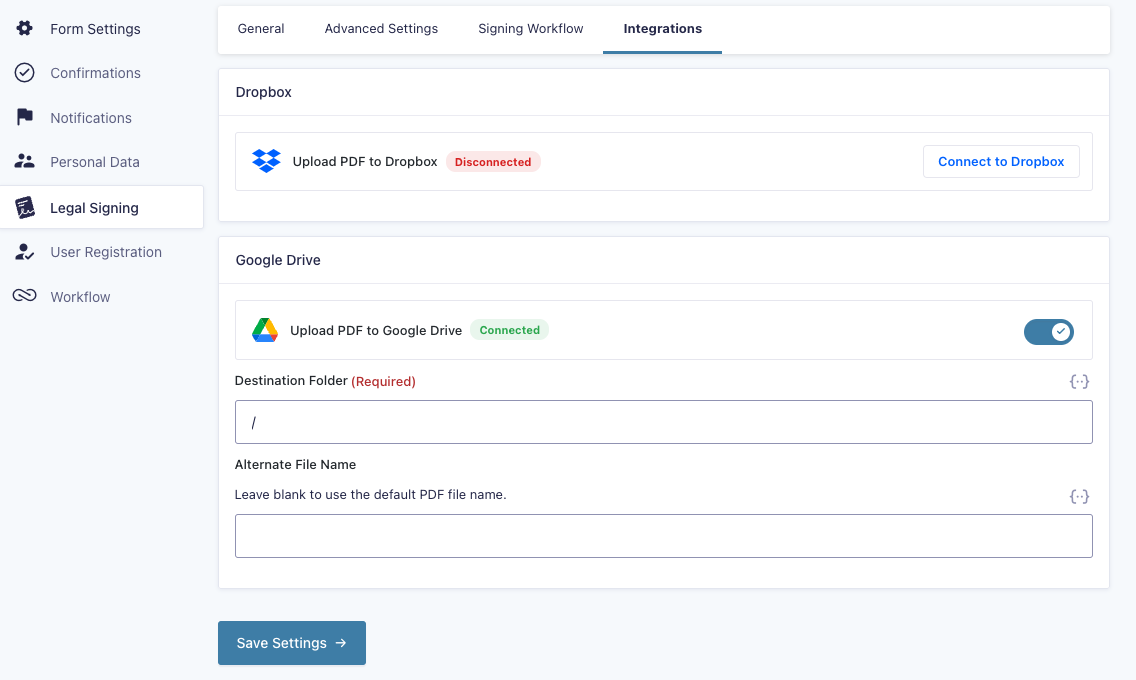
Destination Folder
This is the only required setting for the integration and it specifies where in your Google Drive account the feed will attempt to write files to. Keep in mind this is relative to the user you’ve authenticated the integration with, so the upload root should always be the Google Drive’s root for the authenticated Google user.
Merge tags are also supported in this setting which allows you to feed in dynamic data from the entry tied to the document to be uploaded. You could for instance use this to create a directory for every entry feeding in data like the entry id, a name, etc. to the directory name.
Alternate File Name
This allows you to optionally override the Output File Name setting in the General settings tab of the feed for the generated document in case you’d like the file name of the document uploaded to Google Drive to differ from what the version initially generated was named.
Merge tags are also supported here just like the normal file name setting for the feed.
Important Note Regarding File Names
If there is already a file with the same name in the same location the integration is writing to in Google Drive, that existing file will always be overwritten by the new file.
If you’re worried about the integration overwriting existing files already stored in your Google Drive, make sure you’re setting something dynamic from a merge tag in either the file name setting(s) or in the destination folder setting to make sure a file with a unique name or location is always being written.